Table of Contents
Last year I wrote an article explaining how I would build a custom round-the-world touring bike. It was based on the most well-proven and best-designed components that existed in 2019. A whole bunch of people actually went out and built the bike, and as far as I’m aware, are absolutely loving it!
After agonising on this for months and months (seriously!), I’ve got a completely new build for 2020. Surprisingly, about 50% of the build has changed, as new products have been released while others have started going out-of-date.
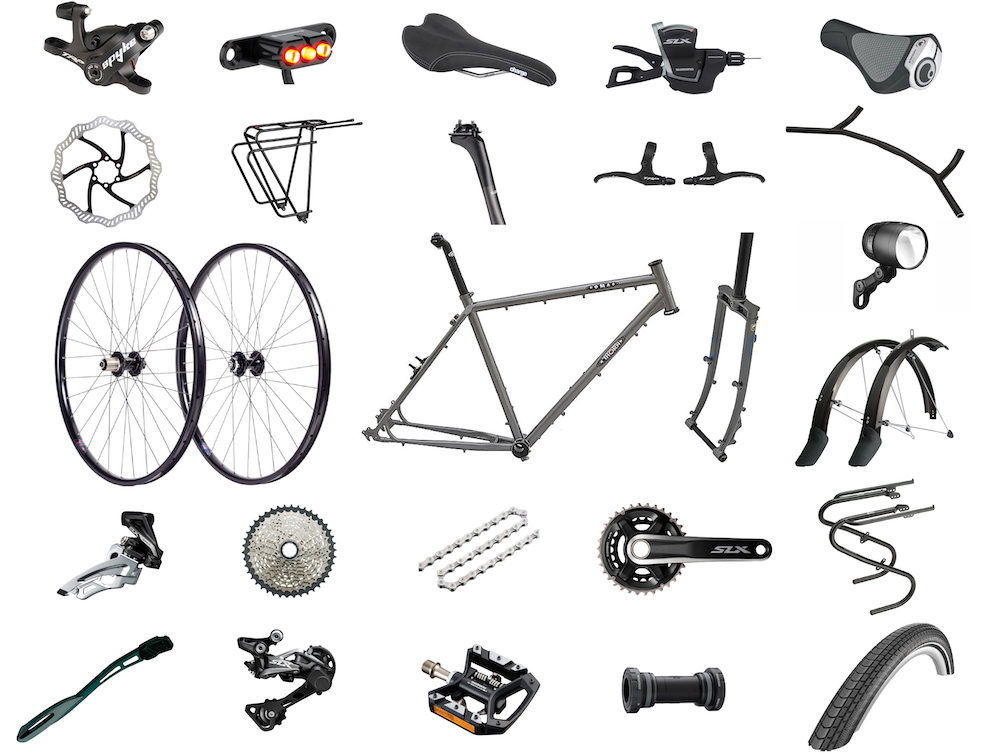
This can be considered a ‘dream build’, but I’ve importantly factored in:
Price – I’ve selected parts that offer high comfort, performance and durability without necessarily being the most expensive.
Product availability – You won’t find particularly obscure or custom parts here; apart from the frame, the parts are available in many regions.
This build is designed to handle rough roads and will support a massive amount of gear if you need. It’ll crush famous routes like the Pamir Highway, Peru Divide or Mawson Trail, but will also roll fast enough to cover the bike paths of Europe. I think it’s the perfect all-rounder for a round-the-world trip.
The article is pretty heavy reading, as there was a lot of thought that went into every component, and it was important for me to share my technical justifications! If you want to properly understand the concepts in this article, check out my book, the Touring Bicycle Buyer’s Guide which starts at the beginning.
Round-The-World Touring Bike Frameset – $863 (Ex VAT)

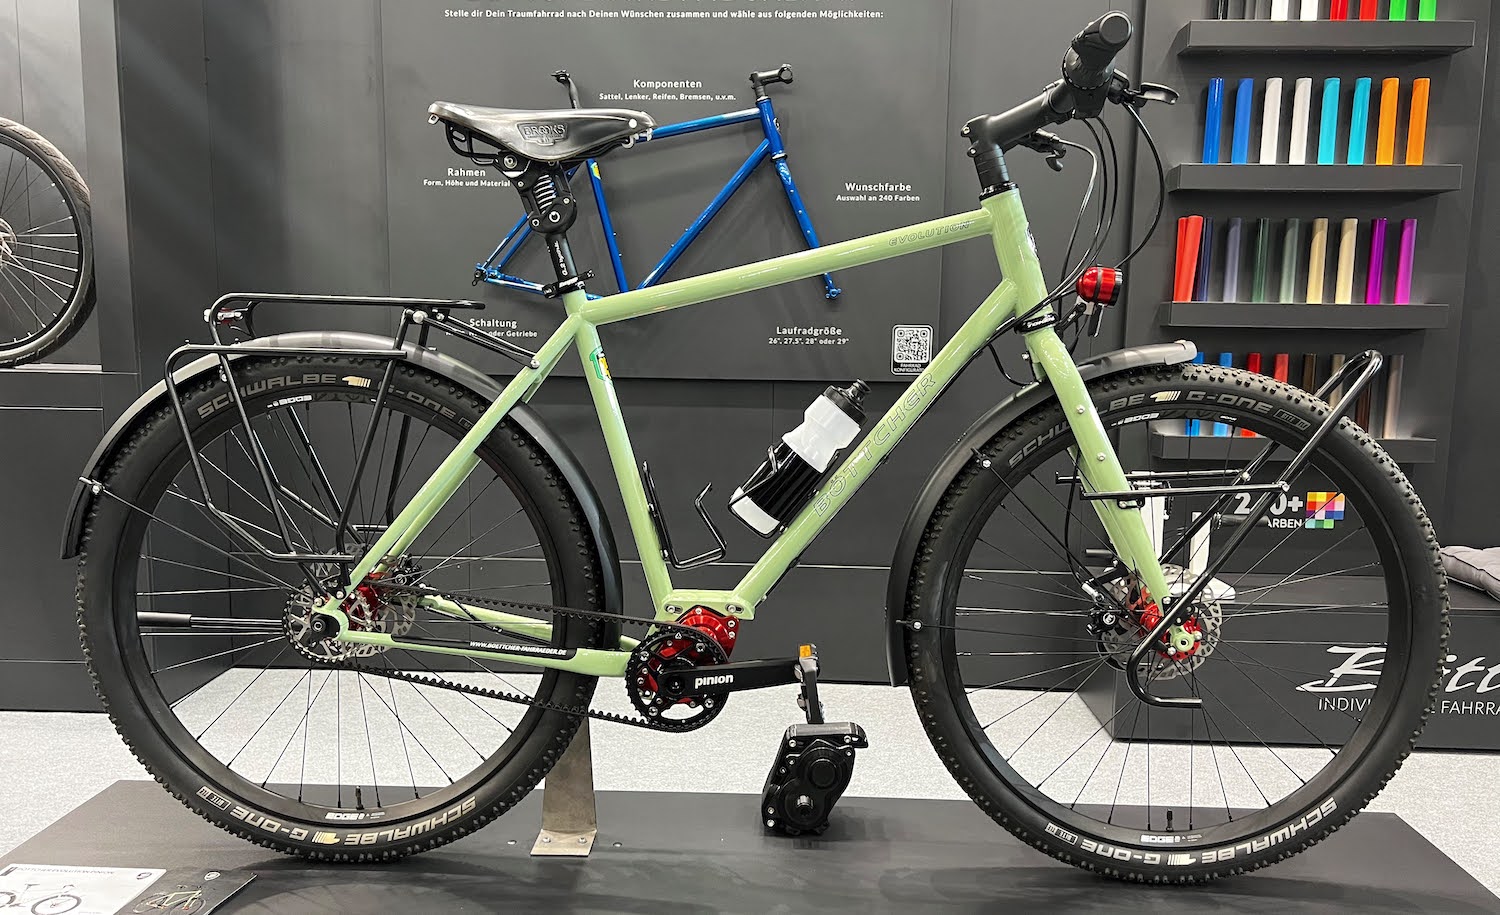
Frameset: Thorn Nomad MK3 – £818 (US $863 or €920)
People have been riding the Thorn Nomad MK1 and MK2 around the world for years and years – it’s an incredibly well-proven steel touring frameset. The MK3 update has brought the Nomad into the 21st century with new features including 26/27.5/700C wheel size compatibility, a kickstand mount, a front thru-axle fork and a split in the rear triangle for belt drive.
The frame has a classic touring geometry with very long chainstays to keep your loaded bike nice and stable. It’s designed to be laterally stiff, using some of the biggest oversized steel tubes seen on any touring bike. There are 12 sizes available, including two step-through frames for riders with shorter inseams. You can get the frameset in a grey, red, green or blue colourway.
If you so desire, the Nomad will fit rim brakes with 26″ or 27.5″ rims. The frame is, of course, derailleur compatible, or if you have deeper pockets, it is Rohloff hub ready with an eccentric bottom bracket shell to tighten the chain or belt.
Yep, a belt-compatible Thorn bike, I never thought I’d see the day! This news will be shocking to you if you’ve ever read Thorn’s publication, “Living With A Rohloff Hub”.
The steel fork uses a classic twin-plate crown to maximise the tyre clearance. It comes in three different offsets, which allows for more toe clearance and better optimisation of the steering speed for the smaller frame sizes. The thru-axle size is 15x110mm, which is unusual for a touring bike (12x100mm would’ve allowed Shimano dynamo hubs to fit), but in terms of performance, there are no downsides to these hub dimensions.
Ok, so there are lots of cool features, but what about the geometry?

There are two different frame geometries for the Nomad MK3 – a shorter and taller frame for drop handlebars (“S” sizing) and a longer and lower frame for flat handlebars (“L” sizing). While Thorn keeps many aspects of the frame geometry and sizing a secret, I’ve managed to squeeze them for a few more clues which have allowed me to manually calculate the missing numbers. This has got to be peak bike nerd, but I was never going to recommend a bike without the numbers first!
NOTE: These numbers are my estimates derived from CAD software.
As you can see in the graphs above, the ‘reach’ numbers are within a very narrow range. Best-practice frame design will see the bikes get longer in proportion to their height, typically in accordance with the category trend lines – check out the Trek 520 for some proper textbook sizing. With bike sizing to the right of the category trend line, it means that the Nomad MK3 is not super upright, especially if you’re on the shorter side. You’ll, therefore, have to rely on headset spacers for an upright bike fit, which is fine, but a little bit ugly, in my humble opinion.
Strangely, the 40S and 47S step-through frames are above the category trend, meaning they’re very upright for their size.
The steering speed (trail) falls within 64-68mm on the flat bar frameset, which is on the fast side for a touring bike with a high leverage bar, but it’s also not unusually fast. The drop bar framesets have an almost identical trail (64-71mm) to the very well-proven Surly Disc Trucker.
Headset: FSA Orbit XLII – Included with the frame ($59 on Amazon)
I’ve been using FSA Orbit headsets as long as I’ve been riding bikes. They offer excellent bearings and extensive seals to keep water and debris from affecting the performance of the headset.
Wheelset – $755

Front Hub: Shutter Precision PD-8X 15mm Boost Dynamo Hub – $210
The SP dynamo hubs offer excellent reliability at literally half the cost of a Schmidt SON28! Read more about dynamo hubs HERE.
Rims, Spokes, Rear Hub: Velocity Cliffhanger 27.5″ – $625 with SP PD-8X Dynamo Hub
This wheelset is a very solid option for touring. It offers super-stiff touring rims, a 25mm internal rim width (suitable for 2.0-2.5″ tyres), Sapim Leader spokes and tubeless compatibility with the Velocity rim strips. The overbuilt rear hub uses four sealed bearings to keep everything running smoothly. Read more about the best touring rims HERE.
Option B: Check out Ryde Andra 40 rims, Sapim Leader 2.3mm spokes and a Velocity ATB rear hub ($63, $28, $150). This wheelset will be stronger again and it will save you $174 – but the rims are harder to source outside Europe, they have silver machined sidewalls and you lose the tubeless compatibility. Make sure to factor in the extra wheel building costs too; the Velocity wheelset includes the labour.
Tyres: Schwalbe Almotion 27.5 x 2.15″ – $130/pair on Amazon
I’ve been blown away by the capability of the Almotion tyre. It’s the fastest touring tyre on the tarmac (even in the 2.00-2.15″ range) and it’s tough enough for the roughest dirt roads. The wide widths offer extra comfort and I’ve found them to be super puncture resistant too. I get 15,000km+ out of a set provided I switch the rear tyre to the front at about 10,000km. I’d go the Vittoria Mezcal 2.25″ if you’re after extra grip off-road, and the Marathon Mondial for a super durable all-rounder. Read more about Schwalbe touring tyres HERE or durable bikepacking tires HERE.
Drivetrain – $427
![]()
Crankset & BB: Shimano SLX M7000 36/26t – $129 and $21 on Amazon
I have controversially selected an 11-speed 2X drivetrain for this build, which goes against the typical 3X setup on most touring bikes AND the current trend for 1X drivetrains.
There are many reasons why:
1. There are smaller jumps between gears compared to 1X. When you go up and down through your gears, there is a change in cadence for every shift you make. The best way to explain this is to imagine you’re going 15km/h and pedalling at 90RPM. If you shift to a harder gear on a 2X11 bike, you’ll still be going the same speed but you’re now pedalling at 79RPM. This works out to be 77RPM on a 1X12 drivetrain. The 2RPM difference may not sound like a lot, but it can be annoying on flat roads where maintaining your preferred cadence results in bigger changes in speed. I’ve calculated that 2X11 and 3X10 offer the exact same gear jumps, but 2X10 and 1X12 offer significantly bigger jumps.
2. 2X has a wider gear range than 1X (17-91″ for the lowest and highest gears). This 528% drivetrain achieves a climbing gear that allows a good cadence at 5km/h (3mph) for the steep hills, but also a top gear that will have you pedalling at 43km/h (28mph). These are the exact gear ratios I personally use to travel the world. If you want even lower climbing gears, you can spec 34/24t chainrings which will go down to a 16″ climbing gear – that’s super low!
3. A more efficient drivetrain. With the straighter chain lines of 2X, you’ll achieve a higher drivetrain efficiency (see the test HERE) compared to 1X.
4. Reduced drivetrain wear. With the straighter chain lines of 2X, you can use the smallest chainring with the biggest rear cogs, and the biggest chainring with the smallest rear cogs – the result is better chain-to-tooth interactions.
5. Great quality components. Shimano has just ditched 3X from its latest Deore mountain groupset. That means that Shimano Alivio will soon be the highest-quality 3X option – which is ok, but a little lacklustre compared to the Deore and SLX we’ll use on this build.
6. Availability is very good. Bike shops in capital cities around the world stock replacement parts to service their existing customers. Mountain bikes at the $1000 price point now come with 11-speed SRAM NX and GX, and will soon have Shimano Deore M5100 drivetrains too. Gravel bikes currently use 11-speed SRAM Apex/Rival/Force and Shimano GRX, which have chain and cassette components that are also interchangeable with Deore/SLX.
Cassette & Chain: Shimano SLX M7000 11-42t & Shimano HG54 – $58 and $29 on Amazon
These drivetrain parts are not particularly expensive, they are longer-lasting than 8/9/10-speed, and are interchangeable with SRAM and Shimano 11-speed parts found around the world.
Front Derailleur: Shimano SLX M7020-H– $32 on Amazon
This derailleur offers very high performance at a reasonable price. The Thorn Nomad MK3 is routed specifically with a high-clamp, side-pull front derailleur in mind, which gives the best possible rear tyre clearance.
Rear Derailleur: Shimano SLX M7000-GS – $59 on Amazon
This SLX derailleur is tough as nails with super crisp shifts. The ‘shadow’ design sits the derailleur in-board which provides excellent clearance from rocks, and the clutch feature allows you to keep the chain taut on bumpy roads.
Pedals: Shimano XT T8000 – $99 on Amazon
I have nothing but good things to say about Shimano XT pedals. I’ve worn through two sets, each clocking an outstanding 50,000km (and they still spun perfectly after a re-grease). The T8000 is clip-in on one side, but flat on the other. It’s weighted to prioritise clipping in, so I never have to find the ‘right’ side. If you like flat pedals, check out the XT M8140 flat pedals. If you like a dual entry clip-in pedals, check out the XT M8120 trail pedals.
Cockpit – $393

Handlebars: KOGA Denham Bars – $95 (HERE or HERE)
I designed the KOGA Denham Bars, so they’re obviously the ultimate for touring! My bars have a bullhorn section which lets you mimic the ‘hoods’ of a drop handlebar (making your body more aerodynamic) and they also feature a wide grip section for the best bike control with front luggage. You can read about the thinking that went into the Denham Bar design HERE.
Grips: Ergon GC1 – $29 on Amazon
This grip is developed specifically for backwards-swept handlebars. The grip surface is designed to spread your upper body weight over a larger surface area, minimising hand numbness on long rides – and it really works! There’s a raised bulge in the middle of the grips that cups nicely below your hand; my grips honestly feel custom-moulded to my hands. These grips are quite long, so I normally lop 10-20mm off each side so that there is more real estate at the base of my bullhorns. Read more about grips HERE.
Stem: Zoom Black 4-Bolt – $16 on Amazon
I don’t find a big difference between stems once you get to a certain quality. Anything 4-bolt with nice hardware is good enough for me. If you’re riding rough roads and want a little extra comfort, take a look at the Redshift ShockStop suspension stem – I’ve just fitted one to my bike, so I’ll let you know how it goes in a few months.
Shifters: Shimano SLX M7000 2X11 – $86 on Amazon
I’ve specced the latest Shimano SLX trigger shifters on this build which are super reliable and easy to use. They also pair very well with the bullhorn section of the KOGA Denham Bars allowing for ample hand space.
Brake Levers and Calipers: TRP ML800 and TRP Spyke – $32 and $135 on Amazon
I’ve chosen cable disc brakes, even though I swear by hydraulic. Why? The difference in power is there, but it’s not huge. Cable disc brakes will give you peace of mind in remote areas and it’s easy enough to run some lubricant down the cables periodically to keep them snappy. The TRP Spyke calipers are definitely the pick of the bunch as they pull both brake pads in like a hydraulic caliper. Personally, I ride with Shimano XT hydro brakes which have worked flawlessly the last few years, as long as I give them a yearly bleed. I’ve been able to find people to carry out hydraulic brake bleeds in any major city. If you’re happy to accept the risk of a potentially temperamental hydro caliper, the XTs are the go. You can read more about touring brakes HERE.
Saddle and Post – $196
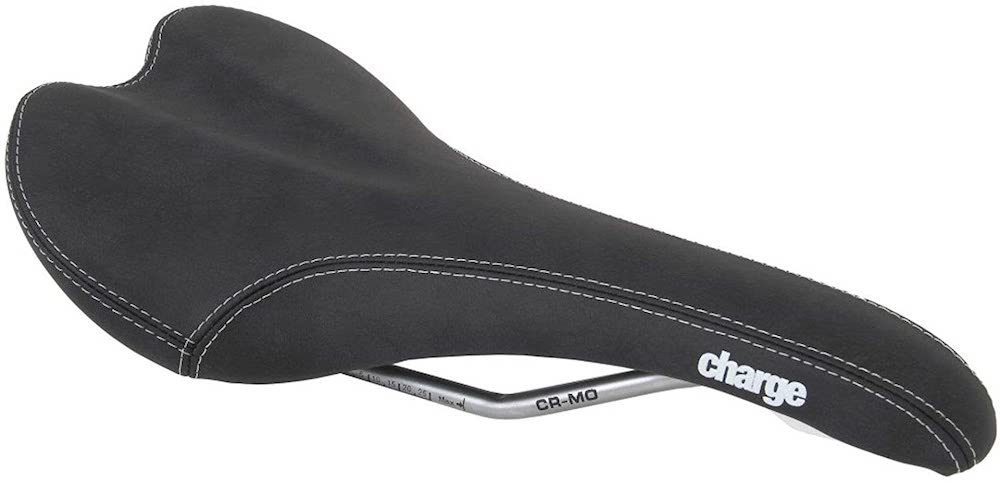
Saddle: Charge Spoon– $27 on Amazon
Saddles are hugely personal preference, so I am just going to recommend one that I like on my mountain bike. The shape really works for me on long rides – I never get saddle sores, I never get numbness. That doesn’t mean I recommend it for you! Please note, that some riders have reported that the stitching is hard on this saddle, wearing baggy shorts prematurely. It’s worth learning about saddle shapes HERE.
Seatpost: Cannondale SAVE or Cane Creek Thudbuster ST – $199 and $169 on Amazon
In terms of rider comfort, a flex seatpost is the ultimate upgrade. Bike frames require thousands of newtons of force to flex one vertical millimetre. On the other hand, a carbon or suspension seatpost requires well under 100N of force to travel the same distance. This allows a great reduction in road buzz, and the seatpost will absorb big hits on any dirt roads. A suspension seatpost is more suitable for both shorter riders and those wanting a bit more cushion. The carbon posts offer roughly half as much flex (20mm), which I personally prefer, but you will need a relatively high seat to unlock the full travel. Read all the nitty-gritty on seatposts HERE.
Accessories – $432

Lights: Busch und Muller Toplight Line Small (Rear) and IQ-X (Front) Dynamo Lights // $30 and $90 on Amazon
The IQ-X has the best road beam going around (same reflector as Schmidt Edelux II), it’s super bright, it’s pretty efficient and it’s under $100. The asymmetric lens is optimised for bike paths and roads so your light won’t blind people approaching you. The Toplight Line Small tail light is super compact, bright and will mount directly to your rack. Read more about dynamo lights HERE.
Racks: Tubus Logo Classic 29 and Tubus Duo – $112 and $90 on Amazon
Along with rims, spokes and tyres – racks are the next likely thing to break on a round-the-world touring bike. If you’re planning a long journey, using top-notch racks is one of the best ways you can possibly spend your money. I’ve had the most success with Tubus (zero failures) – but if you break these racks anywhere in the world within five years, Tubus send some new racks out, no questions asked! Read more about racks HERE.
Fenders: SKS Bluemels P65 – $50 on Amazon
These wide fenders clear 27.5×2.4″ tyres without issue. They are light and come with quick-release mounts to prevent sticks and rocks from getting caught on trails. Read more about fenders HERE.
Kickstand: Dropout Adapter + Pletcher ESGE Comp – $42 and $18 on Amazon
I’m a massive kickstand fan. Thorn has a neat kickstand mount that connects to the rear dropout. Read more about kickstands HERE.
Build Summary
The total came to US $3066. This includes top-tier accessories like the best dynamo lighting and racks that money can buy.
Make no mistake – a complete touring bike offers unparalleled value. The Thorn Nomad MK3 starts at just $2200 for a 3X10 Deore build. But if you’re interested in optimising every component, it can really be worth building a custom bike to get the right gear ratios, brakes, rims, tyres, lighting and more.
Although this is a lot of money, I think it still represents good value considering the comfort, durability and performance that this build would offer. I was pretty careful about saving money in areas where it’s safe to do so, but in other areas, I picked parts which would optimise everything nicely.
You can definitely cut corners at the seatpost and tyres, saving ~$200 off the build price. You could also do without the lights, dynamo hub, fenders, kickstand and racks (if you went for bikepacking bags instead) bringing the build price down to a touch over US $2200.
And if you were to use the same parts but with a Rohloff 14-speed internally geared hub, I’ve estimated that the total price would increase to about US $4000, which is cheaper than many Rohloff builds.
How Would You Spec Up A Dream Build With Price Factored In?