

Table of Contents
I was pretty excited when Ortlieb announced they were dropping a line of bikepacking bags (including this Ortlieb Seat Pack). After all, we’re talking about a brand that has been innovating waterproof panniers since the 1980s.
Ortlieb are renowned first and foremost for their durability. I’ve got some Backroller panniers with over a decade’s wear and tear including 2+ years around the world. Although they’re not looking super sharp today, I’ve managed to keep them alive with only a handful of spare parts.
The Ortlieb bikepacking set includes a 15-litre handlebar pack, a 6-litre frame pack, a 3.5-litre accessory pack and the seat pack on review here. All models are made using a PU-coated nylon fabric that is lightweight, waterproof, PVC-free (no petroleum used) and rather abrasion resistant. It seems that Ortlieb have cut no corners with regards to materials, parts and fittings – they’re all A1 quality across the board.
I’ve been thrashing the Ortlieb Seat Pack for five months now, including two solid weeks on the Munda Biddi Trail. I’m now confident that this saddle bag is the real deal.
Head HERE to read my review of the Ortlieb Handlebar Pack.
The Ortlieb Seat Pack In Numbers
8-16.5L / 488-1007 cu.in
430g / 15.2 oz
64cm / 25″ long
US $160
The Design Details

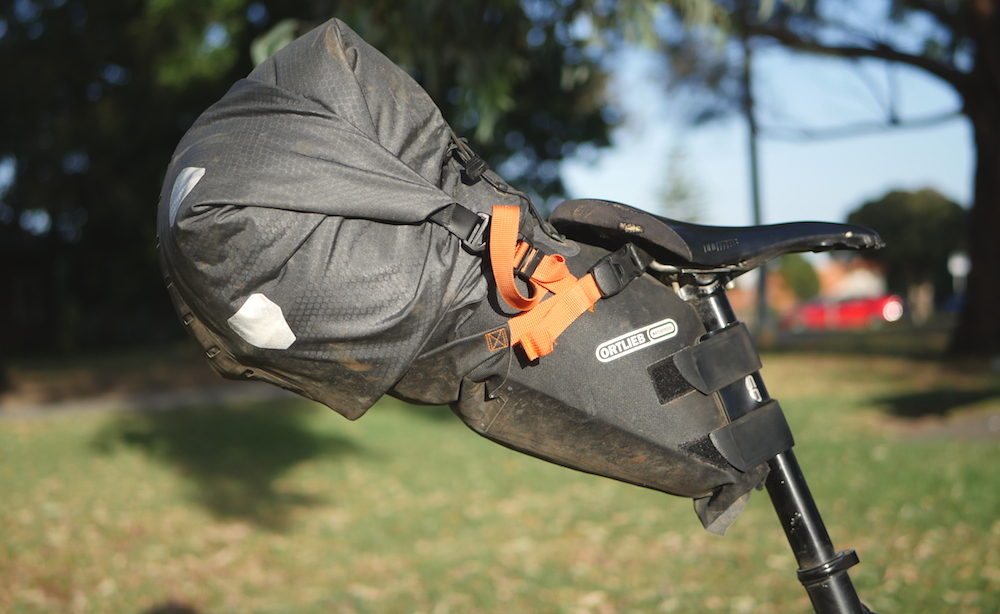
The Ortlieb Seat Pack offers an aggressively tapered shape in order to maximise the bag’s volume. The 16+ litre seat pack widens after the saddle to balloon to 25cm by the bag’s end. But this doesn’t mean it will have a noticeable presence between your legs. The Seat Pack is surprisingly narrow under the saddle for such a large bag. The bag’s profile in combination with an internal structure does the trick at eliminating leg rub.
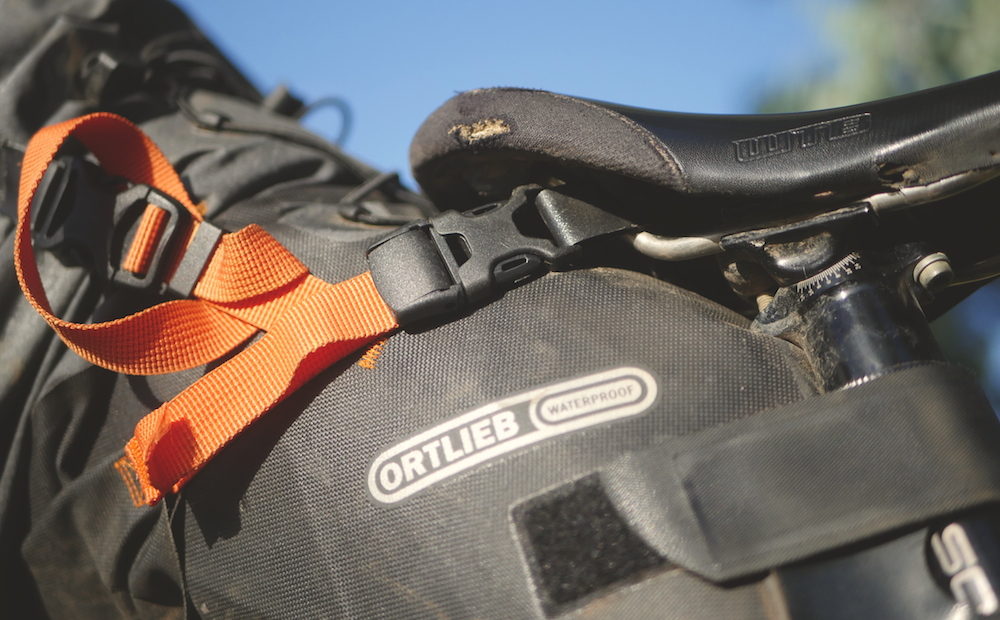
The seatpost straps are easy to wrap around an array of post diameters. But while the straps have been rubberized to increase grip and minimise rub, I’ve still found that they scuff your seatpost over time. I’d recommend applying a little tape to your post before using any kind of saddle bag.
The Ortlieb bikepacking gear is all 100% waterproof, buying you a peace of mind that you may not get with other bags. A particularly good thing about waterproof bags is that you don’t need individual stuff sacks for items like sleeping bags or tents. Just shove them all in and off you go!
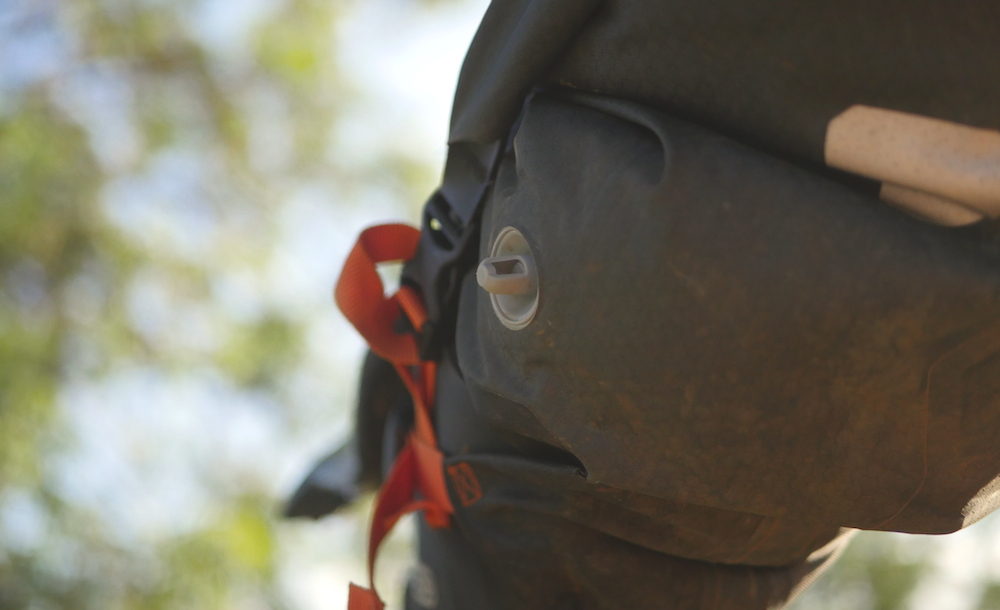
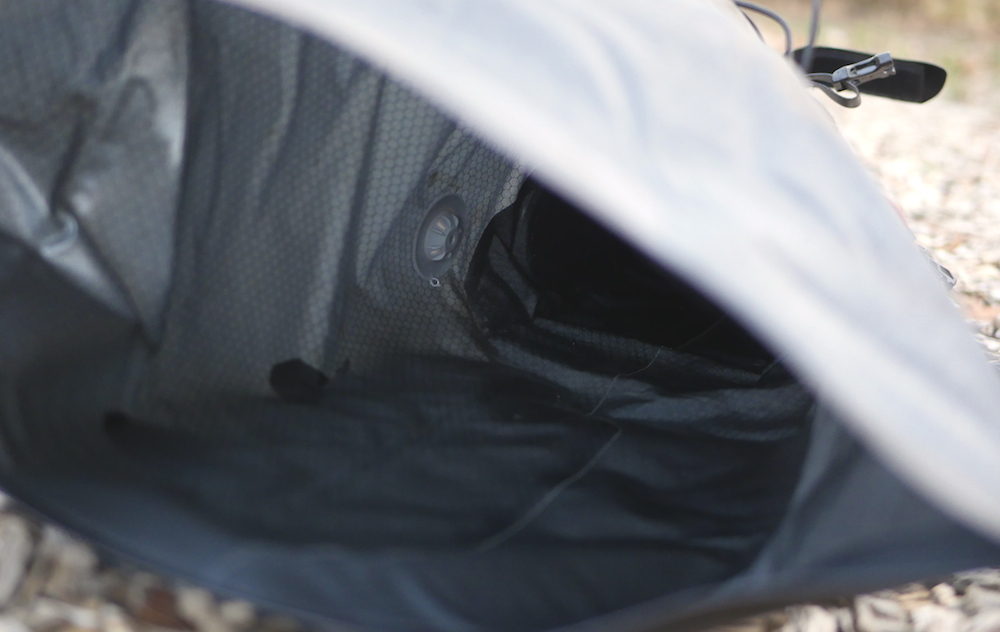
Due to the waterproof nature of the Ortlieb Seat Pack, a ‘purge valve’ has been installed on the left-hand side to move air out of the bag while you’re compressing it. It’s a really cool feature in theory, but I only found the purge valve to be useful half the time. The other half it was obscured by the objects I was packing into my bag.
The Ortlieb Seat Pack is impressively large – it’s definitely the biggest saddle bag I’ve ever played with. Despite its 64cm total length, the roll-style closure allows you to dictate the bag’s volume. But large bags like this do come with drawbacks. In order to get enough strap compression, the Ortlieb Seat Pack needs to be filled tight to about 2/3 of its overall length (about 8-10 litres). If the bag isn’t packed well or strapped appropriately, it will ‘wag’ about (more below).
Installing the Ortlieb Seat Pack
The Ortlieb Seat Pack is one of the easier saddle bags to install onto your bike. This can be put down to the ultra-pliable seat strap material which is easily directed up and over the seat rails. In comparison, other manufacturers use rather rigid straps that make installation a bit more tedious – especially while wearing gloves.
I’ve found that the best way to install a saddle bag is to stand behind the bike and grab the rear wheel with your knees. You can then wedge the saddle bag between your chest and the seatpost while you connect the seat rail clips and seatpost straps. The forward pressure is normally enough to make sure the bag stays still.
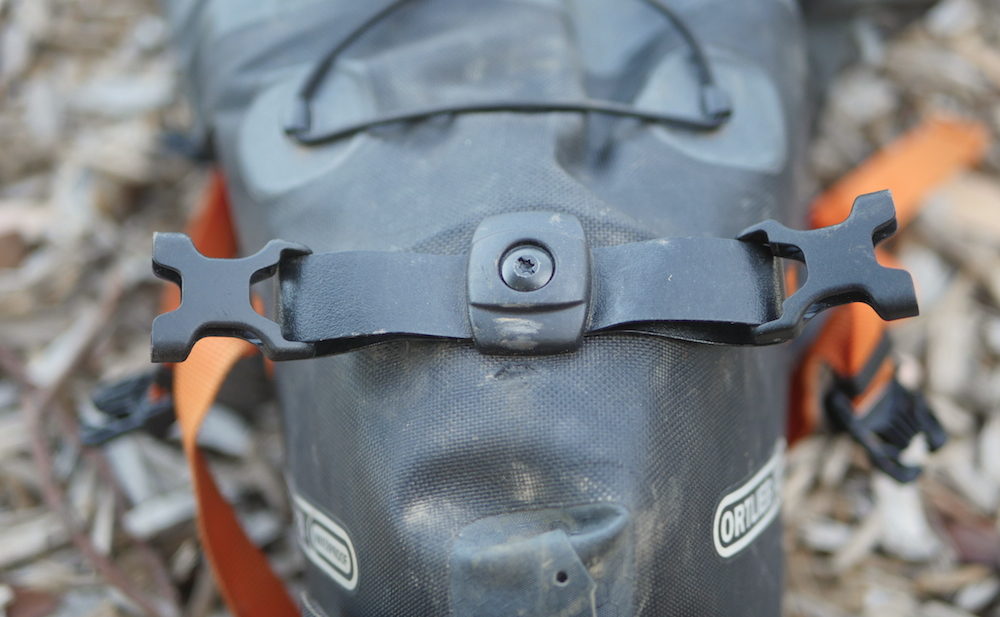
As the seatpost straps are really long and versatile, the only thing to consider is if you have enough seatpost real estate. This bag requires about ~17cm (7 in) of seatpost to get a good fit. Like many of Ortlieb products, spares are of course available for this bag. The seat rail straps will take a beating and it’s nice to know that they’re replaceable in the long-term.
Very Little ‘Tail Wag’
The Ortlieb Seat Pack features a high-density plastic ‘stiffener panel’ to create an internal skeleton of sorts. At the seatpost straps, the bag is bolstered further with two metal brackets that prevent bulging. This simple plastic and metal structure results in one of the most laterally stable bikepacking saddle bags I’ve had the pleasure of using. That is providing you fill it with enough stuff (~8 litres).
But the bag won’t do all the work for you; it will still need to be packed well. By loading tight, form-fitting gear into the bag first (eg. clothing or a sleeping bag), the section nearest the seatpost will be as rigid as possible. It’s best not to load heavy objects at the very rear of the bag for obvious reasons.
Conclusion and How It Could Be Improved
The Ortlieb Seat Pack is very well made product. It’s waterproof, easy to fit and durable. The ‘stiffener’ panel and metal brackets do a great job of stabilising the bag provided you’ve packed it well and put enough tension through the straps. The fact that some of the bag’s components are replaceable ensures you’re making a good investment here.
My criticisms are mostly around the fact that it’s only available in one size. A smaller size would sure be welcomed as not everybody wants their gear high and towards the rear of the bike. (UPDATE: The size-M 11-litre Ortlieb seatpack is now available). The other thing I’d love to see is a different colour option.
Disclosure: The Ortlieb Seat-Pack was provided for this review.

I’m not a native speaker but “piece of mind” is probably a typo. Just in case you want to fix it 😉
Thanks!
Good review Alee!!
Sick site mate! I didnt know this was yours till the other day.
One thing that is missing from all manufacturers (I think) is a hard-tail version: there is no reason to have the load so high and far back when there is no risk of wheel rubbing.
Cheers Harley! I’ve been working on this one for about five years now. Can’t get enough of the bike travel stuff!
The only issue with a shorter, but taller bag design is that it will be less compatible with smaller frames.
I’m riding around the world with this bag at the moment and after being initially impressed I have had some issues.
First, one of the buckles snapped. Now this is easily replaceable and I just put it down to bad luck and fixed it.
More seriously, the bolt shown in the 4th picture down rattled loose and got lost. As a result the strap for the seat rails is no longer attached and the bag swings around like crazy. I’ve managed to cable tie it back on but it’s not that secure and causing wear to the strap, which will snap in time. Inferior design to Apidura (and others) in this respect imo
Sorry to hear it hasn’t worked out. RTW riders definitely put gear properly to the test! How did you go about sourcing the buckle? Was it easy to change? Are Ortlieb able to help you with the seat rail strap and bolt? Alee
I got someone back home to get me a buckle (from SJS cycles I believe) as they were coming out to see me. I think it’s probably a standard size but if not you could just switch both ends to something else, so I could have sourced one on the road without too much trouble. Very easy to change as it just threads on to the webbing strap.
The other bit is not standard though, very annoying! It’s a great bag otherwise, the material is tough and there’s minimal sway even when packed out. Most importantly it’s the only one I’ve found that never hits my legs. Would recommend some locktight on that bolt and keeping an eye on it.