

Bicycle gearboxes have been around for almost a century, but it’s only recently that they have truly proven themselves as a worthy alternative to derailleur gears.
Gearboxes trade a small amount of drive efficiency and weight, in order to achieve a significant reduction in maintenance and component wear, as well as a higher performance in poor riding conditions.
Additionally, you can pair gearboxes with belt drive, which eliminates chain cleaning and lubrication, and allows you to pedal over 30,000km before replacing any parts.

These days you can find gearbox bikes that will cross continents, complete your daily commute or slay mountain trails.
Right now, you’re probably thinking gearboxes are pretty cool, and I agree. But have you ever thought about building your own? Like, at home with old cassette cogs and chains and plexiglass…
Well, champx (a user on Instructables) did just this. And today, I’ll be showing you both how this homemade gearbox works, and how it was constructed.
The Bicycle Gearbox Plans
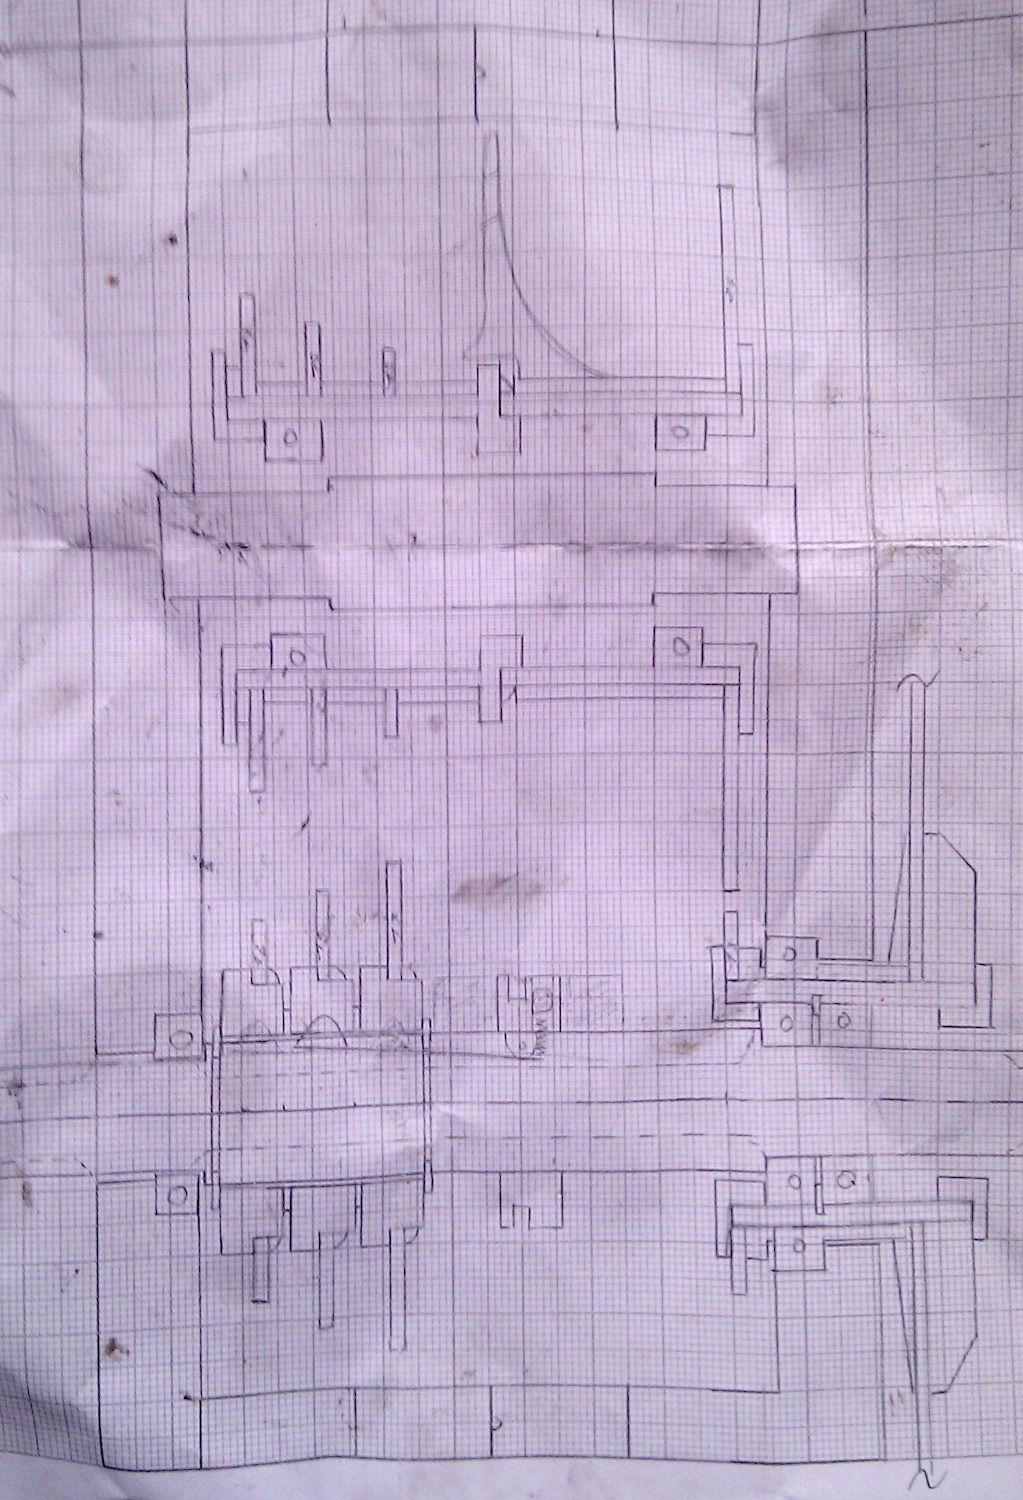
The first step was to put the idea on paper.
The inspiration for the design was based on a lawnmower gearbox, which uses a similar gear selector but differs a little when it comes to the use of spur gears rather than chain and sprocket gears.
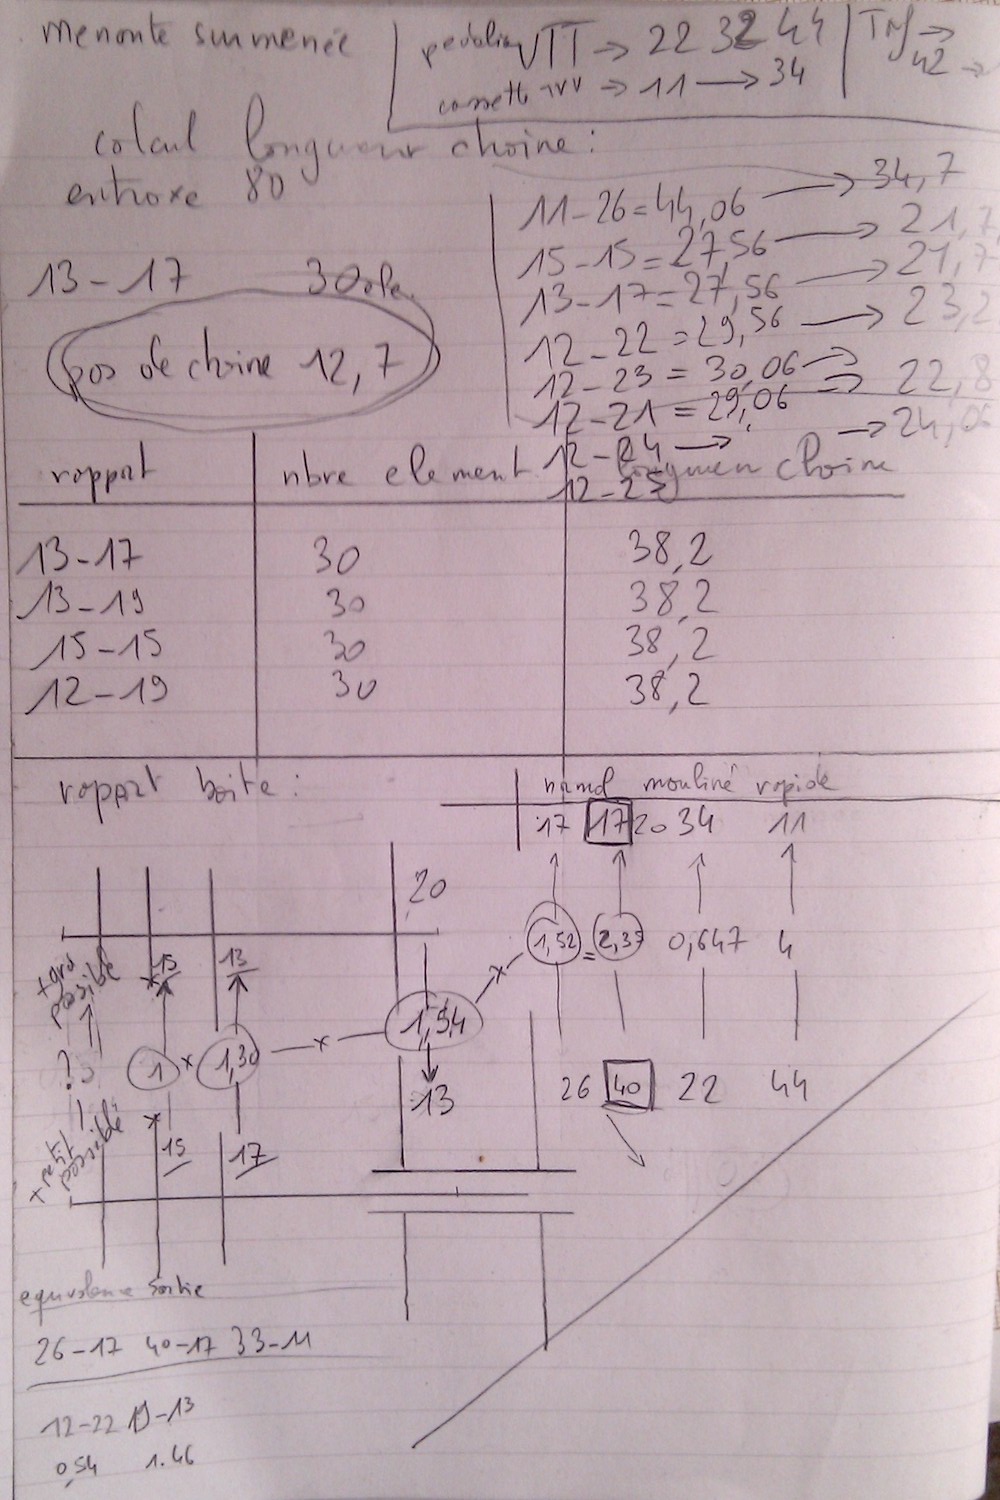
Champx first ran the numbers to determine the gear ratios and drivetrain parts that were required to make the gearbox work. Once the sprocket sizes were found, the concept was turned into a set of plans, which were drawn to scale.
From an idea floating in his head to having a full set of plans, it took champx just two weeks.
How Does The Gearbox Work?
If you’re scratching your head and trying to understand how it works, it’s time to listen up (my explanation will make the most sense if you watch my video on this gearbox).
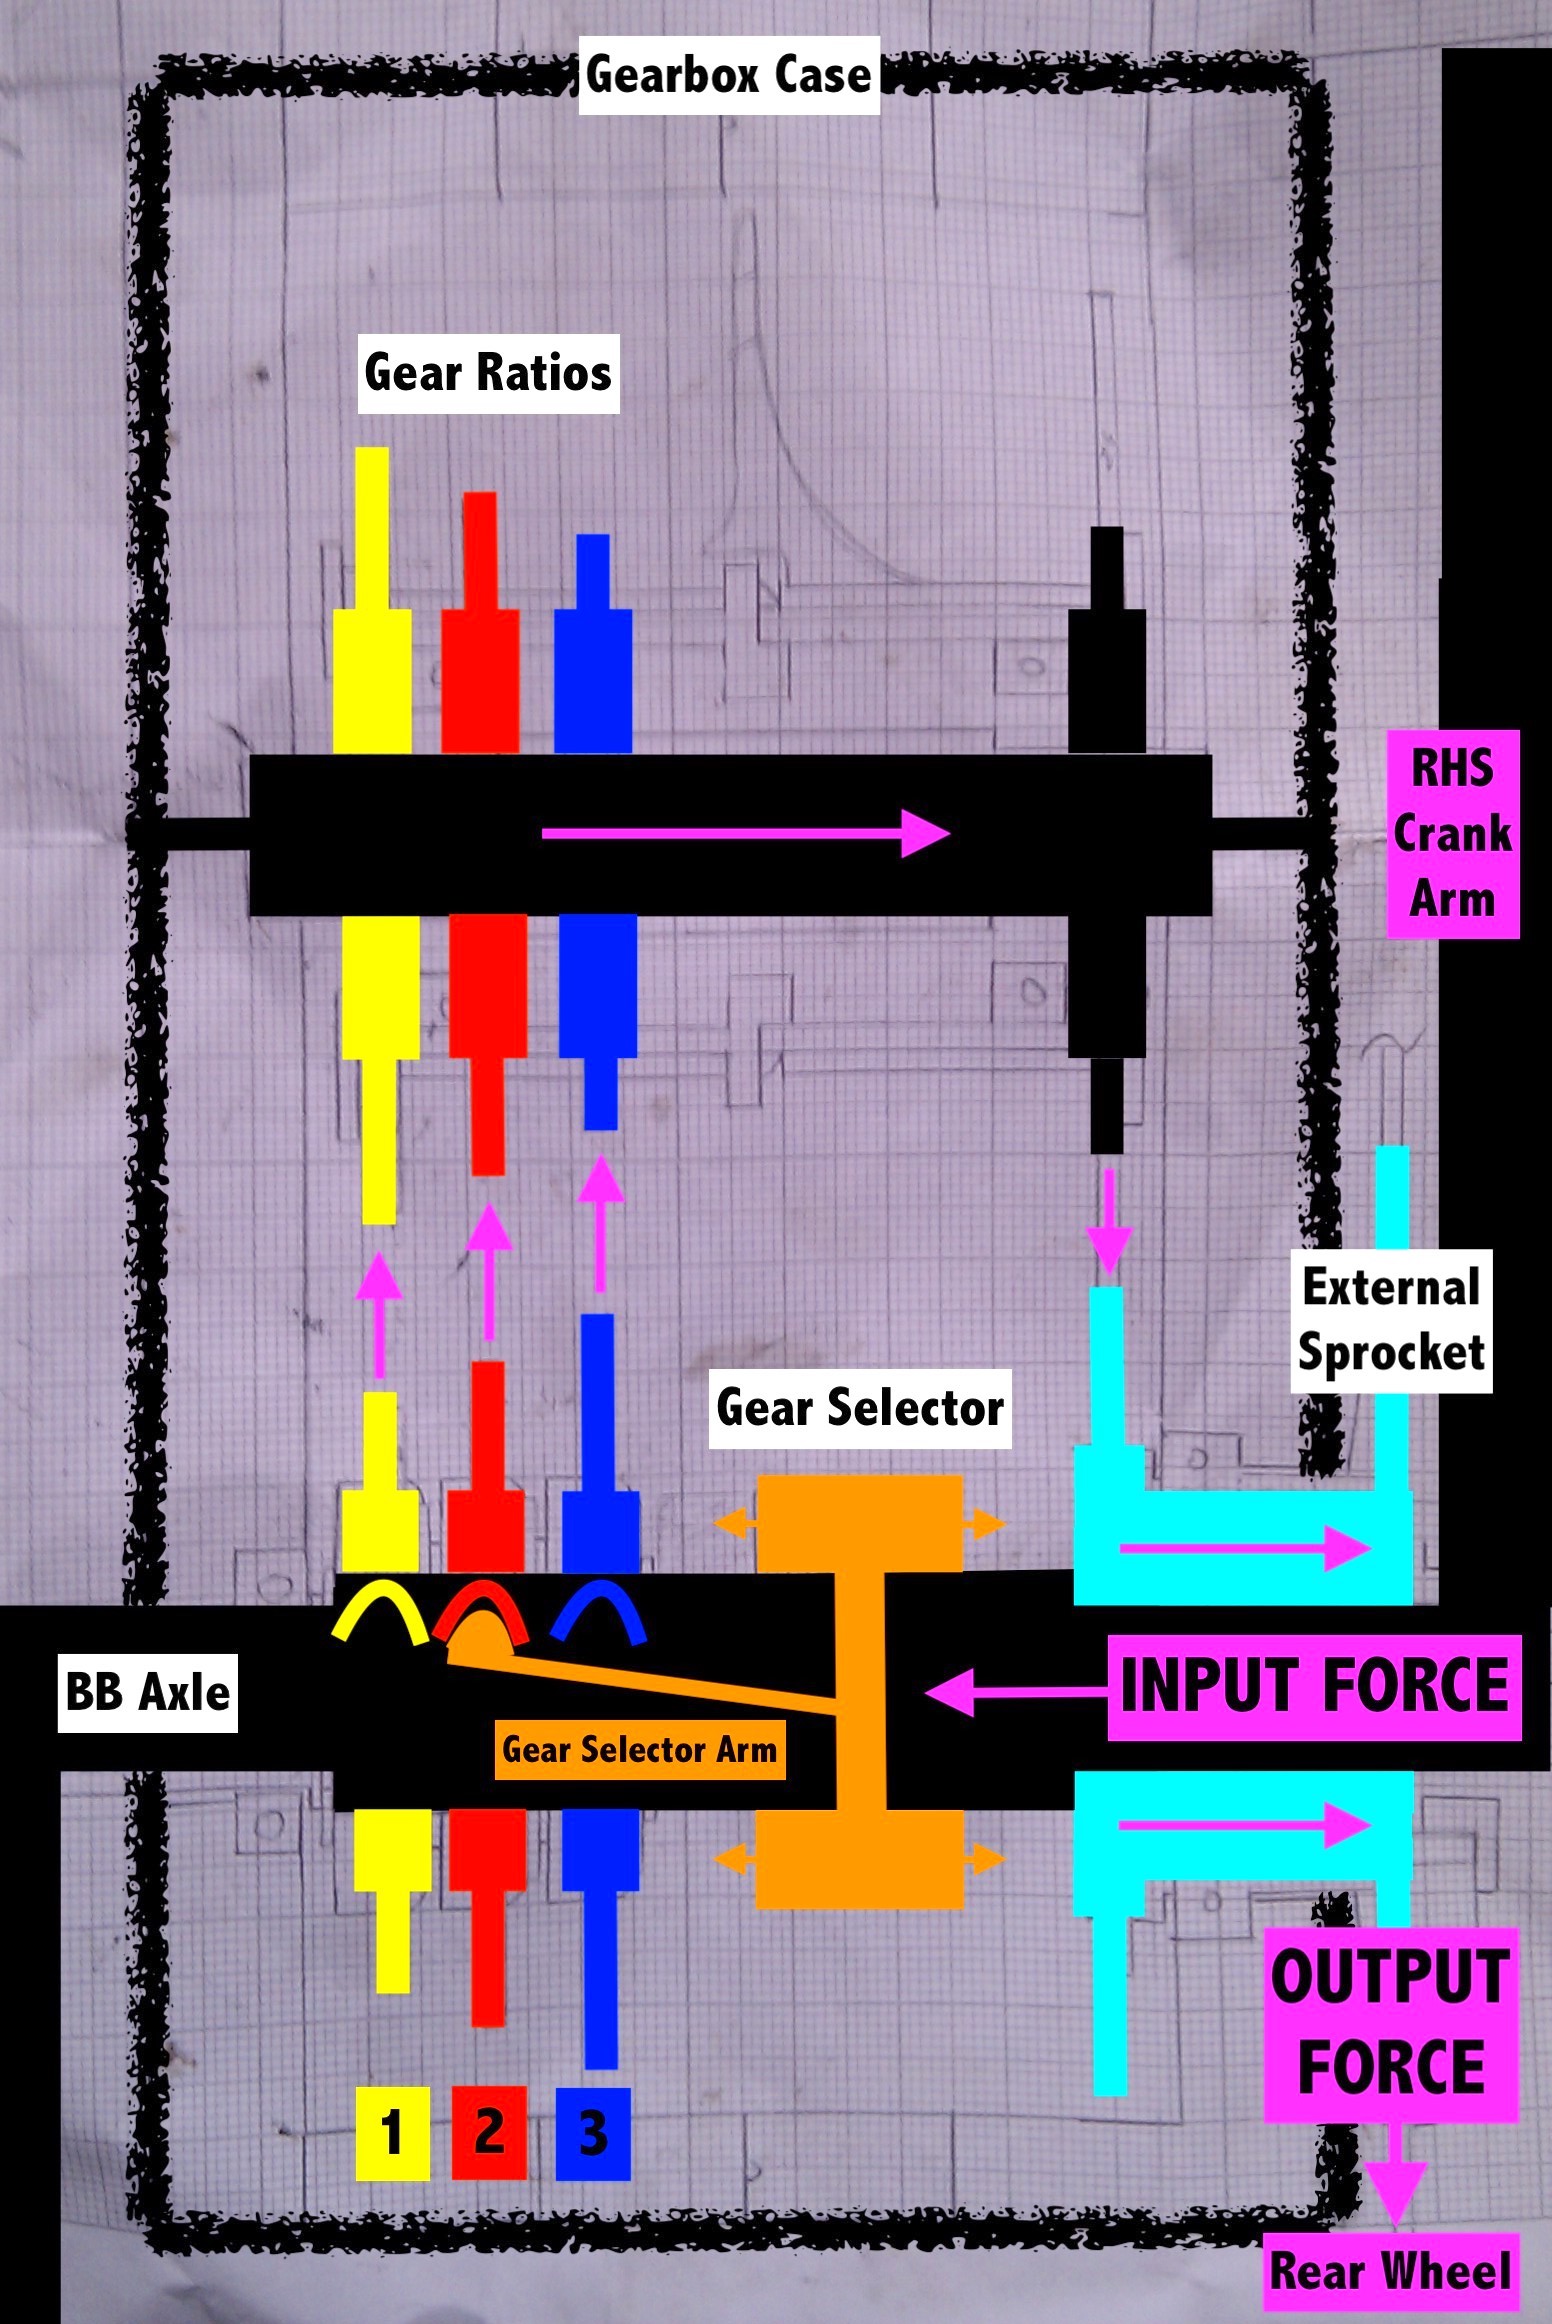
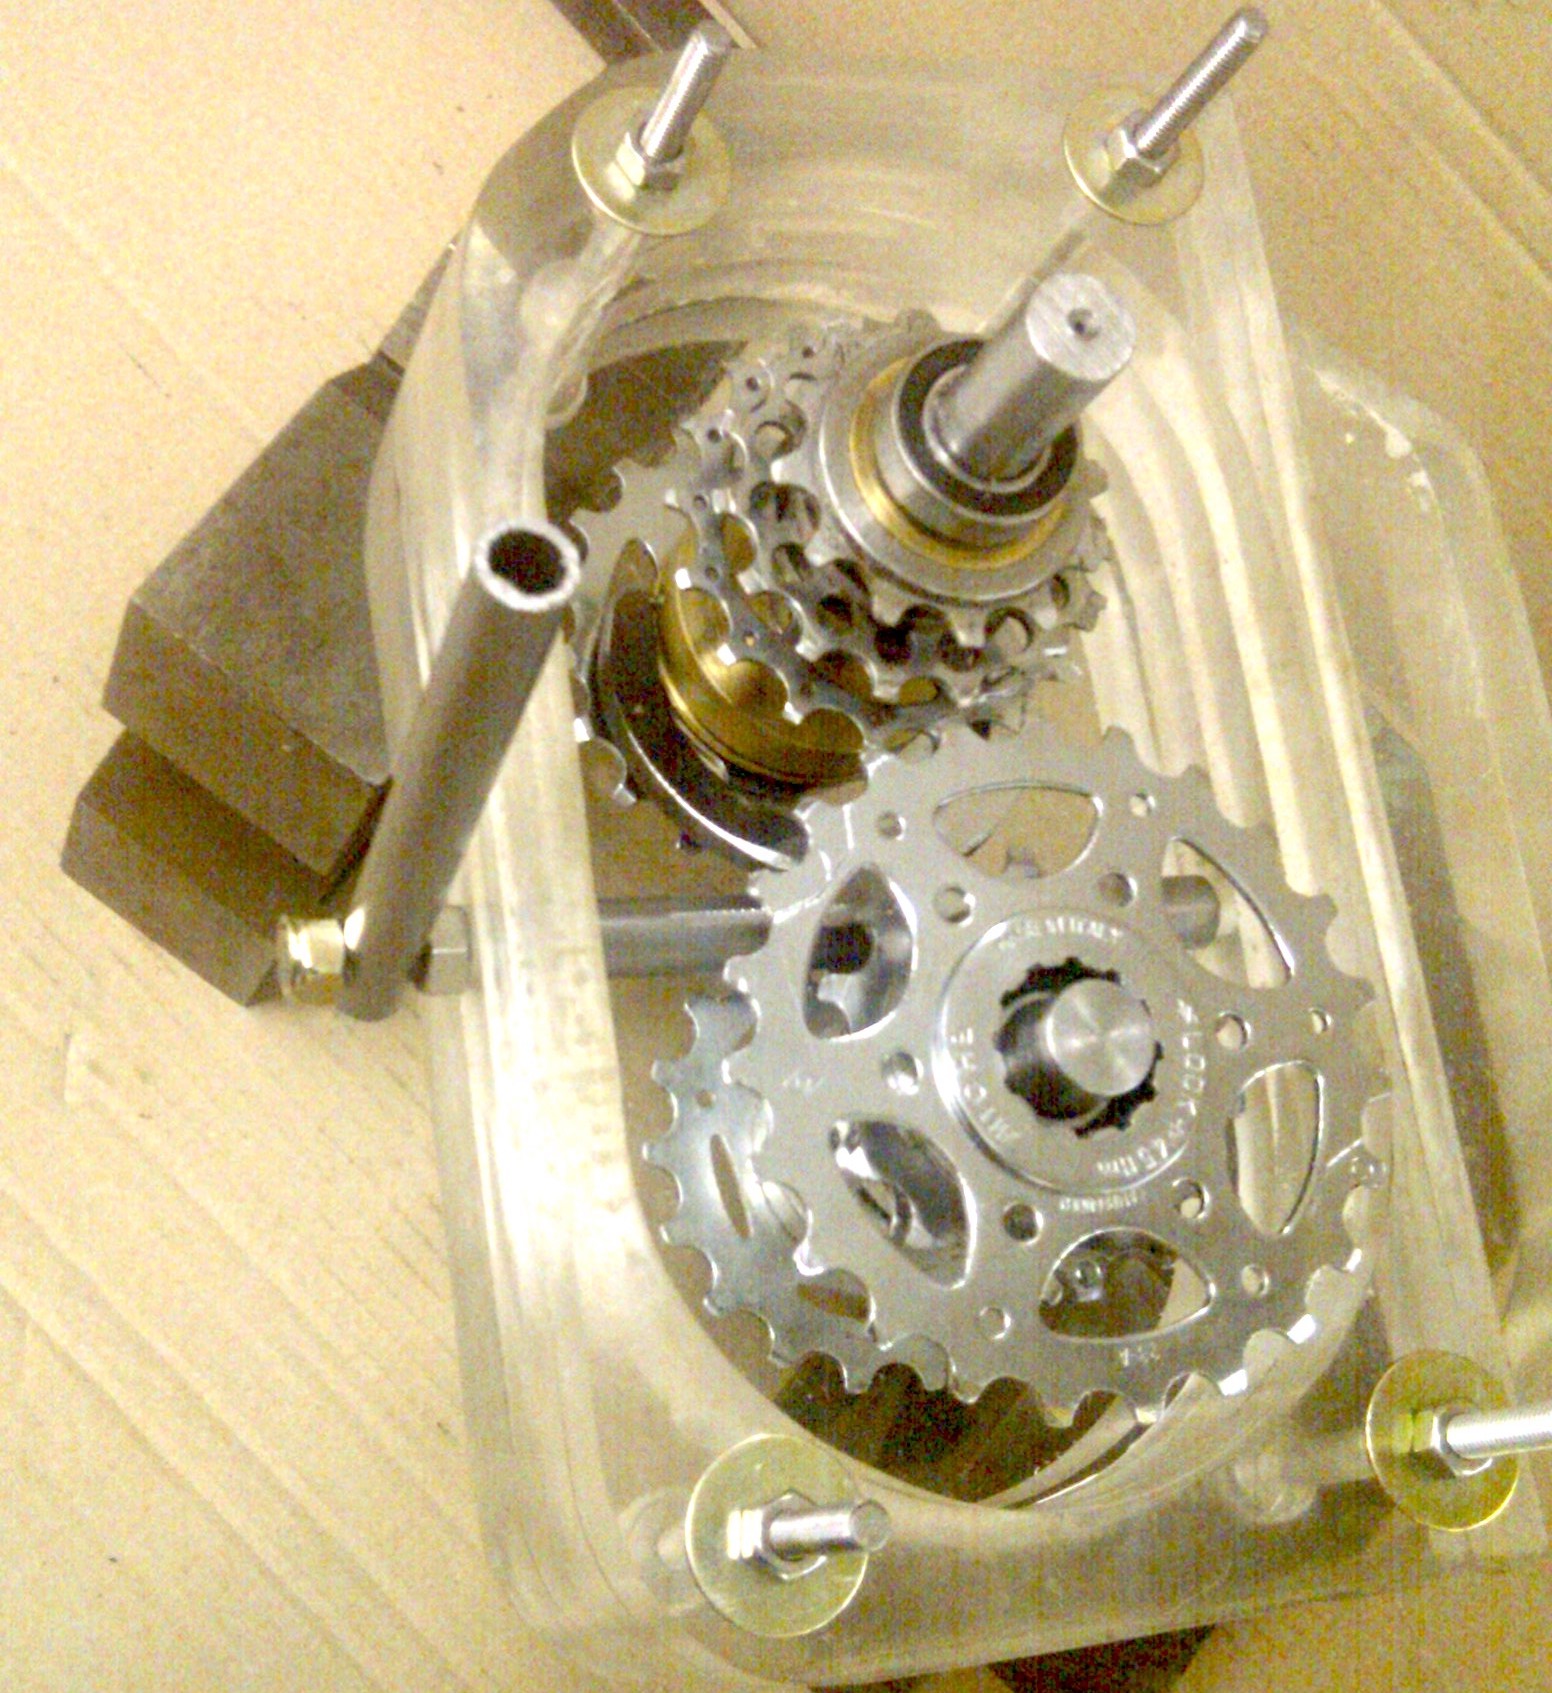
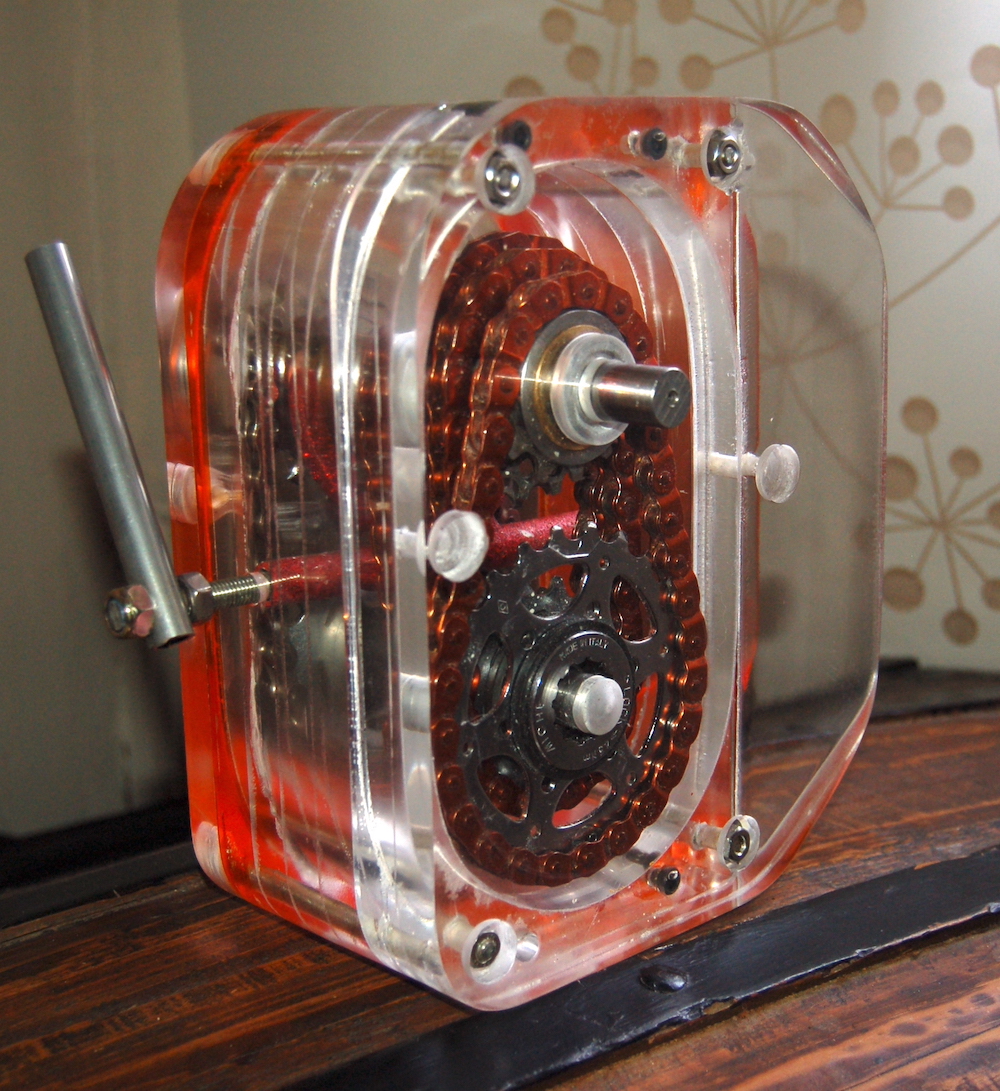
Looking down at the gearbox from above, we can see the crank arms as well as the bottom bracket axle. The picture above on the right side should give you a sense of orientation.
The force from the pedals travels inside the gearbox to a gear selector, which slides along the axle and allows you to engage one of three different gear ratios. The first gear provides the lowest drive ratio and the third gear the highest.
Your pedal power now travels via one of three chains to the next set of sprockets on a separate axle, which then turns a sprocket on the opposite end. All four of these cogs are welded to the axle, which means that all four chains inside this gearbox spin when you pedal.
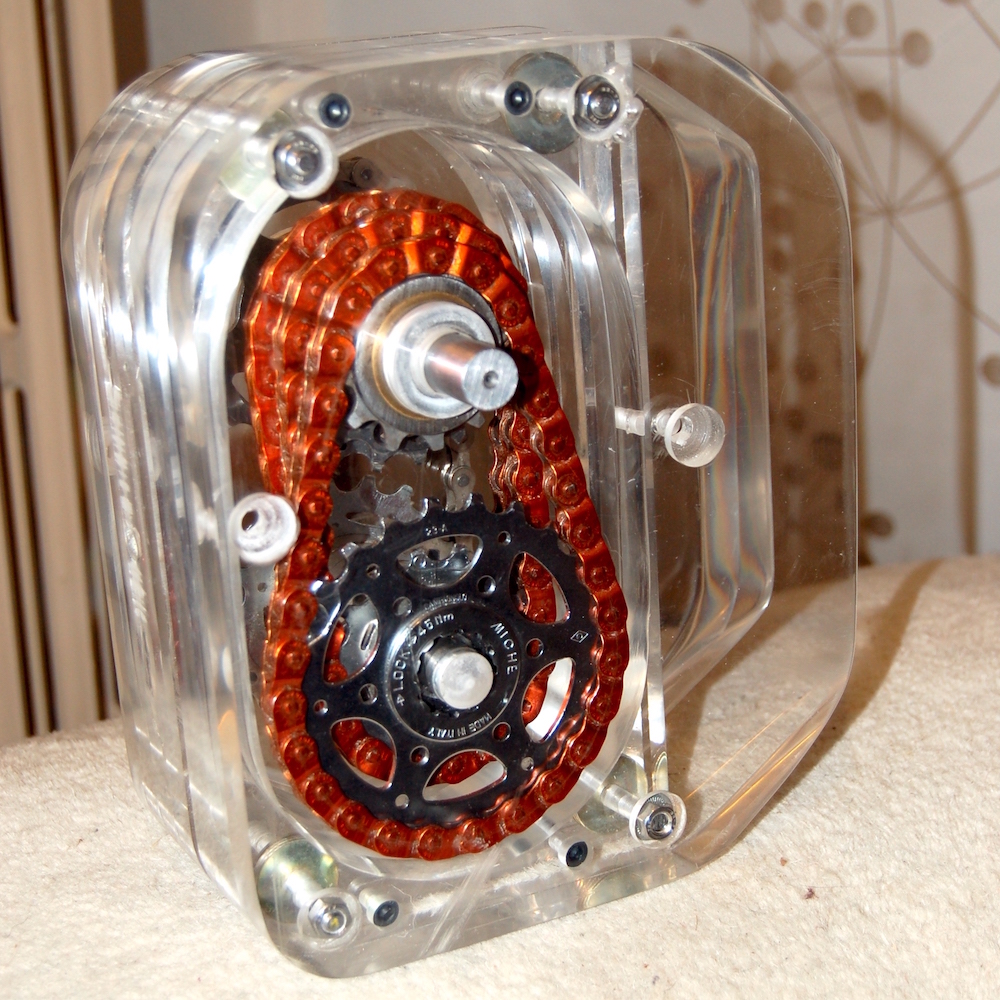
The chain on the right-hand side then connects to one last sprocket inside the gearbox. This sprocket is attached to the external sprocket, meaning they both spin at exactly the same rate. Importantly, these two sprockets are decoupled from the axle, allowing the external sprocket to spin faster or slower than your cranks. I’ll show you a video demonstration of this shortly.
The external sprocket then goes on to drive the rear wheel.
How Was The Bicycle Gearbox Made?

Hopefully, you now have a good understanding of what’s going on inside this gearbox. Let’s now take a look at how it was constructed.
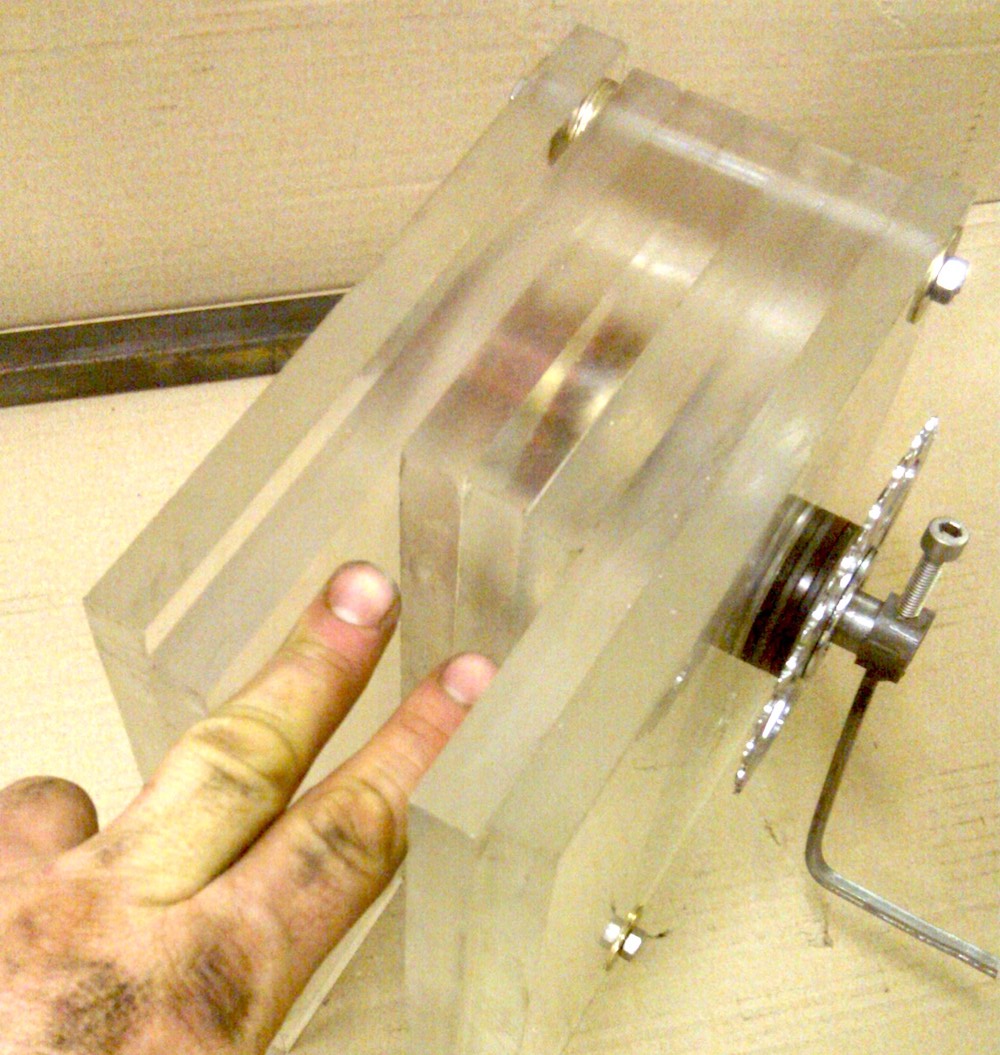
The first thing that champx made was the bottom bracket axle and gear selector. Special rings with internal notches were machined with a mortiser, and attach the cassette cogs to the axle. The notches inside the rings allow the gear selector arm to engage the desired gear.

The axle was later hollowed out so that the spring-loaded gear selector would fit inside. To prevent corrosion from affecting the gear selector’s ability to slide, it was made from brass – hence the gorgeous gold colour.
With the hardest bit out of the way (machining parts), champx made a test rig to try out his concept. The secondary axle was assembled with the four necessary cassette cogs, which are all welded to the axle.
The four chains were then hooked up, and the rig was ready to test.
If you watch the red striped tape on the right-hand side of the axle, you can see it spinning at different speeds when each gear is selected.
Ok, so the concept clearly works!
Champx now needed to make the box part of the gearbox. He chose to use stacked together sheets of plexiglass so that you could see the sprockets spinning inside!
A friend machined the bearing locations into the outer sheets, but otherwise, champx used a jig saw and hole saw to shape the plexiglass, which is no easy feat.

With the gearbox coming together nicely, the next step was to make it look pretty. Champx worked his way from coarse to fine-grit sandpaper to give it that glassy look.
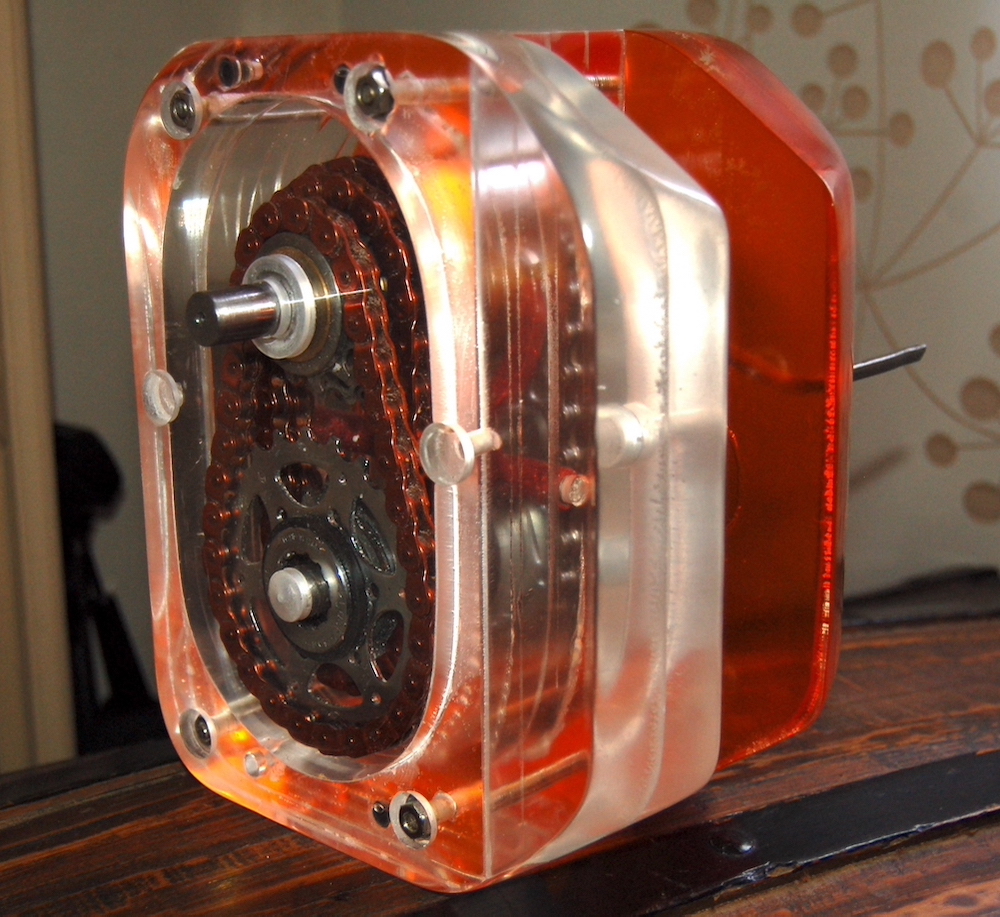
The box wasn’t quite wide enough, so one more 6mm sheet of orange plexiglass was added. This turned out to be the cherry on the top, and ties in really nicely with the orange chains.
The remaining shifting components now needed to be added to the gearbox.
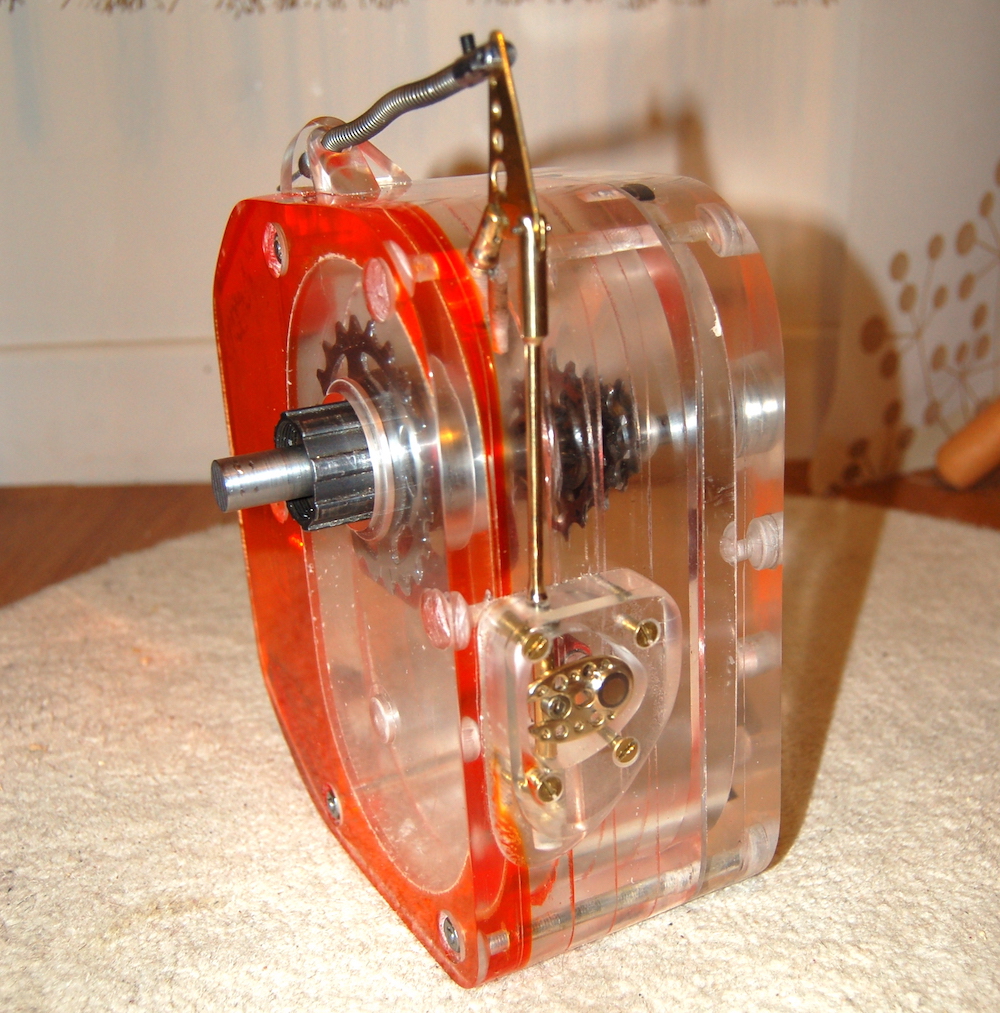
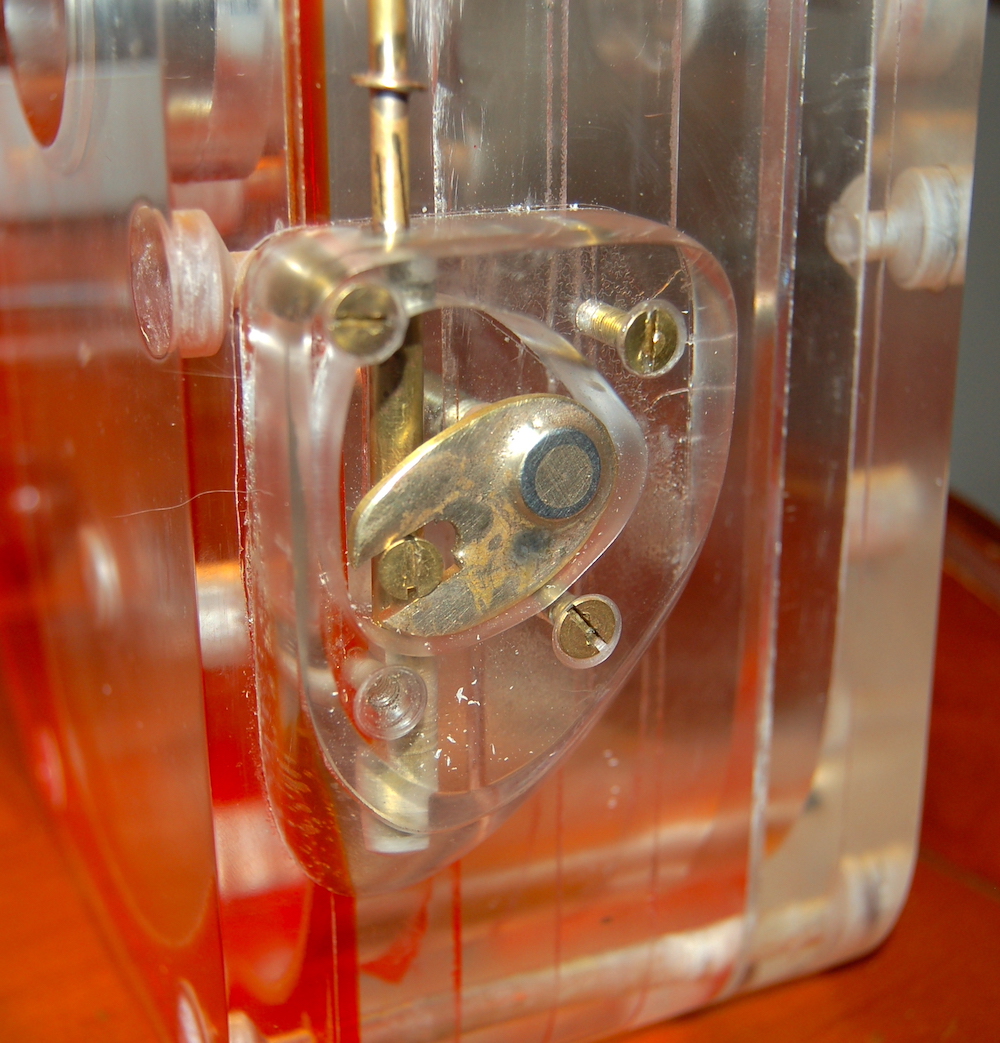
Inside, you can see a small red rotating “hand” (shown in the video at 5:05) that pushes the gear selector to the left and right. This connects to a rod outside the gearbox, which is lifted up and down using a spring-loaded cable.
Unfortunately, the original spring mechanism didn’t provide enough cable tension, so champx built a heavy-duty version that works well.
The Completed Gearbox Bike

With the gearbox now complete, it was time to build a bicycle frame to house it.
Given the novelty of this project, it made sense to build the gearbox into a fun bike!

Champx welded up a frame that he calls the “Swing Monster”. This cruiser-style bike uses headset bearings at both the fork and seatpost, so that it can steer from the front or rear wheel.
I say, mission accomplished on this project! The bike looks amazing and would be a fun challenge to ride too.
Summary

As a bike nerd, tinkerer, gearbox aficionado and lover of cool projects, I had to share this work!
I hope it inspires some of you to build something that’s normally out of your comfort zone.
If you know of some more out-of-the-box DIY bicycle projects, I’d love to hear about them in the comments.
And if you’d like to learn more about the two most popular bicycle gearboxes, check out my article comparing the 14-speed Rohloff hub with the 18-speed Pinion gearbox.


