
Mechanical or hydraulic disc brakes? It’s still a hotly-contested competition in the touring and bikepacking world.
While hydraulic brakes now dominate most bike categories of cycling, the criteria is a little different for bike travellers, as reliability and simplicity play a much larger role. Do you use the more complex but higher-performing hydraulic brakes? Or the more simple mechanical system that doesn’t quite perform as well?
I’m starting to get a LOT of inquiries about disc brakes as my most recent resource on touring bike brakes was written way back in 2011 (oops!), so let’s work out what is better in 2020.
In A Nutshell: Mechanical vs Hydraulic Disc Brakes
Mechanical Disc Brakes:
- Easier to maintain yourself, but require more maintenance generally
- Powerful enough for most touring applications
- More of an on/off brake feel
- Very unlikely to fail in remote areas
- Typically cheaper, although not so much these days
Hydraulic Disc Brakes:
- Self-adjusting and low in maintenance (usually!)
- More powerful, more effortless braking
- Gradual power delivery
- Cylinder, piston and general oil leaks can render brakes useless
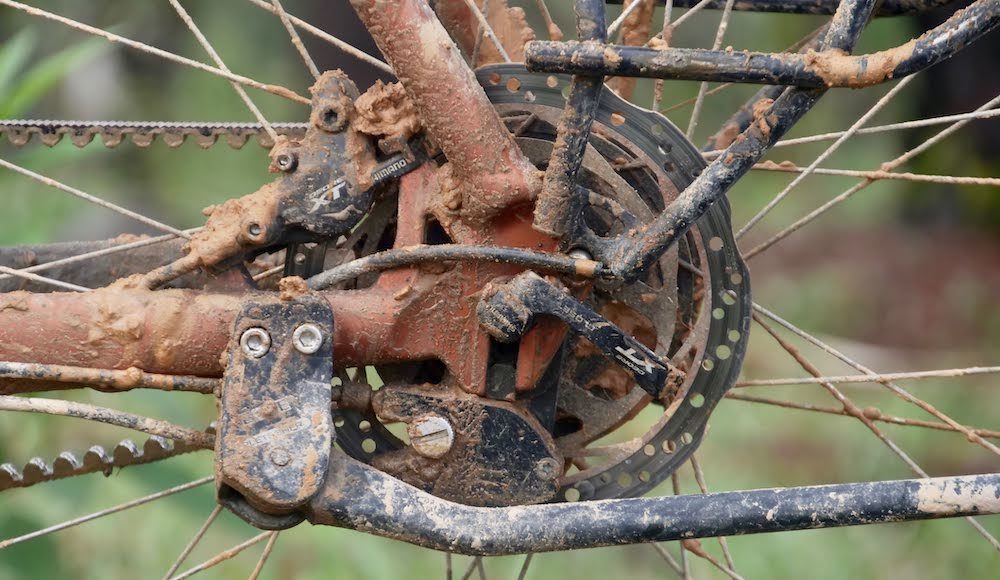
- Perform better than mechanical brakes as the conditions get worse (system is sealed)
Why Not Rim Brakes?

A decade ago, almost all touring bikes came with rim brakes. These days, just 8% of the bikes in my Touring Bicycle Buyer’s Guide use rim brakes… and it’s 0% (zero!) my Bikepacking Bike Buyer’s Guide.
Clearly, disc brakes have prevailed, and for great reasons:
– You get better braking performance, especially in the wet and/or muddy conditions
– Your rims theoretically last forever, as they are not worn down by the brake pads
– Your brake pads will last much, much longer in the equivalent riding conditions
– You get additional tyre clearance
The Case For Hydraulic Disc Brakes

Hydraulic disc brakes have a fluid inside the brake lines, much like those in a car or motorbike. When you pull the brake lever, the fluid rushes down to the caliper, closing the brake pads. This type of brake line is sealed away from the elements, so they tend to work well in any riding conditions.
A big advantage for users is that as the pads wear, the pistons move inwards, keeping the same pad-to-rotor clearance. This self-adjustment just means they require less tinkering to keep them running well.
I was originally a little hesitant travelling with hydraulic disc brakes on my multi-year bike trips, as I have the propensity to disappear into remote areas with poor weather conditions. I also don’t like working on my bike if I don’t have to. But KOGA assured me that Shimano XT brakes had been working reliably for their customers, so I took their word and figured I could always switch to mechanical brakes if I needed.
Turns out, my Shimano XT brakes have been fantastic! Hydraulic brakes simply have more power than mechanical brakes, but additionally, they usually have a more ‘modulated’ feel too. This just means that you can ramp up the braking power at a more measured pace.
I did have to bleed a rear brake early-on as it must’ve been a bit dodgy from the factory, but otherwise, I bleed my brakes once every 12-18 months and swap my pads when they wear out. I went through just five sets of brake pads in South America, which is pretty incredible given the terrain.
As hydraulic brakes can have issues with oil leaks and brake bleeds from the factory, I recommend using your brakes for a minimum of three months before going rogue. This should iron out any kinks and give you confidence that your system will work as advertised.
The Case For Mechanical Disc Brakes

Mechanical brakes use stainless steel cables between the lever and caliper, resulting in a very simple brake system. Replacement inner and outer cables can be found in any bike shop in the world, and they’re easy to change yourself – which is why I’ve long recommended mechanical disc brakes for touring and bikepacking.
I adopted Avid BB7 brakes for touring back in 2012, and while they weren’t the highest performing brakes available, they were plenty powerful for touring, especially with large rotors.
But more importantly, they were a fool-proof brake system. Lubricating the inner and outer cables was easy and it almost always brought my brakes back to their on/off brake bite after feeling a bit gunky.
One thing I found a bit annoying was the need for constant adjustment. As my brake pads would wear, I would need to add cable tension. This was done easily by adjusting the barrel adjuster, but I found I needed to make fine adjustments at the Avid BB7 caliper too, or my brakes would rub.
My TRP Spyre disc brakes required a little less tinkering as both brake pads pulled inwards at the same time, but still – the inner brake pads always wear quicker than the outer pads, so caliper adjustment is inevitable.
What About The Hydro/Mechanical Combo Brakes?
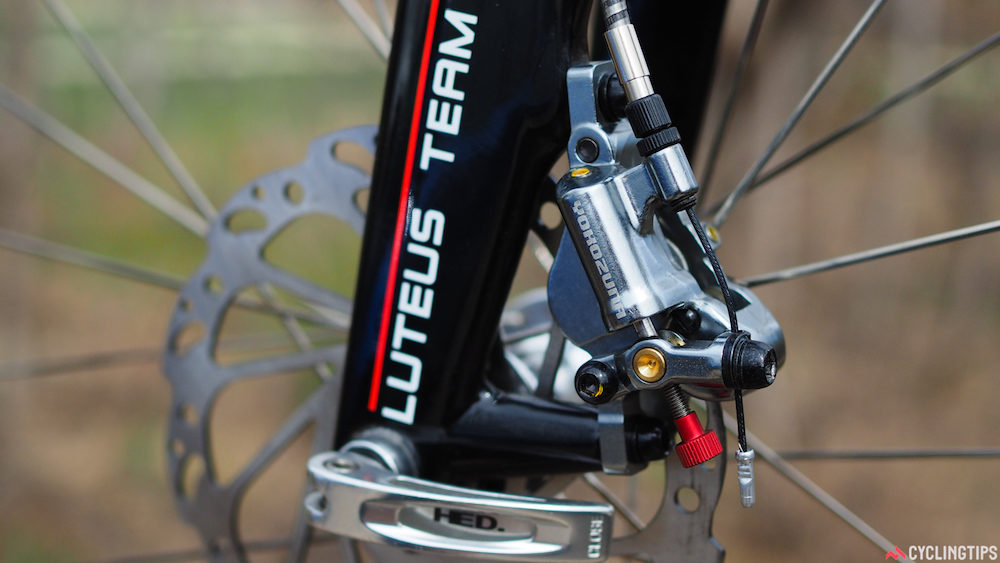
As well as these brakes do work, I feel like you’re better off (a) getting the full hydro system so that the cables are more weather-resistant or (b) going for the simplified mechanical system. These combo brakes a bit heavier and have the same cable friction losses as a mechanical brake.
They’re not a bad idea for a brake upgrade, however. For example, if you currently have integrated drop bar shifters and mechanical disc brakes, you can swap in some combo calipers which will give you more braking power and the self-adjusting hydro pistons.
Brake Pads

Do not underestimate the importance of brake pads! They come in two main compounds:
– Resin (aka organic or semi-metallic) which combines together various fibres
– Metal sintered which are made from metallic particles that have been fused together
I generally like using sintered brake pads for touring because they last longer (especially in wet/muddy conditions) and they manage heat very well on long descents. I’ve found sintered pads are a bit less common to find in bike shops around the world, so I often stock up on them when I can.
Resin brake pads are made from softer materials than sintered brake pads, so they often run quieter. As dust and other contaminants can cause brake pads to squeal, resin pads are usually best for dry regions. Some people prefer the brake feel of resin pads too, as they can have a bit more initial ‘bite’.
Ideally, you shouldn’t mix brake pad compounds on the same rotor. This is because brake pads deposit a small layer of particles on the rotor, so you essentially contaminate the brakes when you mix pads. That said, I switch between sintered and resin when that’s my only choice and I’ve found it only reduces the performance a bit.
One thing to note: many different brake brands use their own brake pads. If you are travelling through low-income countries, the most common pads available are always (1) Shimano and (2) SRAM, in my experience.
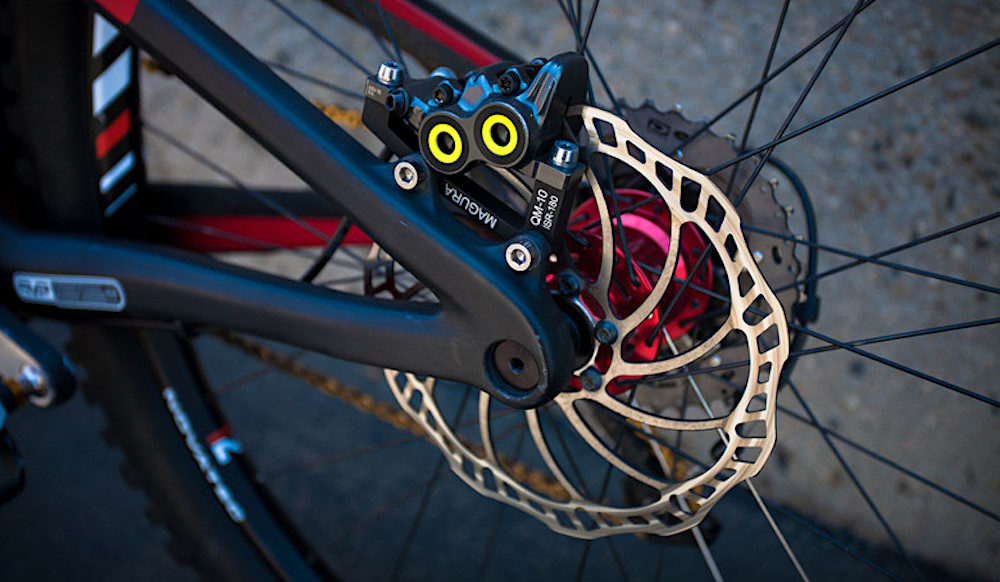
Number of Pistons
Disc calipers employ pistons on either side of the rotor (two-piston) to push the pads inwards, but four and six-piston calipers are also available. With more pistons, manufacturers can create brake pads with additional surface area to clamp on the rotor, and therefore, stop your bike quicker. You’ll find 4-piston brakes on most gravity-oriented mountain bikes, but they’re also popular on tandems.
The downside to four or six-piston brakes for travellers is that the brake pads are much less likely to be found in shops, so you’ll need to bring a few sets of pads from home when you travel.
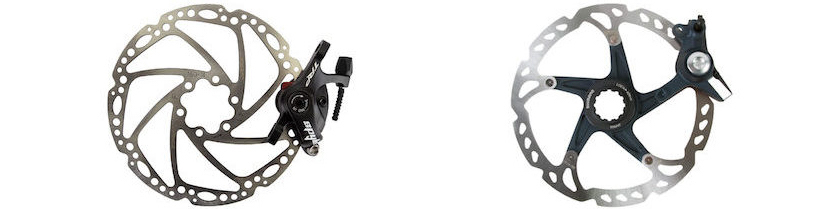
Rotor Sizes

There are three common rotor sizes for touring and bikepacking: 160mm, 180mm and 203mm.
By increasing the rotor size, you achieve more leverage at the caliper, which results in more braking power. The larger surface area of the rotor offers better heat dissipation too for longer descents.
Generally, a heavier rider+bike+luggage will require more braking power than someone who is lighter. But if you’re riding steep mountain roads, using a 180mm or larger rotor diameter will be ideal, no matter your weight.
For a mechanical disc brake bike, I recommend going up a rotor size to help it to stop on a dime. On a touring bike, 180mm or even 203mm will get you closer to hydraulic brake bite.
Mounting Type

The most common mounting type for disc brake is called ‘post mount’ and it’s found on 99.9% of mountain bikes. I generally prefer this mount type for touring and bikepacking, as you can easily install big 180mm and 203mm rotors to stop your loaded bike.
The ‘flat mount’ type of caliper is becoming more prevalent, especially in the gravel bike category. It’s essentially a more compact caliper design that better suits the aesthetic of road bikes. In its best form, it has no adapters and is easy to set up with a perfectly-aligned brake mount.
But generally, I find it’s harder to adjust a flat caliper for a couple of reasons:
– There is a disparity in distance between each bolt at the fork (when using an adapter), so one end of the caliper moves more than the other when you make small adjustments.
– The close bolt spacing can amplify any frame imperfections on the rear mount, resulting in a higher chance of rubbing (in particular with an adapter fitted).
In addition, some flat mount forks will not allow you to use rotors bigger than 160mm due to design constraints, for example, the 2021 Surly Disc Trucker – you’ll need to check with the manufacturer to find out if 180mm rotors will fit (203mm definitely will not).
Hydraulic Brake Maintenance

I’ve found that I can travel with hydraulic brakes for more than one year without needing to replace the brake fluid. There have been workshops right through Latin America who can bleed Shimano hydraulic brakes, in fact, I think it’s a really simple task for any mechanic (I would do it myself if I carried the bleed cup and fluid).
Around when its time for a bleed and my levers are starting to pull closer to my handlebars, I normally adjust the lever position so that it sits further out. This temporarily keeps me going until I find a shop in the next few thousand kilometres.
When you change your brake pads, you’ll want to clean your caliper well. This is because the pistons need to be pushed inwards for the thick new pads, and any debris on the sides of the pistons can potentially run into the caliper and damage the seals.
Disc Brake Squeal – A Technical Explanation
![]()
We all know the truly evil sound that disc brakes can make. Disc brake noise comes from a few different sources, but let’s focus on a brand new, already bedded in brake setup.
When you grab the brake, the pads move a tiny bit forwards and backwards in the caliper, slipping and sticking on the rotor (known as “stick-slip”). This causes small oscillations in the caliper which then transfer to the frame and other components like your spokes, generating noise.
The reason disc brakes squeal more in wet conditions is that water creates a bigger difference between sticking and slipping when you brake, resulting in a higher amplification of noise.
A well-designed brake system will eliminate the potential for noise by resonating at fewer frequencies in the brake pads, caliper and rotor. This can be done by using different materials and shapes for the brake components – the aim is to minimise the number of frequencies of each of the brake components, ensuring they cannot ‘sing’ together.
As it’s not just the caliper and rotor that generates the noise, that means that the same braking system can be noisy on one bike, but not another! I’ve actually heard of some frame manufacturers needing to stiffen the seat and chainstays to attenuate more noise.
In the last three years of touring, I’ve only had my Shimano XT brakes squeal in particularly wet conditions, but they were also noisy when I fitted some cheap brake pads in Bolivia.
Flying With Disc Brakes

You might have concerns about flying with disc brakes, but let me reassure you – I’ve been on dozens of flights and have never bent a rotor or had anything drastic happen to the levers or calipers.
It’s best to install a spacer between your front brake pads and remove the rotor from your front wheel before flying. If you have a “centre lock” rotor, you’ll either need to use a cassette tool to remove it yourself or take your bike to a shop where they can take the rotor off for you. The six-bolt design is technically inferior (in my opinion), but you can remove the rotor with a small multitool, so I prefer that for touring.
I don’t worry about my rear rotor as it’s very well protected by my rack, kickstand and quick release lever (see pic below).
Recommended Hydraulic Disc Brake Models
1. Shimano XT disc brakes are what I’ve been using since 2017. I lost most power to my rear caliper about three months into my adventures in Patagonia, but was able to add new fluid which remedied the problem – I suspect it wasn’t bled properly from the factory. Since then, I’ve been riding worry-free with my XTs. I usually bleed them every 12 months or so and get anywhere from 1000km to 10,000km out of a set of brake pads. Shimano brake pads for XT brakes are very common everywhere in the world, which is great if you’re on the road for a long time.
2. The Magura MT7 (or MT5) is recommended by Iohan Gueorguiev from Bike Wanderer. He originally had problems with his Shimano SLX brakes and switched to Magura which have since worked flawlessly in the remote terrain he rides. If you need more reassurance, KOGA also specs their touring bikes with the Magura MT5 brakes. But just make sure you stock up on pads as you definitely won’t be finding replacements in many bike shops…
Recommended Mechanical Disc Brake Models
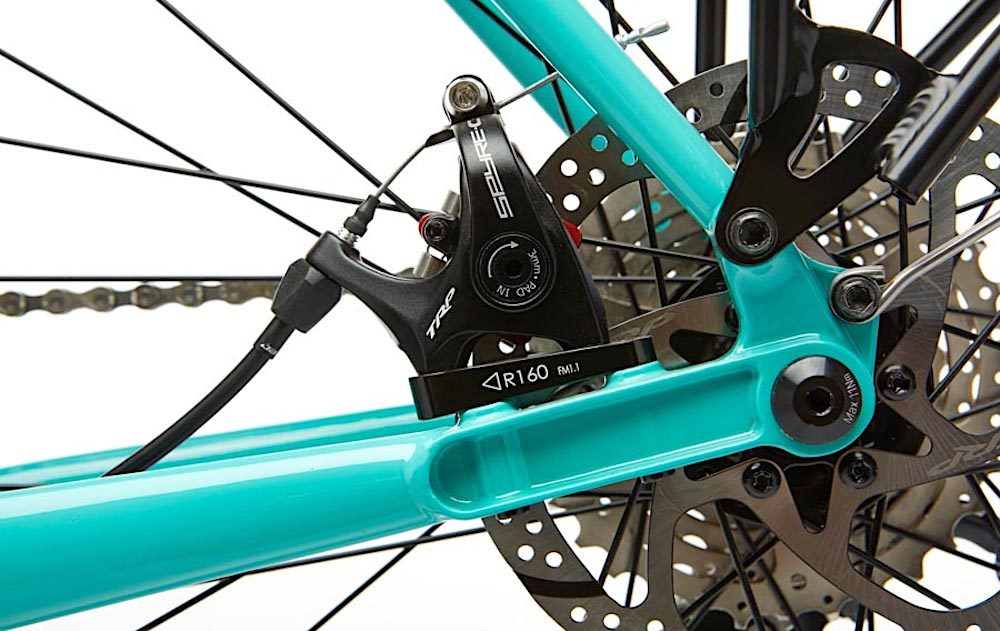
1. TRP Spyke (or TRP Spyre for drop bar bikes) are my preferred mechanical disc brakes as both brake pads cleverly pull in together like a hydraulic caliper. While some people think they lack power, I’ve never found this – but then again, I’ve always used them with larger rotors. TRP uses Shimano ‘B01S’ brake pads which are readily available around the world.
Buy on Amazon: Front and rear flat bar brake calipers for $135
Buy on Amazon: Front and rear flat bar levers for $32
Buy on Amazon: Front and rear drop bar brake calipers for $113

2. Avid BB7 Mountain (or BB7 Road) disc brakes have been around for decades and I’ve personally used them on multiple bikes. They have a decent amount of power, and you can easily adjust the cable tension by turning the red knob. SRAM brake pads are pretty common around the world too.
Summary: Mechanical vs Hydraulic Brakes
Given my positive experience, I feel that hydraulic brakes are the way to go for touring in 2020 (but only just).
I have had very few issues with hydraulic systems in the last three years of travelling. I love the effortless power, the general brake feel, the self-adjusting pistons and the fact that the brake lines are sealed from the elements. I definitely recommend using your hydraulic brakes for a few months before tackling a remote tour, just to make sure they’re bled well and have no leaks.
If you prefer the most simple option and are happy to adjust your brakes a bit more, mechanical brakes will do you just fine. You can replace the cables anywhere in the world and easily lubricate the cables in between. To boost the power, I definitely recommend using rotors larger than 160mm.


