

Some people spend a lot of time on bike adventures… but without actually riding their bike! Perhaps the most famous for this is the Iohan Gueorguiev who seeks out the most off-the-beaten tracks through the Americas. I’ve also spent my fair share of time pushing bikes around the world, so I thought I might be able to give you some insights into these crazy places.
But… why would you use a bike if you’re going to spend so much time pushing it?
Sometimes you just want to get to the world’s most remote areas. It may take a longer time to get through a hiking trail section with a bike, but guess what, you’ve now got wheels for when you get to the dirt road on the other side.
Let me share a few techniques, show you a few bike setups, and then give you an idea for how I’d optimise my luggage for a trip with hike-a-bike galore!
Hike-A-Bike Techniques
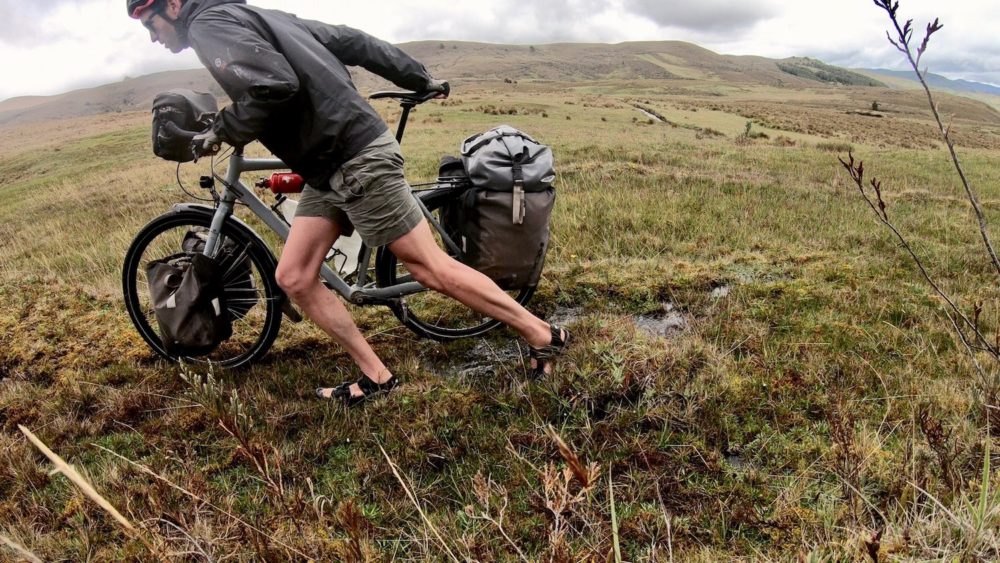
I rarely push my bike…
…I pull it. I pull it through the mud, through rivers and up the rocky trails. One hand sits on the bars for control and the other pulls behind the seat. The only time I push with both hands on the bars is when the ground is hard and completely flat (but normally you can ride those sections).
When it gets steep, I pull my bike from behind the seat tube.
Pulling from the seat is only good up until a certain gradient (20-25% in my experience). After that, you’ll then need to tuck your hand in the gap behind your frames’ seat tube. I also find lifting my bike from the seat tube is ideal.
I use my rear brake. A lot. (When it’s steep)
My hand that I keep on my bars is always hovering over the rear brake lever. I often move my bike a bit, grab the brake and use the stationary bike to pull myself up!
When it’s insanely steep, I take off my front panniers first.
I’ve found that it’s easier to drag a heavy rear load than lift a heavy front one up crazy steep inclines.
Iohan Gueorguiev’s Fat Bike
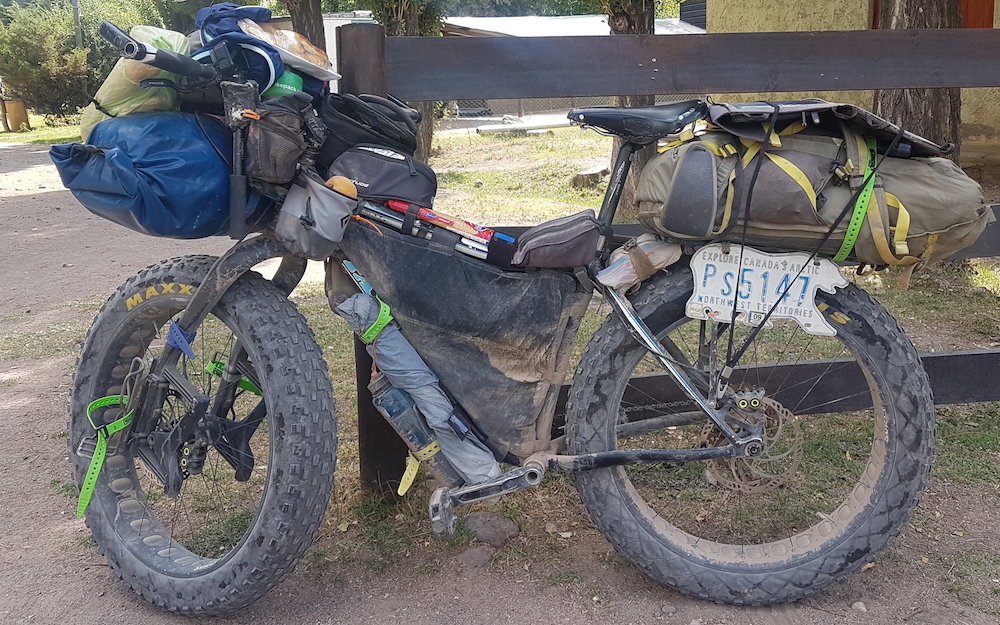
The key feature of Iohan’s Fatback Rhino FLT is the removable 30-litre backpack. When Iohan needs his bike to be lighter and more manoeuvrable for the steeper hike-a-bike sections, he is able to carry a decent percentage of his gear on his back. Otherwise, he is carrying equipment in a Cleaveland Mountaineering framebag, massive Sea-To-Summit front drybag and multiple Blackburn cargo cages on the frame and fork.
You can read more about Iohan’s Fatback Rhino FLT HERE.
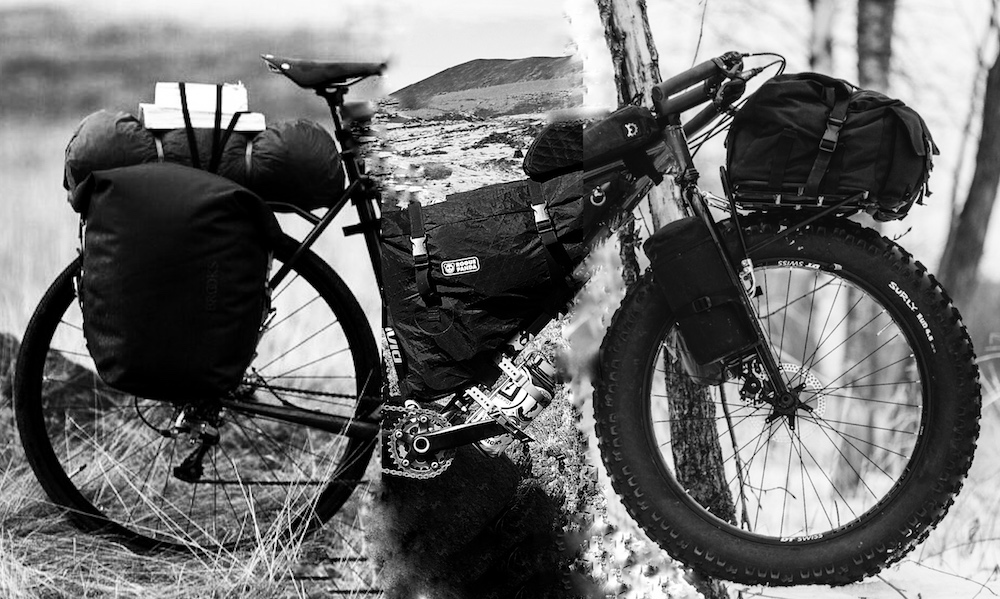
Sylvain St-denis’ Surly Troll

Sylvain uses a Surly Troll with a similar-sized backpack to Iohan, strapped to the rear Surly rack. To carry the rest of his gear he’s using full frame bag, front drybag and a few cargo cages. More recent photos of Sylvain’s bike show a front rack to support a small and large drybag.
Ryan Wilson’s 44 Bikes Maurauder

Photography wizard, rmdub, uses a custom 44 Marauder bike with Pass and Stow front rack to support a removable camera backpack for the hike-a-bike sections. Ryan keeps his electronic gear in this padded bag – camera gear, laptop, hard drives etc. Rather than a heavy rear load, the majority of Ryan’s weight is off the rear wheel. He’s using front Ortlieb panniers, two stem bags, a few cargo cages, a Porcelain Rocket frame bag and Porcelain Rock seat pack.
It’s worth taking a closer look at Ryan’s bike and gear on the Radavist. Great article.
How Would I Optimise My Luggage For Hike-A-Bike?
There are a few key principles here:
– Most of the weight is found in the centre-to-rear as it makes lifting the front of the bike easy.
– Weight can be removed from the bike easily. By using a backpack and drybag you can easily take 10kg/22lbs off the bike.
– Waterproof everything. This goes without saying, I have no time for anything else!
Front Top Rack w/ 30-Litre Waterproof Backpack
– The backpack would ideally have 5-7kg inside it while riding and could be combined with the separate rear drybag to remove over 30% of the bikes weight.
– I’d probably keep my electronics (laptop etc) in this bag.
Fork Cargo Cages
– These would stay on the bike when pushing and would allow the bike to be light enough to lift, even on a steep incline.
– No more than 2kg/5lbs of gear each side – probably a tent and sleeping gear as it packs well.
– Easily removable from the bike (I like the Dom Gorilla Cage system) for camping.
Full Framebag
– Heaviest items go in here, along with food and tent poles.
– Space for water storage down low in the bag for optimal bike handling.
Rear Panniers
– These waterproof bags would store clothes, toiletries, cooking gear, spare parts, shoes etc.
Rear Drybag + Straps
– The drybag would be able to be removed and strapped to the backpack when the hike-a-bike got serious.
Have You Got Any Setup Tips For Hike-A-Bike Sections?


