

Hills are NOT harder than cycling on the flat. You heard that right, and today, I’m going to explain how this can possibly be the case.
If you’re feeling a little triggered because you currently find hills difficult, this information will hopefully be a game-changer for you.
By teaching you how to make hills super easy, you might even enjoy them as much as I do. After all, mountain roads are often free from cars, less populated, and more wild – plus the world always looks better from above!
Before commenting, please actually read this page because yes, there are limits to my claim. I also acknowledge that hills often feel harder, and we’ll discuss when that’s the case.
But first, here’s a simple explanation of why hills are not harder than the flat.
A Simple Explanation
![]()
When you ride your bike on a flat road, you are putting a certain amount of effort into your pedals (power output), at a certain number of crank revolutions per minute (cadence). Let’s say it’s 150 watts at 75RPM.
Now, let’s add a small incline. To combat gravity, you change into a lower gear.
Congratulations, you’re now pedalling at the same 150-watt power output and at the same 75RPM cadence as the flat road. Your heart rate is the same. Your oxygen uptake is the same. Your perceived effort is the same.
This is possible because lower gear ratios offer a higher mechanical advantage, and by having enough mechanical advantage, hills don’t have to be any harder than flat roads.
The Limits To My Claim
Ok, my claim obviously breaks down at a certain point.
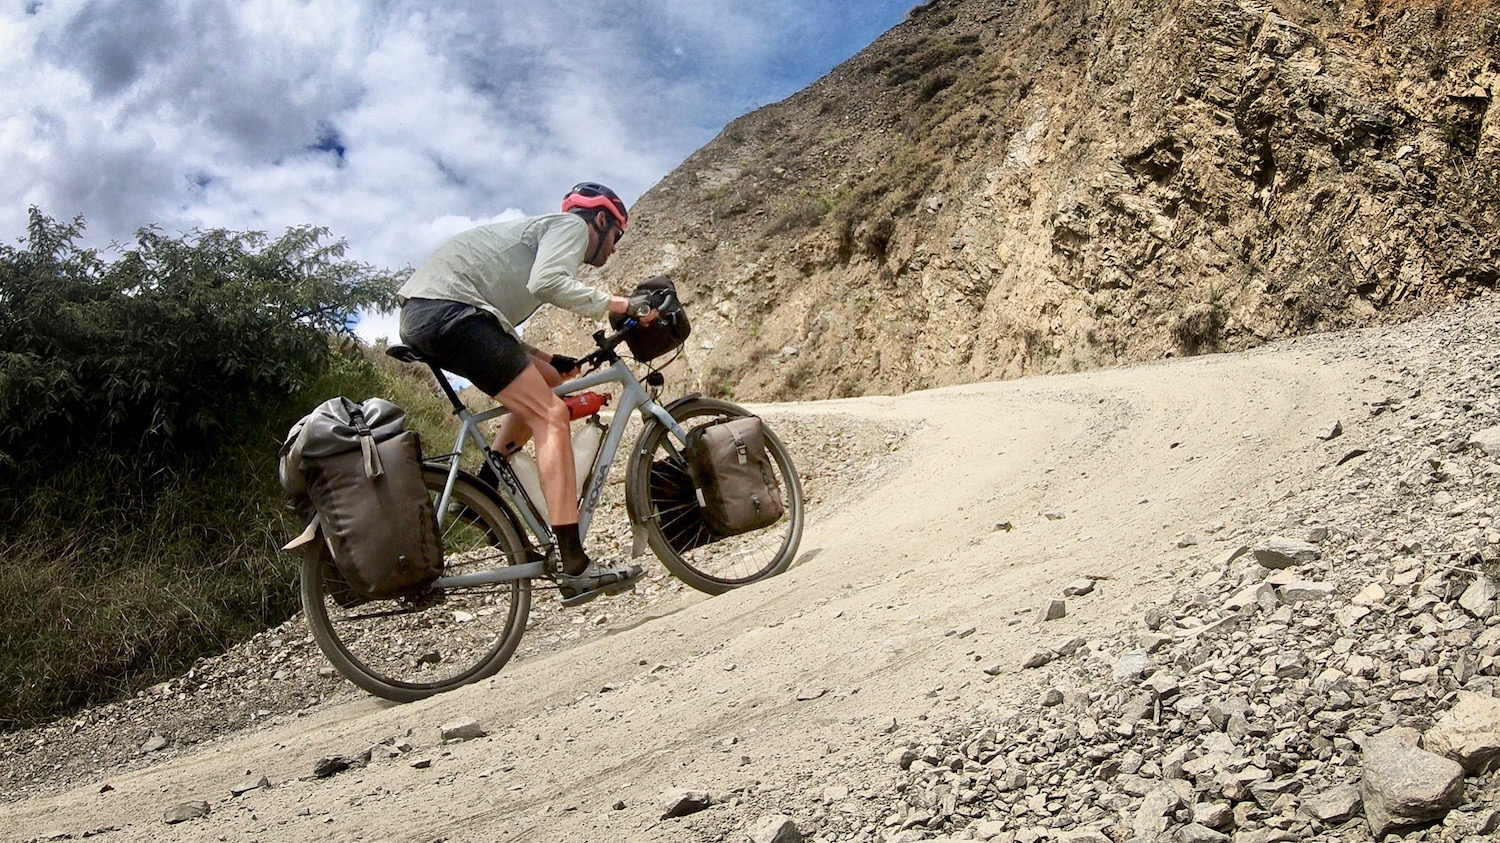
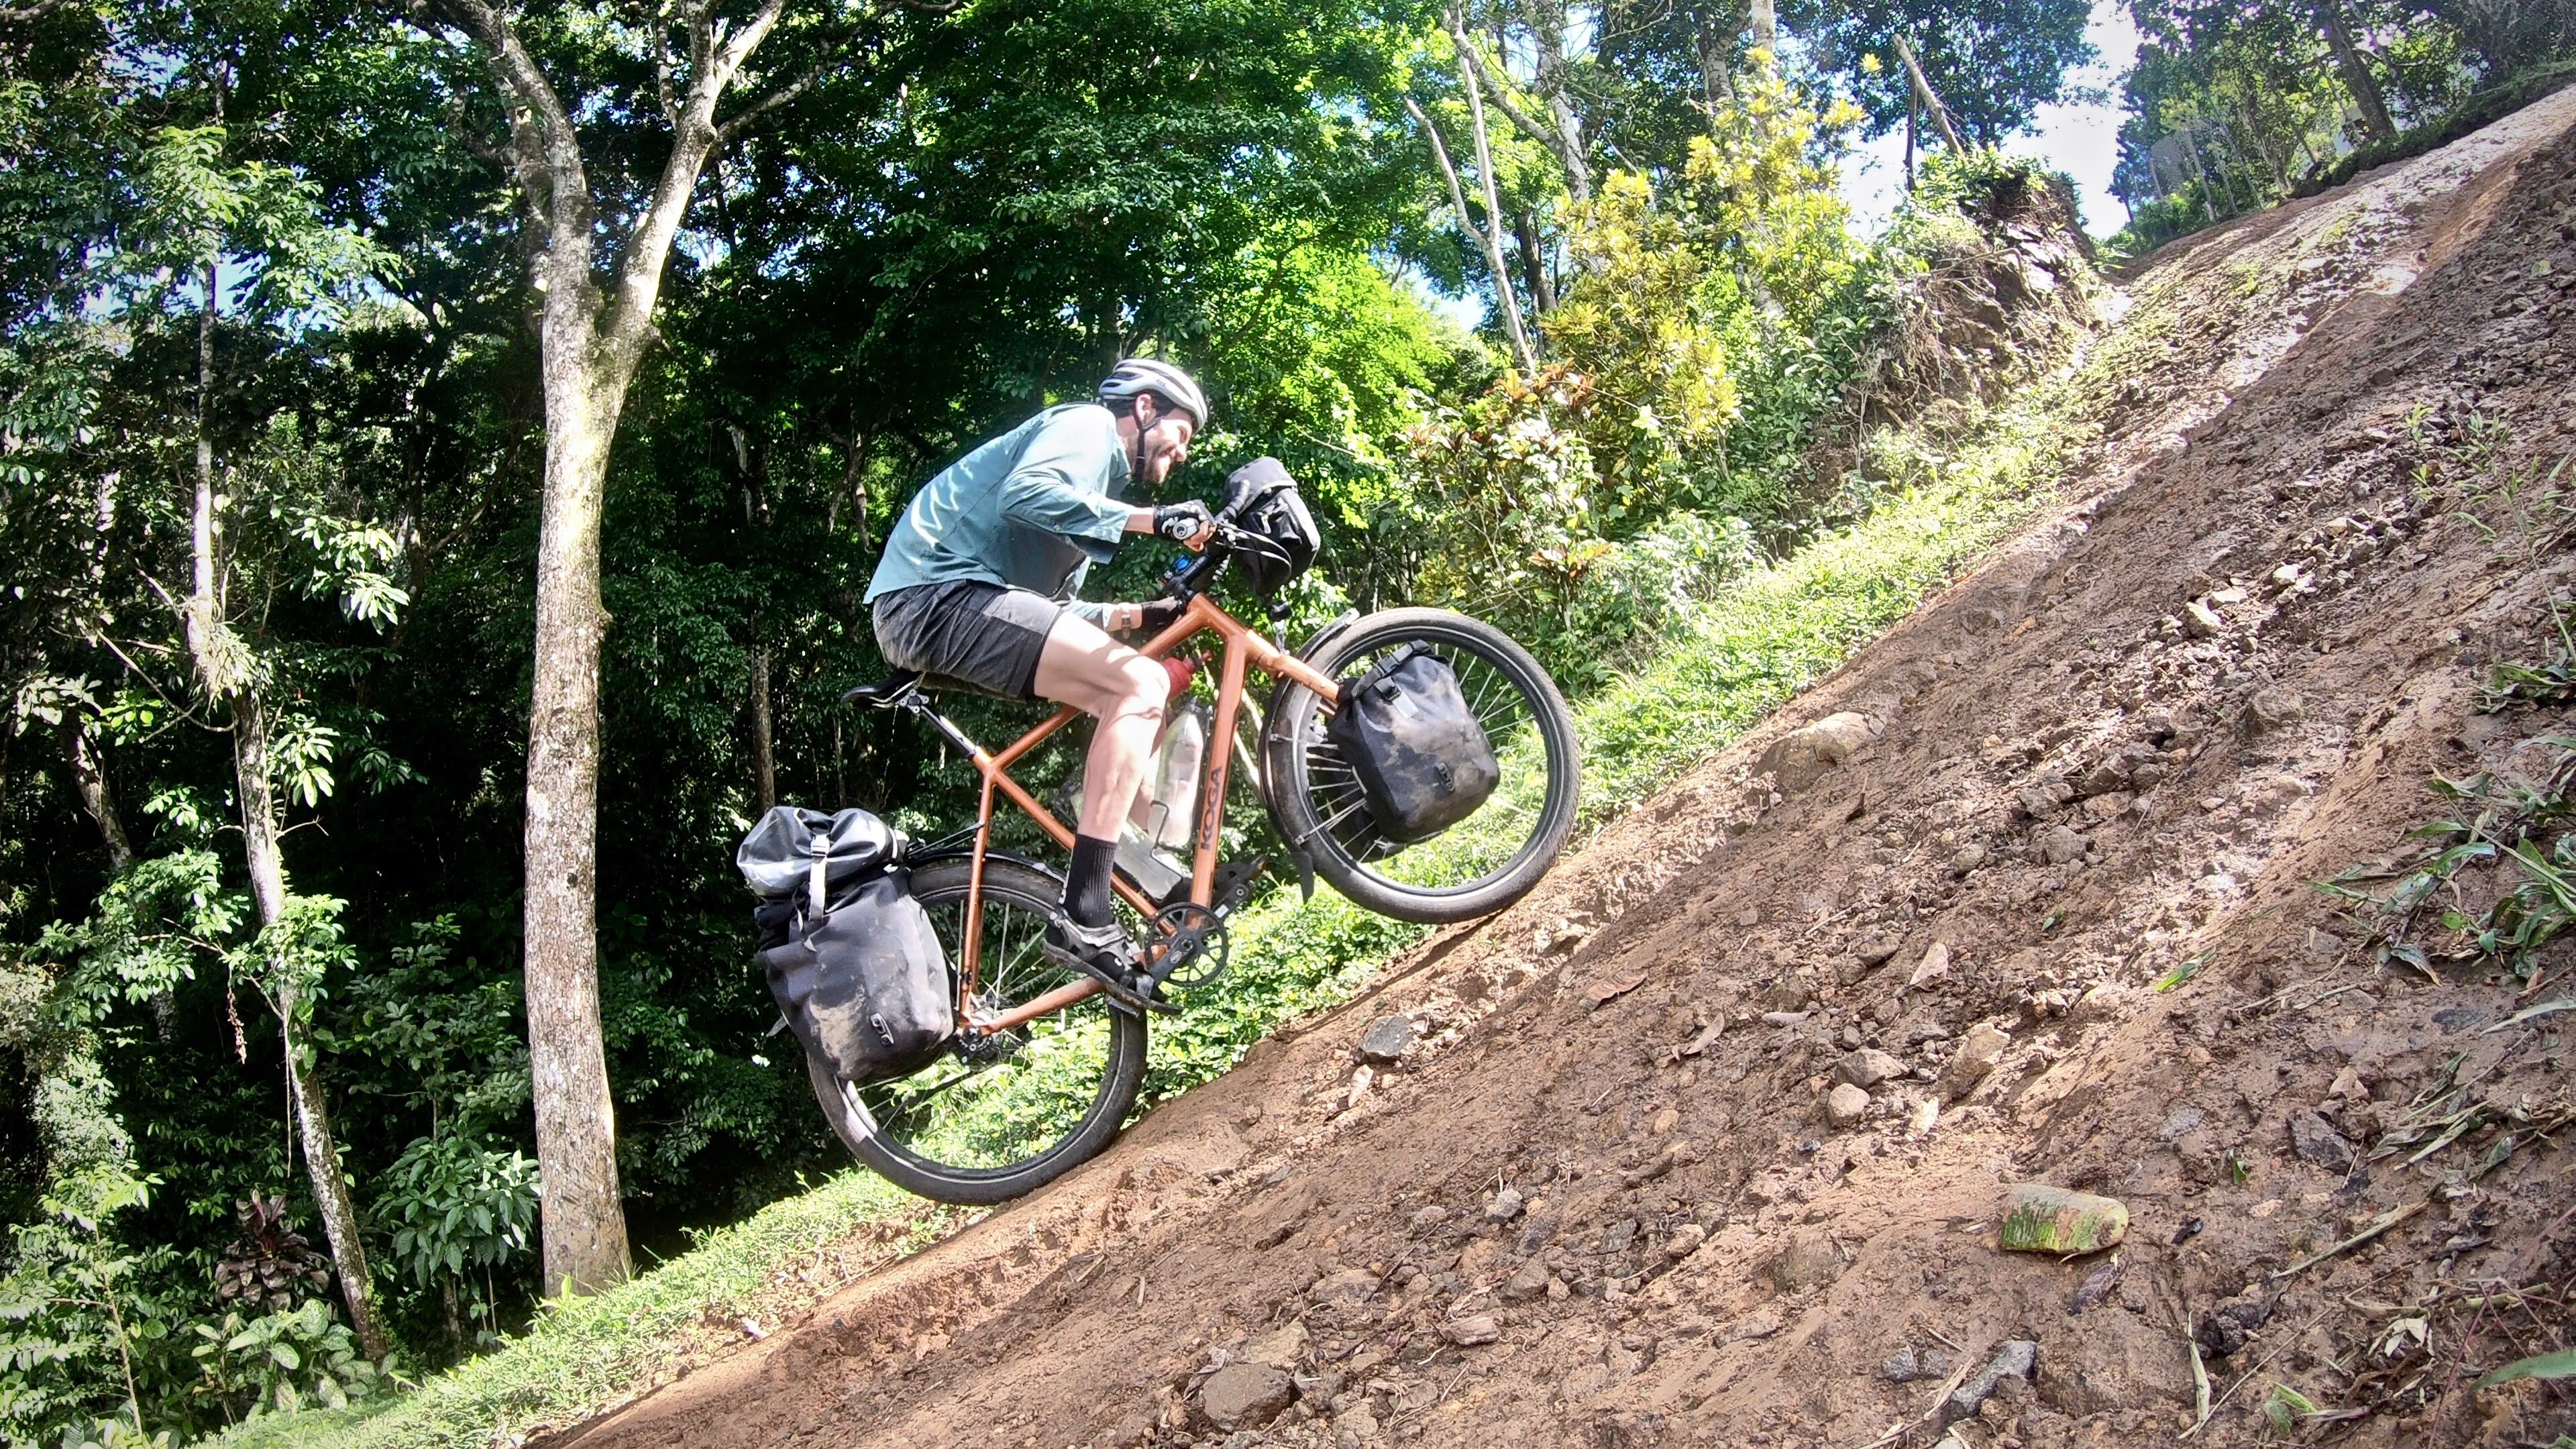
This could be when the road gradient pitches up too far, your bike’s gear ratios are too high, or when your power-to-weight ratio is too low. It could also be because the surface beneath you is too slippery, too soft, too rocky, or too rooty.
But for most riders, I’ve estimated that the right gear ratios can make an 8% grade just as easy as a flat road. And strong riders might even find this to be the case with a 15% grade.
We’ll dive into how you can calculate your bike’s climbing potential shortly, but first, here’s why hills sometimes feel harder.
Why Hills Sometimes Feel Harder
1. There’s Less Air Cooling
If you’re cycling up hills in hot conditions, you won’t get the same sweat evaporation as when you’re travelling faster on the flat. This is the factor that makes climbing in tropical regions particularly challenging.
On a side note: it’s a good idea to cover your skin in hot and dry climates to reduce the sun’s heat radiation. This is why you’ll often see me cycling in a shirt. In tropical climates, fewer clothes are cooler due to the high humidity, but make sure to wear lots of sunscreen, as sunburn significantly contributes to fatigue.
2. You Get ‘Psyched Out’
There is a big psychological element to hills; for many, the idea of an hour-long climb is completely overwhelming. But by the end of this article, when you’re equipped with the knowledge about how to ride hills, along with how to optimise your gear ratios – I promise you’ll have enough mental strength to conquer them.
3. You Cannot Coast or Soft-Pedal
With gravity taking a cut of your momentum, your speed dramatically reduces when you stop pedalling to take a quick break. The good news is that with a bit of experience, soft-pedalling and coasting aren’t a necessity provided you ride at a sustainable effort for the duration of your climb.
4. It’s Harder To Balance
Balancing a bike at low speeds can be difficult. But like any skill, you’ll get better at balancing over time. I’d definitely recommend a wide handlebar if you want to make balancing easier.
5. The Altitude
If you’re cycling over 2000m/6500ft, you’ll notice that it’s harder to breathe. This is because there is less oxygen available. But keep in mind that cycling at altitude is harder both on the flat and in the hills.
6. Bicycle Gear Ratios Are Often NOT Low Enough
If you’re using your easiest gear and are still finding hills to be difficult, this just means your lowest gear ratio isn’t low enough. Don’t worry, it’s not your fault; when I model the average person’s power output, weight, and the typical gear ratios found on different bikes, hills are harder due to a lack of mechanical advantage.
Mechanical Advantage

Mechanical advantage is a measure of force amplification using a tool.
A lever is the most common example: levers can exert a large force over a small distance at one end, by exerting a small force over a greater distance at the other.
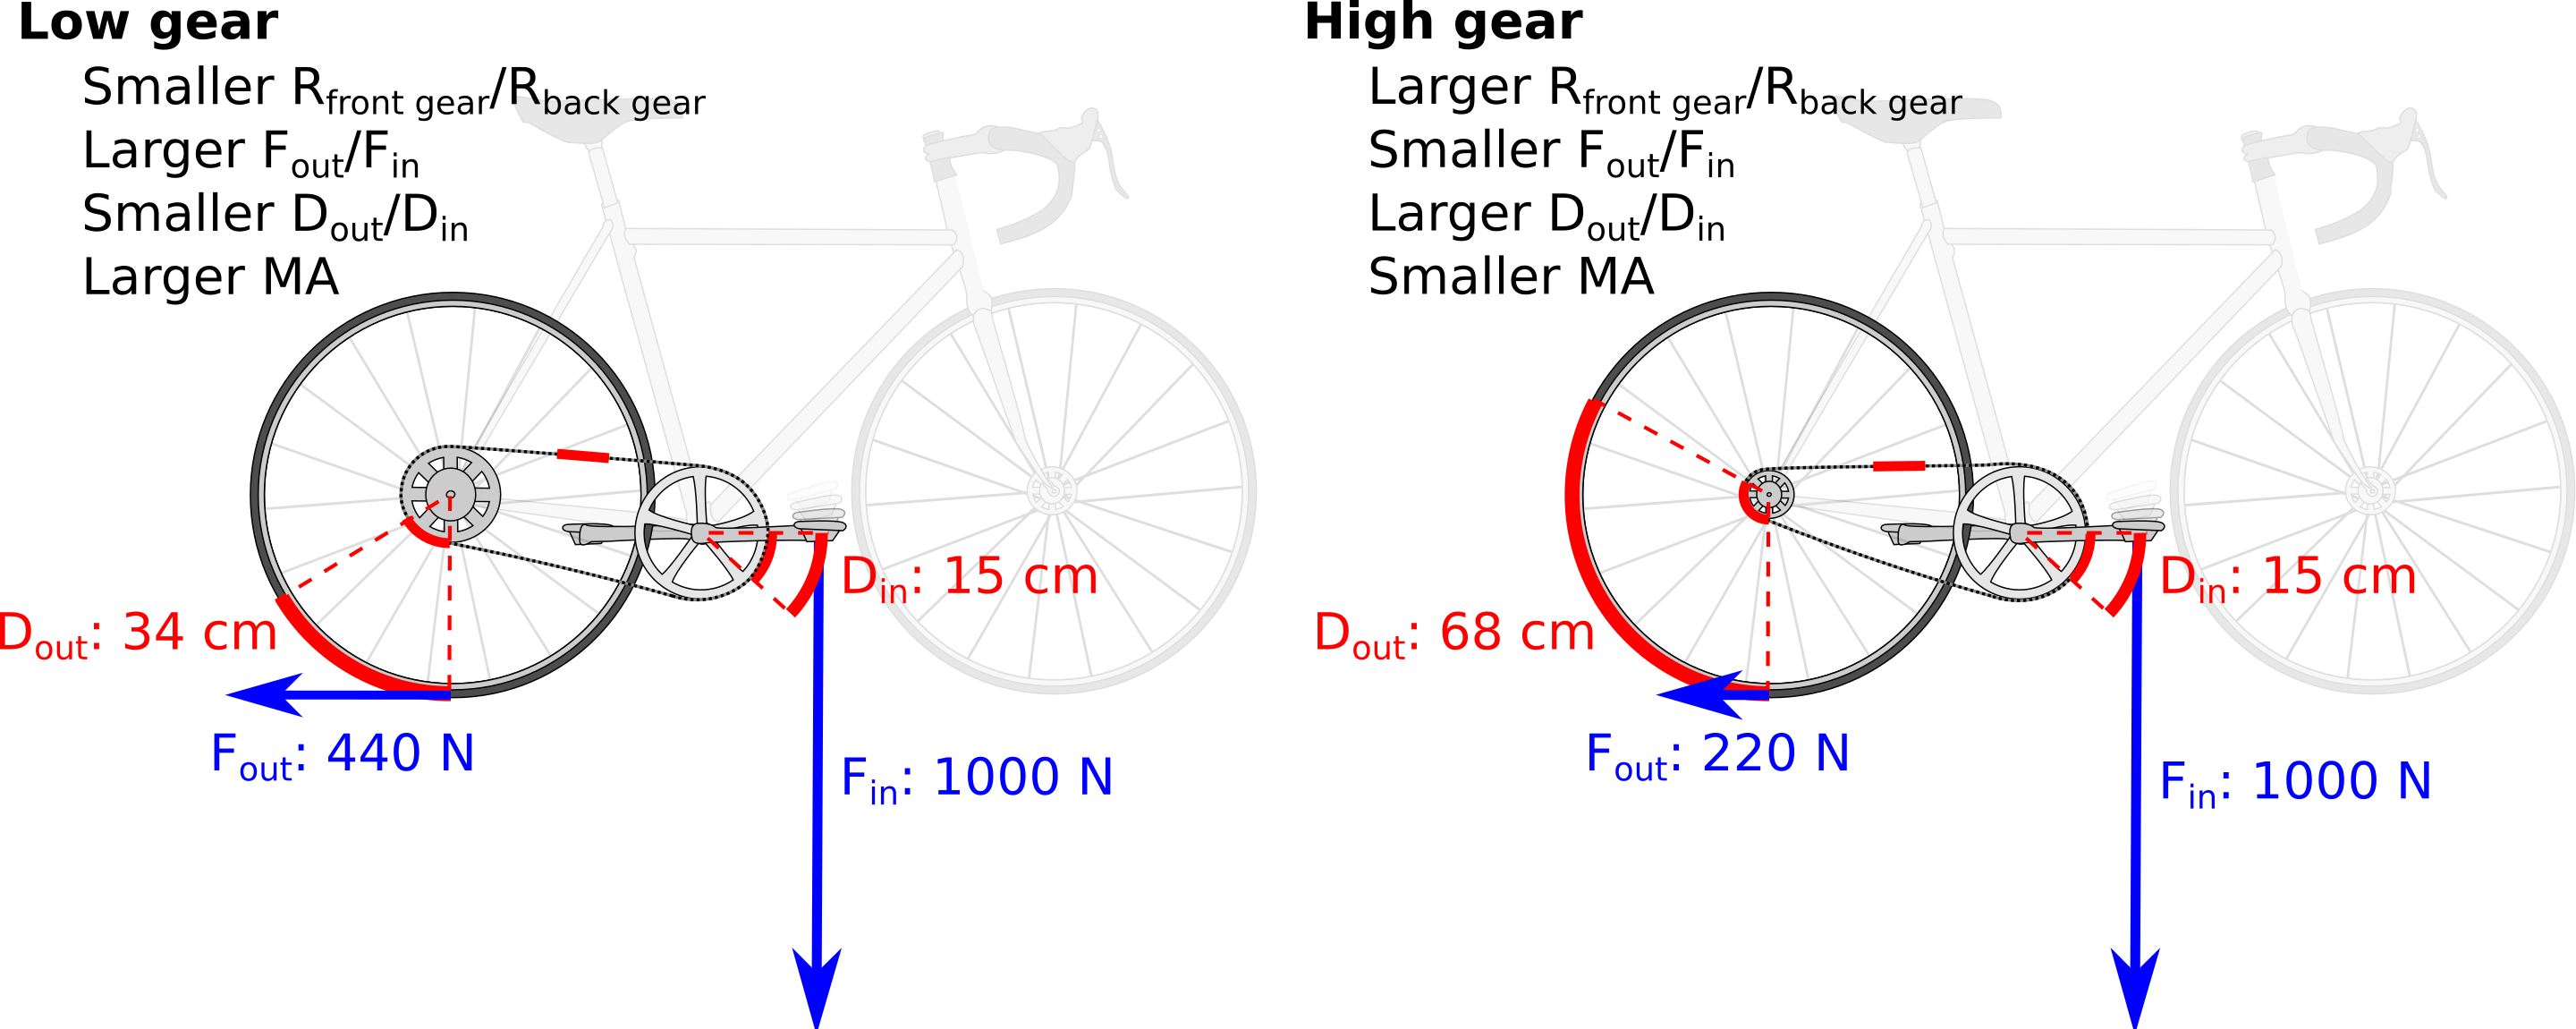
In the case of a bicycle, it’s the length of your crank arms, the radius of your rear wheel, and the ratio between your rear and front cogs that will determine how much of your pedal force can be outputted to drive you forward.
With the same crank movement and pedal force, a low gear ratio allows us to output more force into driving us forward.
Mechanical advantage ultimately allows us to overcome the effect of gravity on a climb, but we also use it to overcome the other main forms of cycling resistance: wind and rolling resistance.
Let’s now determine the steepest hill you can comfortably climb on your bike.
How To Calculate The Steepest Hill You Can Climb
The first thing you need to understand is cadence (pedal revolutions per minute). While I normally recommend riding at whatever cadence feels most natural to you, a good minimum cadence for climbing steep hills is around 60RPM.
This is because your speed momentarily slows at the point of the pedalling phase where you have the lowest leverage on your cranks (6, 12 o’clock). As the rate of deceleration is greater when cycling uphill, we can reduce this slowing effect when we use higher cadences.
Assuming 60RPM is a good minimum cadence for climbing, let’s now use some online tools to find out the steepest hill we can ride up on our bikes.
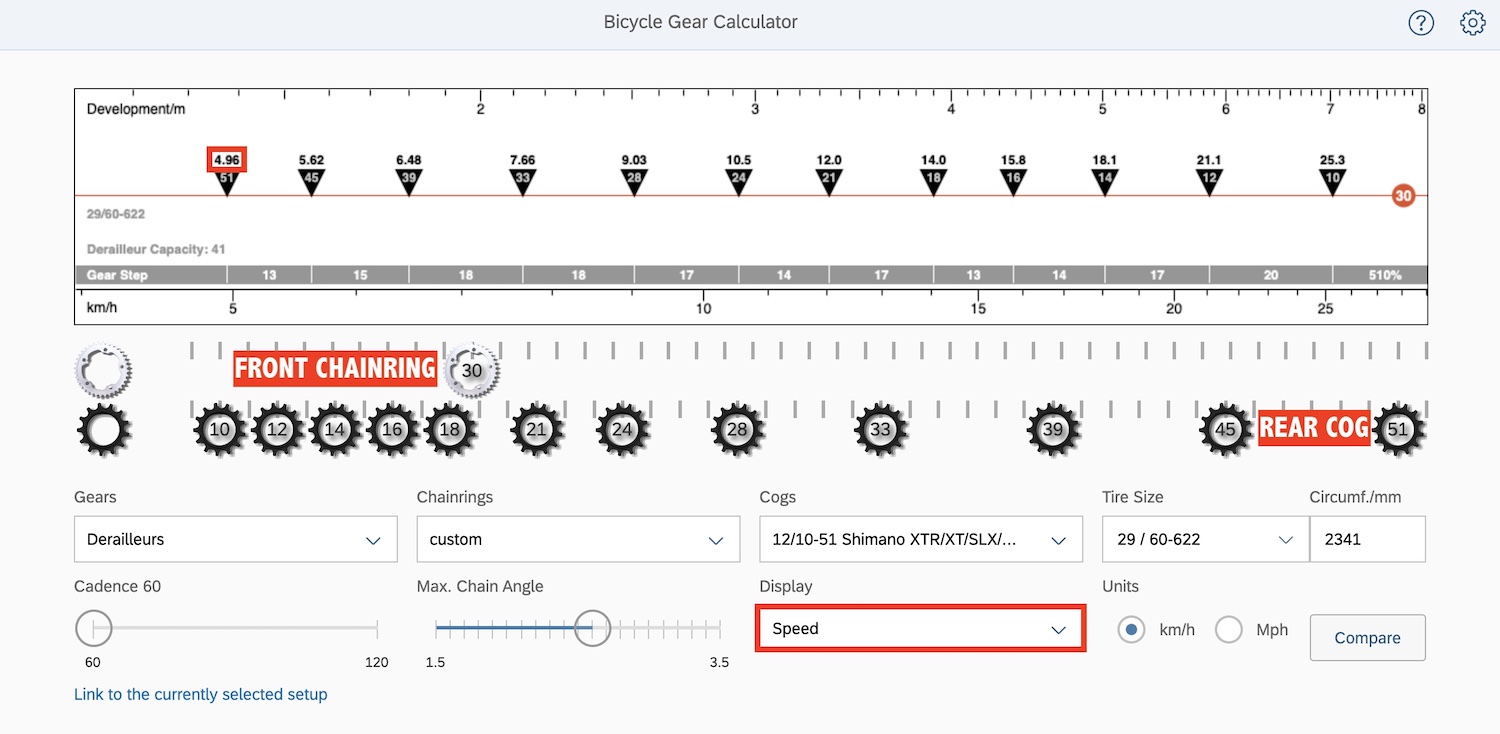
We will first use a bicycle gear calculator to determine the speed in our easiest gear when pedalling at 60RPM.
In my case, my mountain bike uses a 30 tooth front chainring with a 51 tooth rear cog. My tyre size is 29 x 2.4″. When I set the cadence to 60RPM, the gear calculator shows that I will be riding at 4.96kph in my lowest gear.
Note: Before you close the gear calculator, hit ‘display’ and switch from ‘speed’ to ‘gear inches’. Take note of the lowest number because you can now compare your lowest gear with every bike in my buyer’s guides.
The next thing we need to understand is power output.
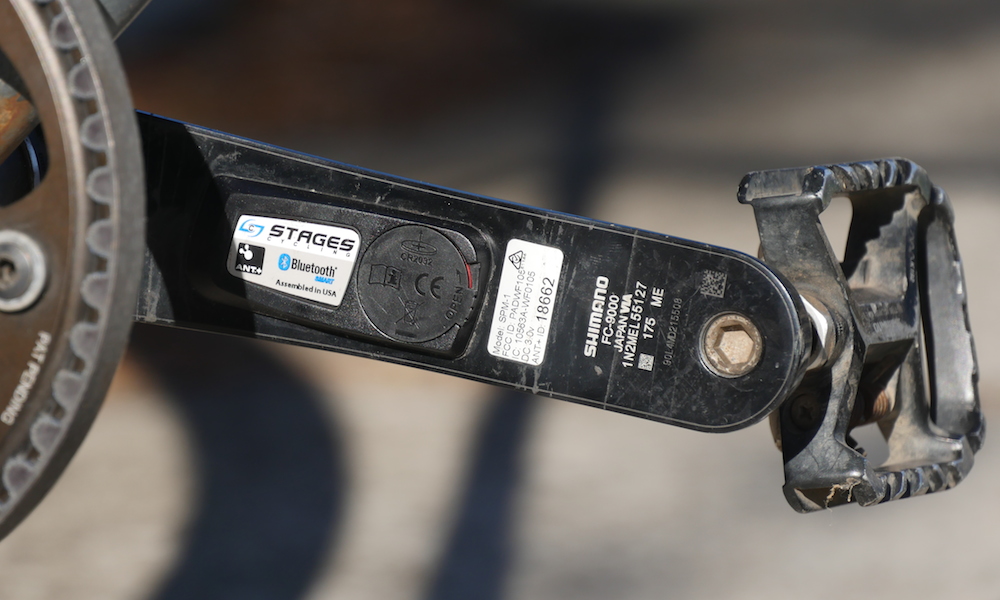
The amount of power that we put into our pedals is measured in watts. We can find out the number of watts we produce in real-time using power meters built into our cranksets, pedals, or rear hub. You can get a sense of what say, 100 watts, feels like on an exercise bike at a gym.
If you’ve never used a power meter and don’t have access to an exercise bike, know that a moderately good male cyclist can push 3.36 watts per kilogram of body weight (w/kg) for an hour, and a moderately good female can push 2.84w/kg (source: Training Peaks).
If we reduce these numbers by 35% so that you’re riding for endurance, we arrive at 2.18w/kg and 1.85w/kg.
That means if you’re a moderately good female who weighs 60kg, you can expect to comfortably ride at 111 watts up a climb (60kg x 1.85w). And an 80kg average male should be able to ride at 174 watts (80kg x 2.18w).
If you’re anywhere between novice and a world-class cyclist, you can go to the FT column on this Training Peaks chart to get a sense of your power-to-weight. Now you can reduce it by 35% (for endurance riding) and multiply it by your weight.
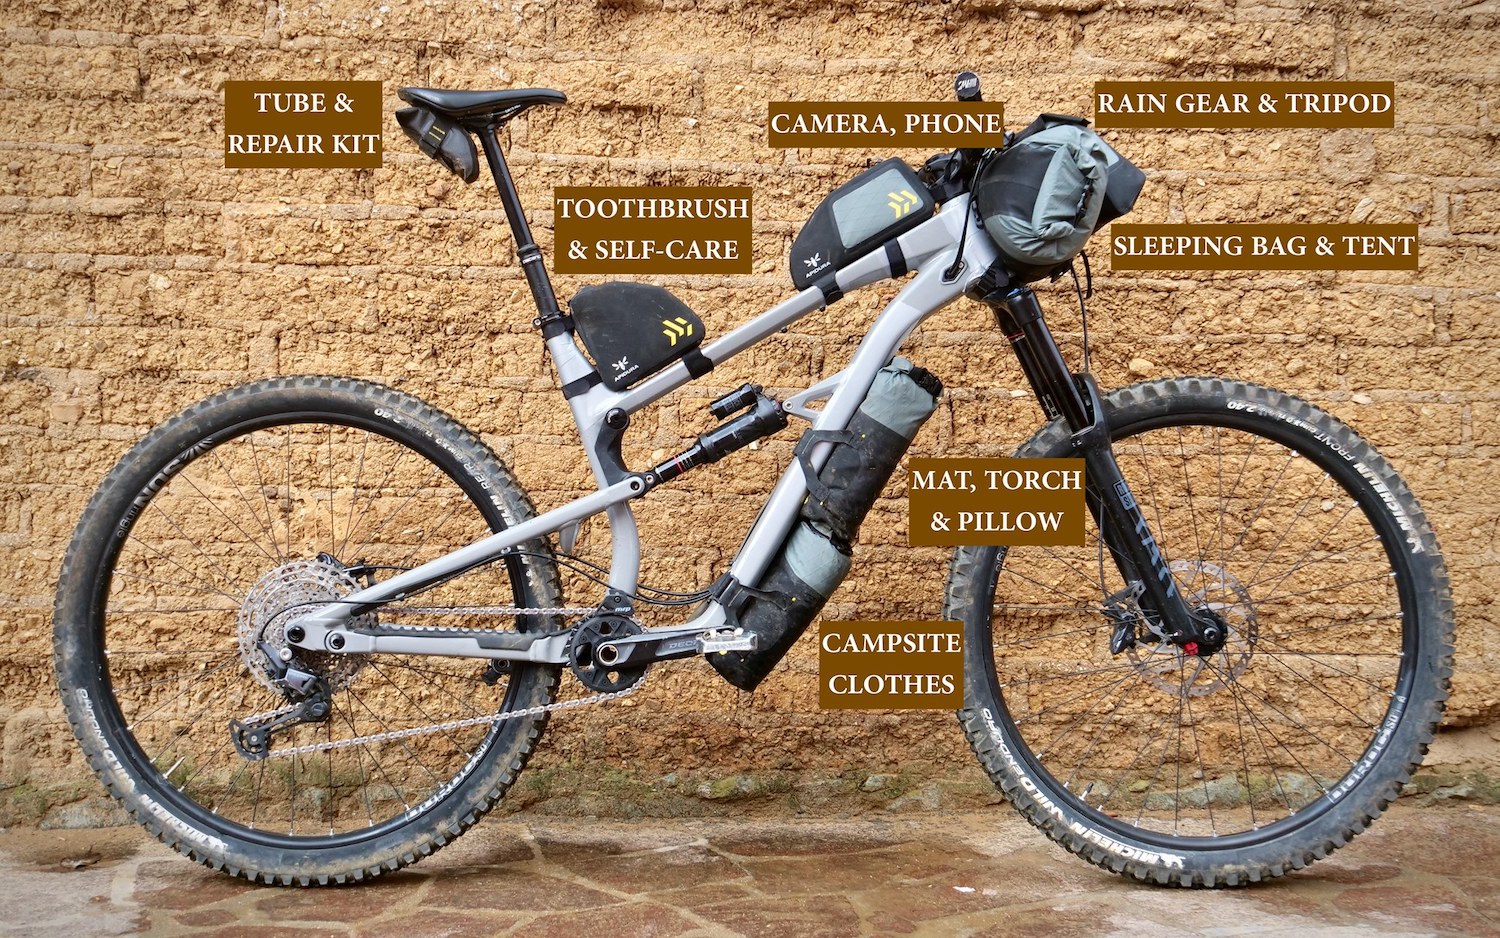
With our cadence and power sorted, we now need to determine our total weight. This is your body, bike, gear, food and water weight.
In my case, I’m currently 76kg, my bike is 15.5kg, my gear is 5.5kg, and I normally have 2kg in food and water. That’s 99kg in total.
We can now use a mathematical model to determine the steepest hill we can comfortably ride with our lowest gear.
If you’d like to get familiar with road gradients, simply go to RideWithGPS and plot a route (my tutorial is HERE). By running your mouse over the elevation profile, you will see the gradient at a specified location on your route.
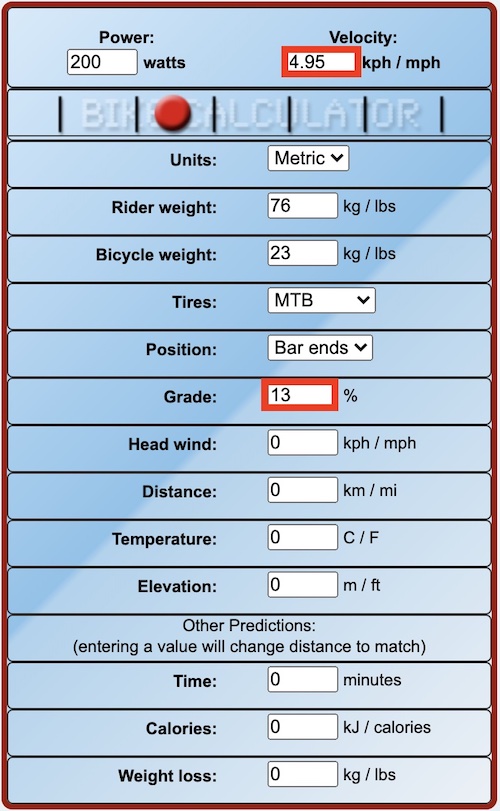
Ok, let’s now input our power estimate, and body+bike weight into Bike Calculator, which I’ve found to work with high accuracy.
Initially, the calculator will spit out your cycling speed on the flat (0% gradient). It’s now time to start adjusting the grade. The aim of the game is to increase the grade until the calculated speed matches the cycling speed we previously calculated for our lowest gear.
When both of these speeds match, you’ve found your gradient threshold. To ride comfortably up a steeper hill will require a lower gear ratio, more power or less weight to maintain a 60RPM cadence.
In my case, I can ride up a 13% grade with my current low gear ratio.
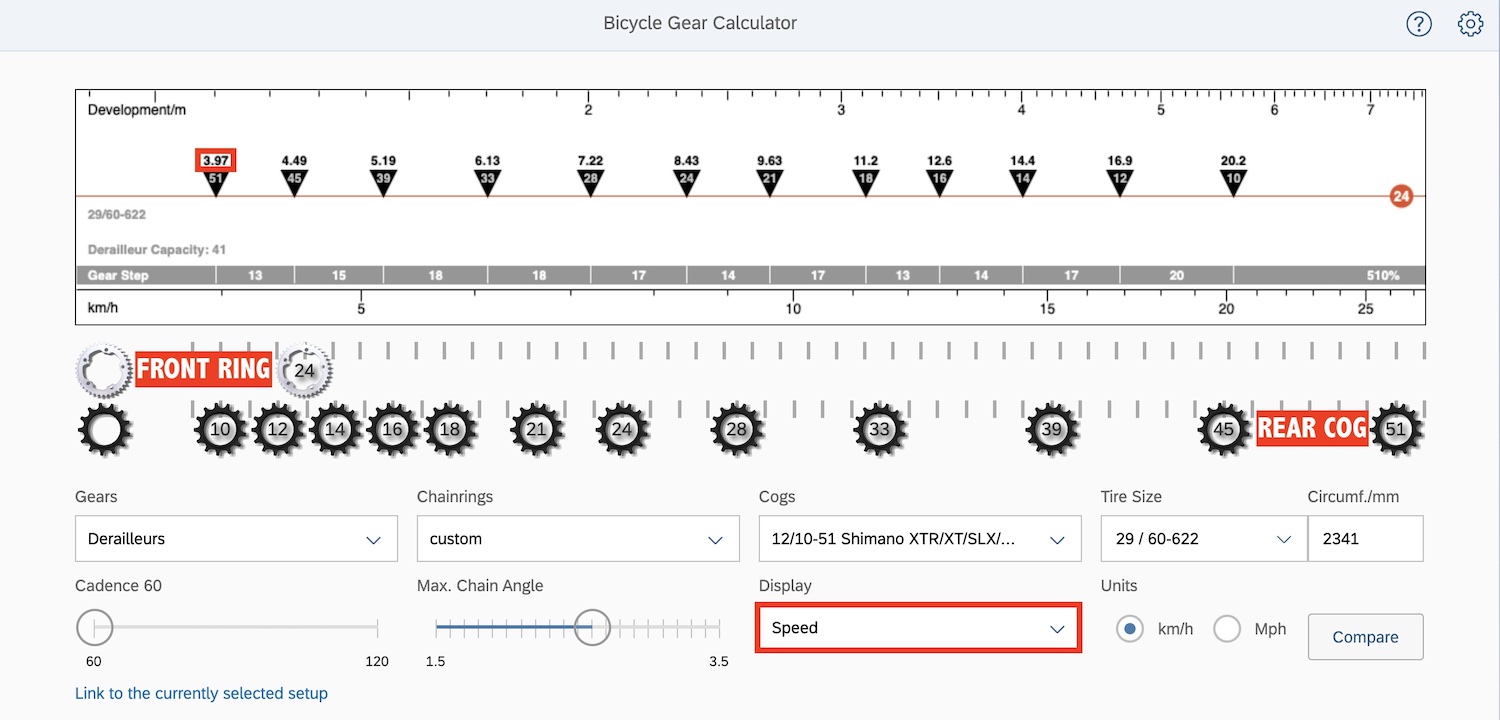
We can now go back to the bicycle gear calculator to play with our gear ratios to find out how they will help with steeper grades.
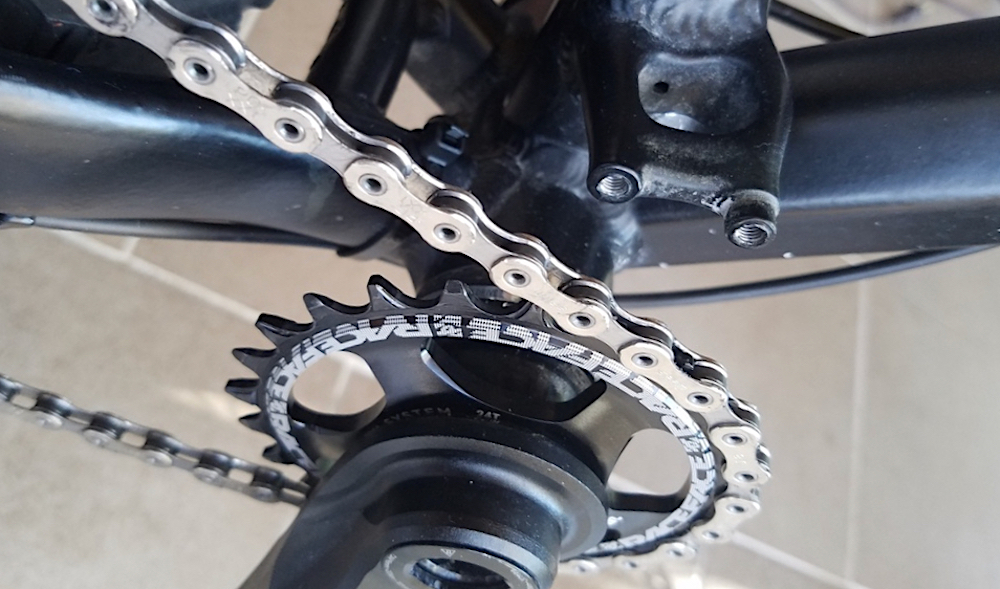
For example, if I fitted a Raceface crankset to my bike, I could use a 24 tooth front chainring. At 60RPM in my lowest gear, my speed would now be 3.97kph.
Circling back to Bicycle Calculator, I can work out that 16.5% grades are now possible at a very sustainable power output and cadence.
How To Fit Appropriately Low Gears To Your Bike
Ok, so you might have just realised your gear ratios are not low enough for the gradients you ride.
You can reduce your lowest gear ratio at the chainring (by decreasing its size) or cassette (by increasing its size).
Unfortunately, drivetrain compatibility is an absolute minefield, so it’s hard to provide simple instructions for reducing your gear ratios.
Most modern mountain bikes use 1X drivetrains which typically already have the biggest cassette cogs fitted (50 to 52 tooth). The best way to get a lower gear ratio is to reduce the size of the front chainring.
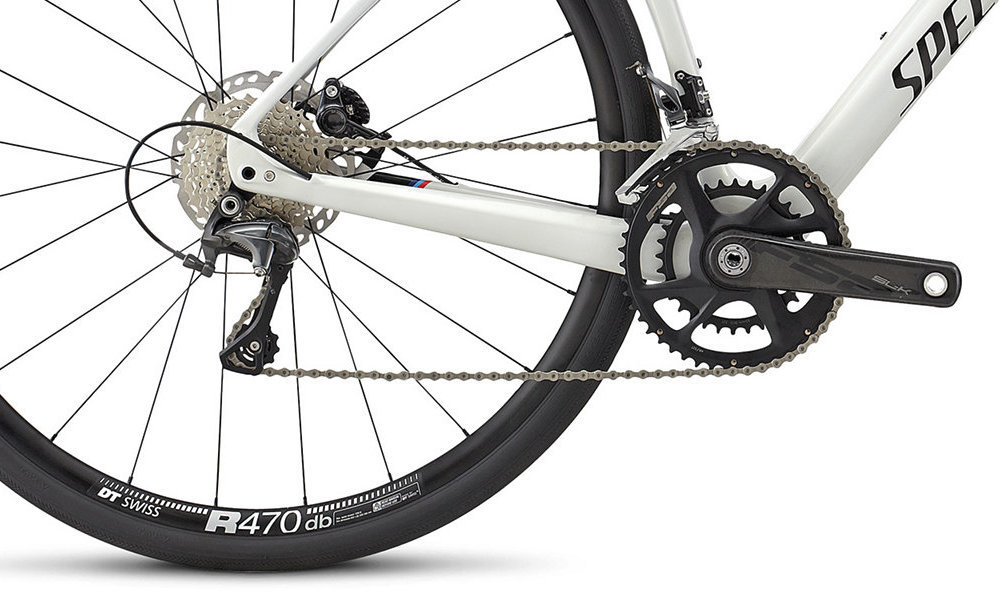
Road and gravel bikes typically use 2X drivetrains. Look out for sub-compact cranksets that offer 30-tooth inner chainrings.
I’ve also successfully hacked road and gravel bike drivetrains to use bigger cassettes. The Wolf Tooth Roadlink is cheap and creates additional space at your rear derailleur for 42 tooth cassette cogs.
Another great product is the Jtek Shiftmate, which is designed to pair a myriad of drop-bar shifters with mountain bike derailleurs, again allowing compatibility with big cassettes.
Here are some of my low gear ratio resources:
– Understanding gear ratios
– Understanding cadence
– Drop bar shifters + MTB derailleurs
– Road bike cranksets
– Wolf Tooth Tanpan
– JTek Shiftmate
One More Hill Climbing Tip

Before I summarise everything, let me share one more climbing tip: ease up and measure your effort.
It’s really common for cyclists to turn themselves inside-out on climbs. The thing is if you maintain a sustainable effort for the duration of a climb – just like you do on the flat – you almost certainly won’t go into the red. Your body will also be ready for any upcoming climbs, day after day.
A simple way to measure your effort is by listening to your breath while you ride. If you’re gasping for air, slip down into a lower gear, breathe a bit easier, and ride at this lower speed to the top of the hill.
Summary
Ok, I’ll admit that hills aren’t always as easy as the flat. This is especially the case in hot climates and on rough terrain.
But in most circumstances, hills can be made easy, provided you ride sustainably and use appropriately low gear ratios on your bike.
Most of you already have adequate fitness and power outputs for hill climbing – it’s likely just your gear ratios that are lacking. With the right gears, you too can enjoy the jaw-dropping, mountainous regions of the world.
I’ve calculated the low gears for you in my Touring and Bikepacking Bike Buyer’s Guides, which are updated yearly for free and feature over 200 different bikes to compare. If you’d like to support this website, grab yourself a copy, and you’ll soon have a very sound understanding of the most important aspects of bikes.


