

When the pandemic hit, it was time for me to put my big bike journey on hold and go back to my mountain biking roots.
Today, I’ll talk you through how I’ve optimised my new bikepacking bike for my current backcountry adventures.
Even if you’re not into mountain biking or bikepacking, I hope to teach you something about frame design, suspension setup, tyres and the tuning involved in squeezing the most performance out of a full-suspension bike.
But first, how did I end up with a long-travel enduro bike for bikepacking?
A Bikepacking Bike For A Very Specific Purpose

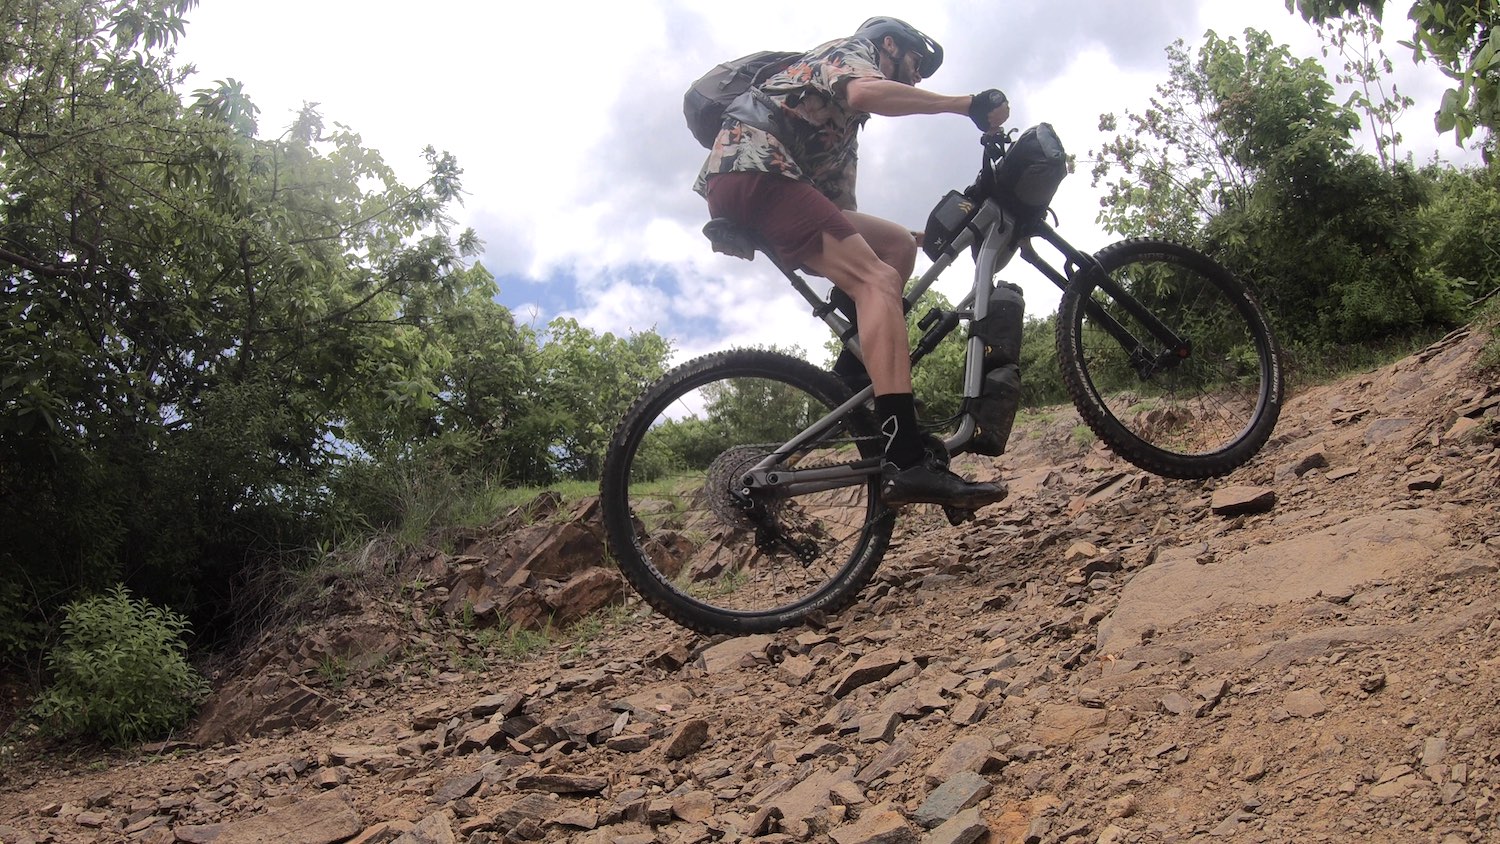
I don’t think it’s an exaggeration to suggest that Oaxaca offers the best gravity mountain biking in Mexico.
Sierra Norte, the mountain range behind Oaxaca City, provides more than a dozen trails with 1000 metres (3300ft) or more of elevation drop. Most trails started life as ancient paths carved into the mountains over thousands of years, taking the most direct route from point A to point B. The trails are often natural, rocky, loose and incredibly steep.
My current mission is to explore as many of these ancient paths as possible and the best way to do that is on an enduro bike.
My Enduro Bike Criteria
To find a bike for steep, technical terrain, I set some minimum requirements:
- Full-suspension bike with more than 160mm travel to give me traction on the roughest trails.
- 63 to 65-degree head tube angle to provide a long front centre length and desirable steering characteristics.
- 78-degree effective seat tube angle to keep my front wheel planted on steep climbs.
- Long frame reach (510mm+) to suit my obnoxious arm span.
- Dropper seatpost so I can place my body weight almost anywhere I need between my front and rear tyres.
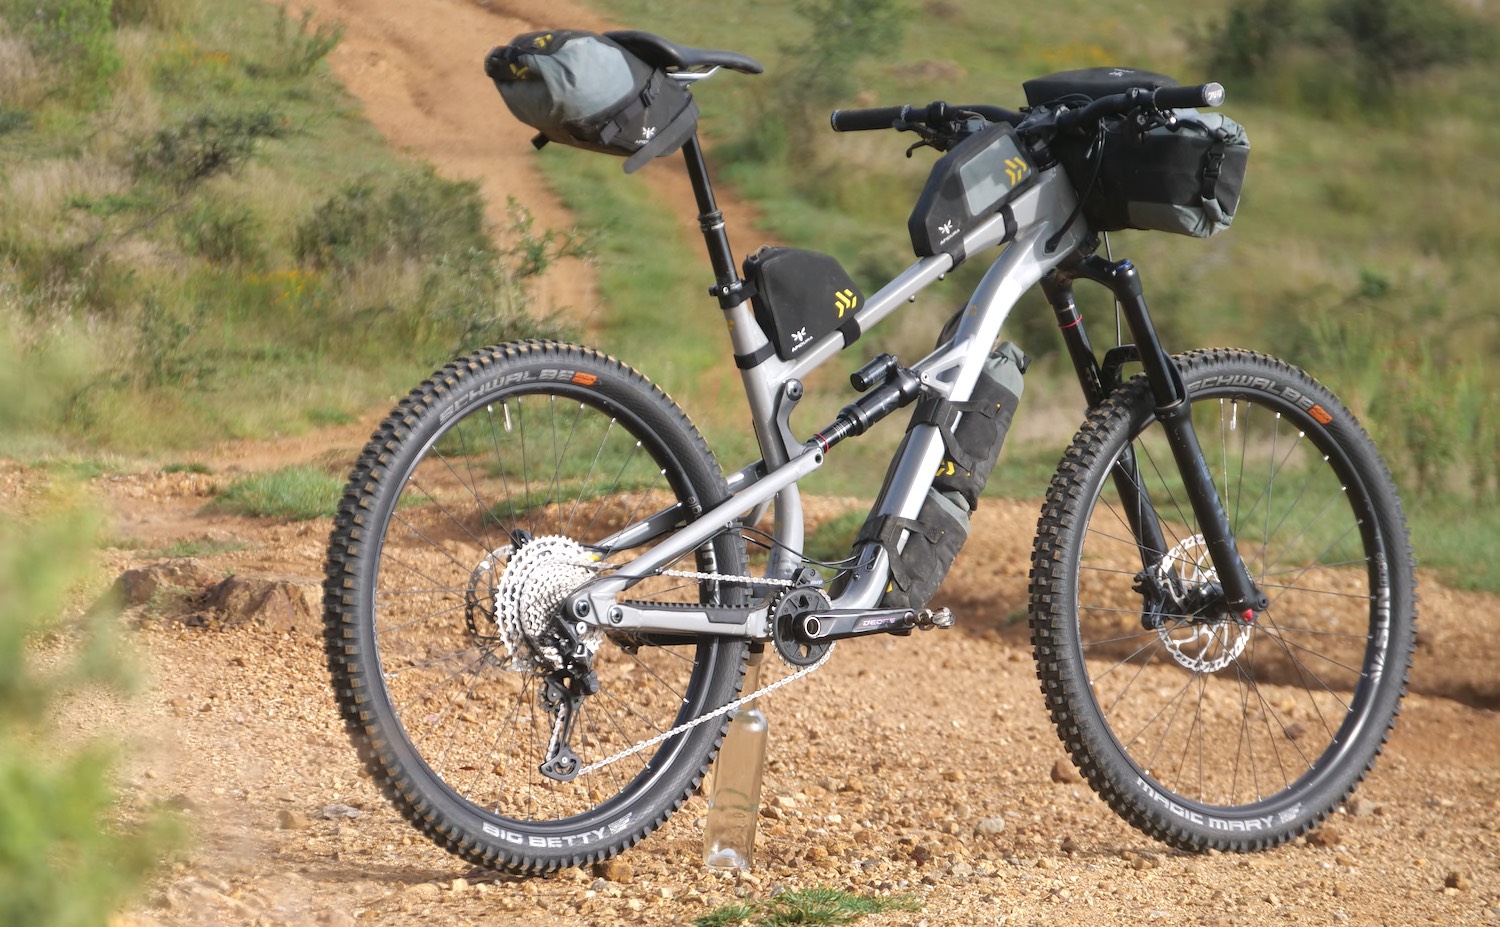
Luckily, I got a stock alert on a bike that ticked all boxes (Nukeproof Mega 290 Comp), I hit buy and it was shipped to Mexico.
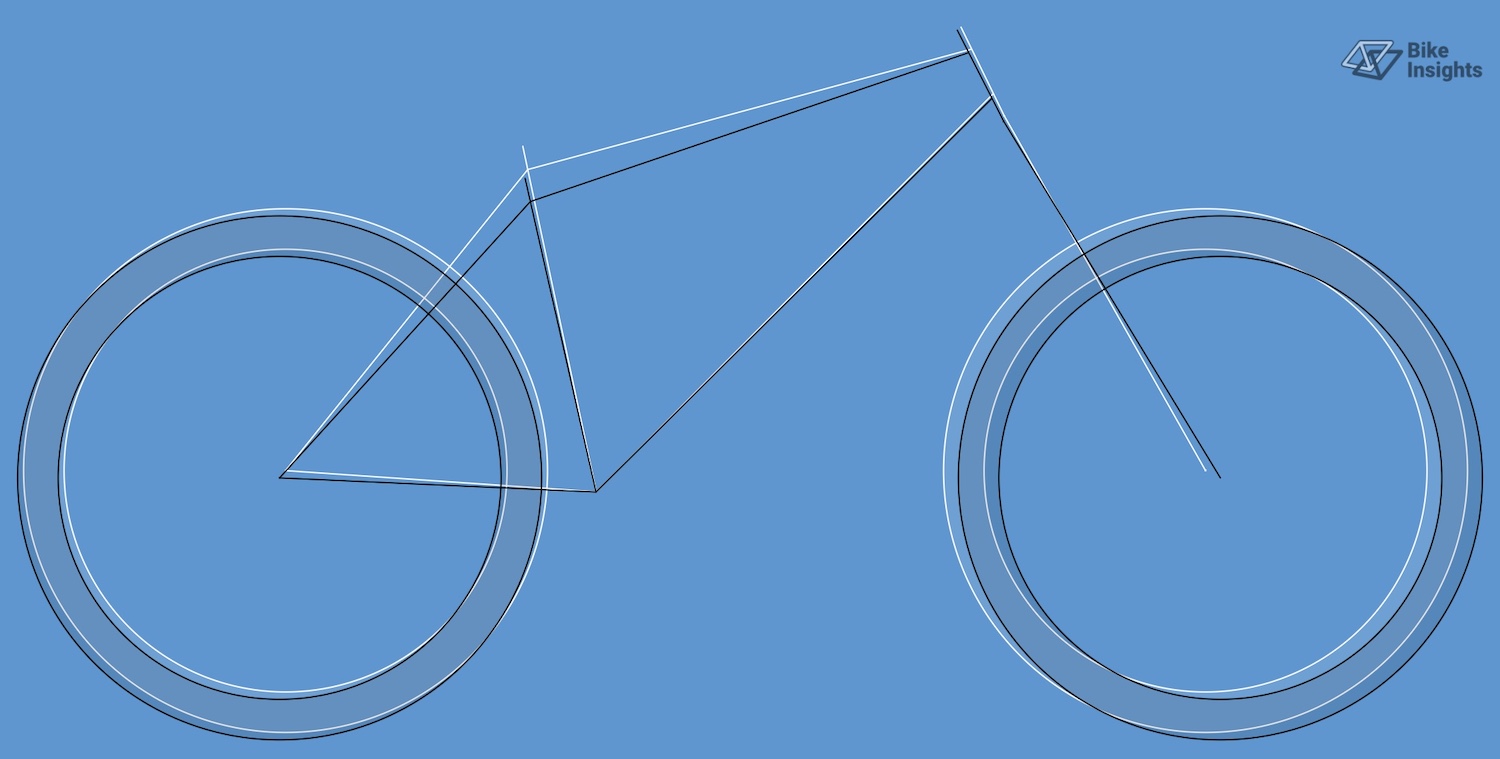
The Nukeproof Mega 290 Frame Geometry
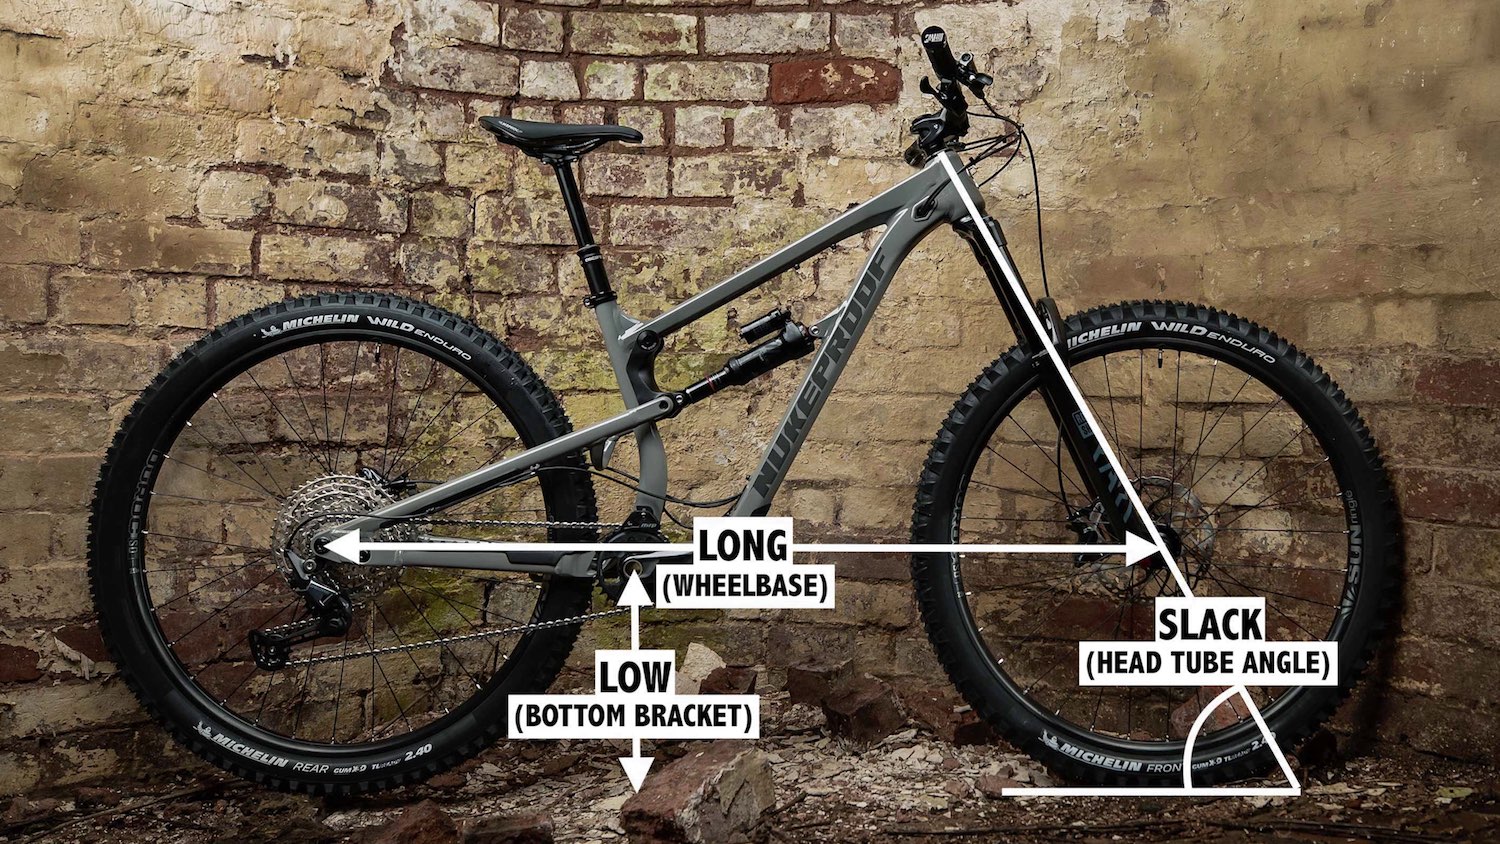
Let’s start with the frame geometry of the Nukeproof Mega. The Mega follows the ‘long, low and slack’ mantra of modern mountain bikes.
By increasing the wheelbase length (longer), lowering the bottom bracket height (lower) and slackening the head tube angle (slacker), you end up with a bike that:
1. Lowers your centre of mass compared to other bikes, making it more stable on steep and rough terrain.
2. Increases your front endo angle, making it harder for you to pitch over the bars after hitting a rock or root.
3. Offers a high mechanical trail figure, which acts as a stabilising force to straighten out your steering after your front wheel has been knocked off-line.
One downside to a bike with this geometry is that it hinders your ability to climb steep, technical trails with tight turns. Luckily, most of my climbing is on fire roads.
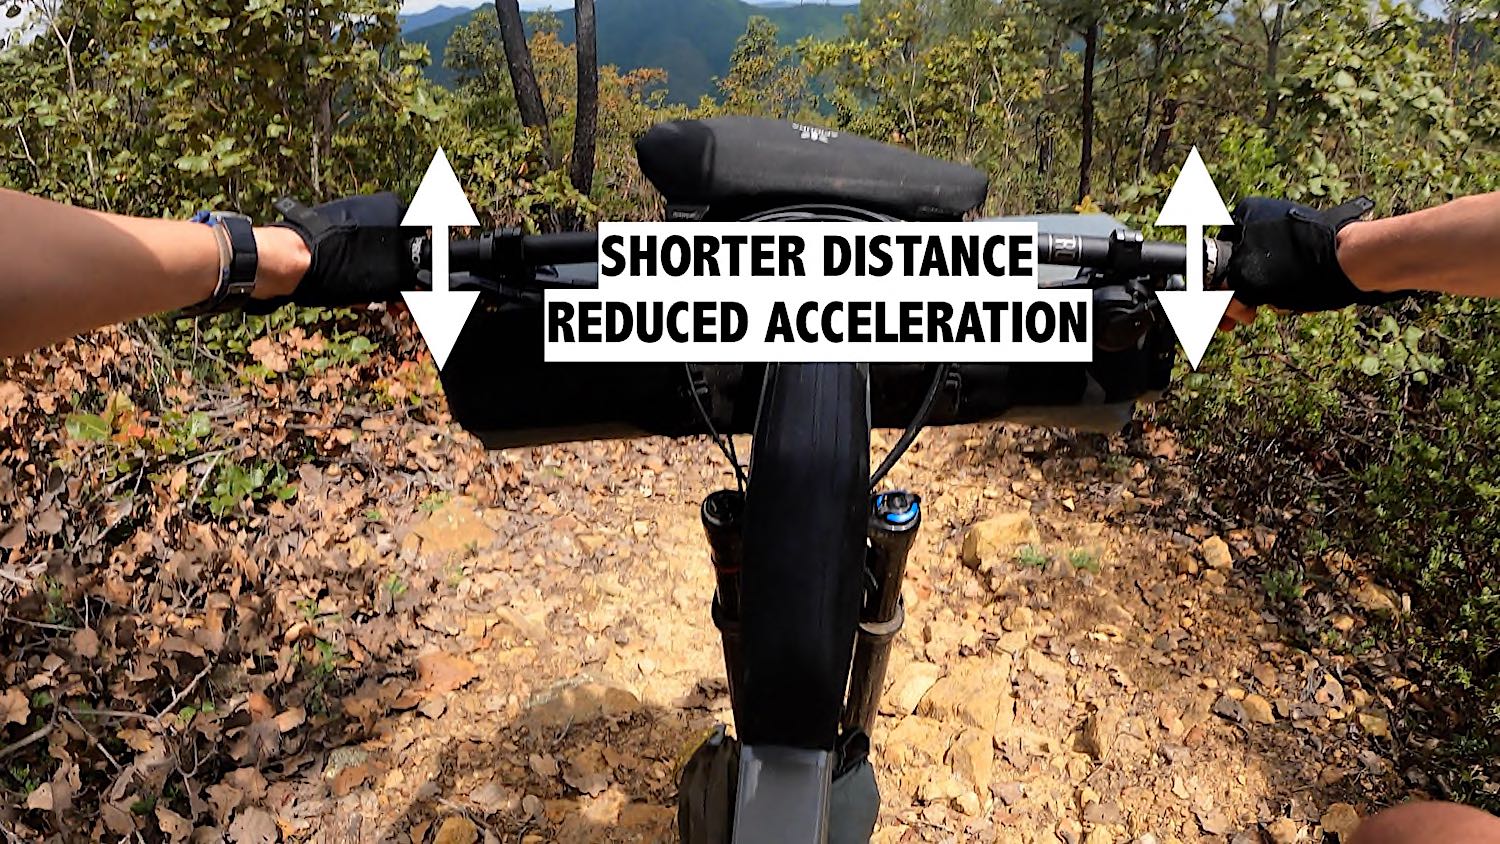
Slack head tube angles result in a heavy steering feel, so you might be thinking my 64-degree bike is a bit of a handful. This is actually not the case, and that’s because I’m using an 800mm wide handlebar that has ample steering leverage to overcome the steering, front bag weight and low front tyre pressure.
To get a sense of how much leverage helps a slack bike to handle well, all I have to do is ride with my hands further inboard – the reduction in steering control is huge.
A downside to a slack bike is that you also get a lot of wheel flop, which is a destabilising force that pulls your front wheel to the left or right when you ride at slow speeds. Again, steering leverage reduces this effect significantly, but it is always noticeable when I’m climbing.
The steep effective seat tube angle at the back of the bike makes climbing surprisingly easy. This is because my centre of mass is further forward of my rear axle than other bikes, which means my front wheel doesn’t want to lift up, even when I’m grinding up 15% inclines.
Right, let’s move on to the suspension.
How I Optimised My Suspension
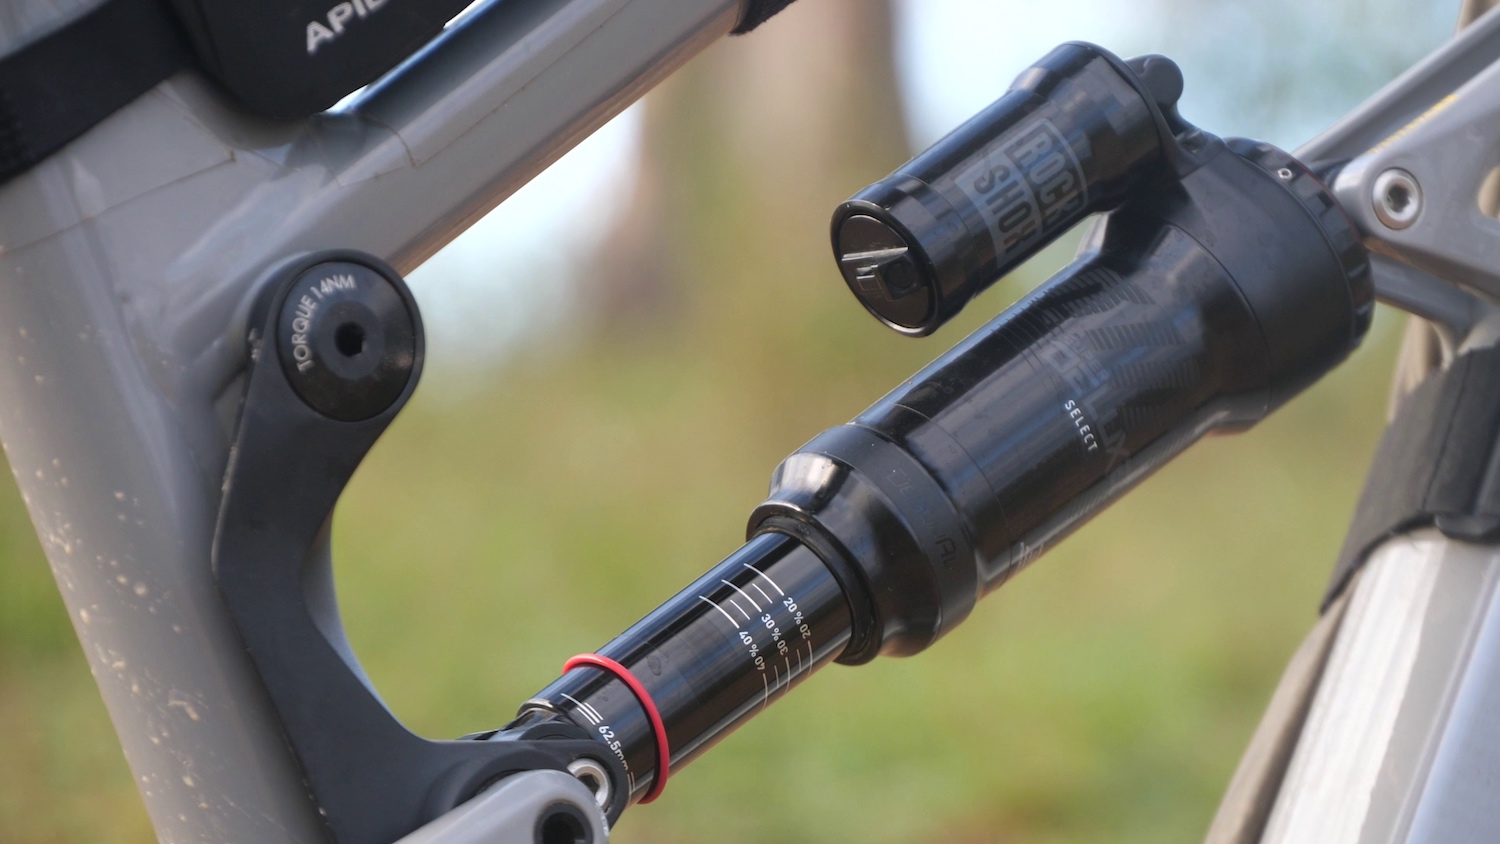
The Mega has 170mm (6.7″) of travel up front and 160mm (6.3″) at the back. It uses both an air fork and shock, which is better for bikepacking as I can easily add or remove air in accordance with whether I have luggage or not.
It’s clear the Mega has been optimised around descending. The frame design allows the rear shock to be very active under rear braking (low anti-rise), especially when it’s deep in its travel. I find this characteristic useful on the loose, chunky terrain as it gives my rear wheel the most opportunity to grip.
When riding uphill, the rear shock is definitely too active, bouncing up and down much more than I’d like (the bike has low anti-squat values). Unfortunately, this particular model of the Mega doesn’t come with a compression lockout switch on the shock to save costs.
I know this doesn’t sound great, but I’ve found a workaround!
I slow the speed at which the shock returns from an impact (rebound), which dulls the suspension response significantly. I then ride fire road climbs with a high cadence, which prevents my shock from dipping too far into its travel. It’s actually a very effective solution.
I’m really happy with the shock damper tune when it comes to descending. It seems really well-suited to my bike and body weight. I’ve set my shock up very soft for the loose terrain, which helps to maximise traction as it’s super reactive to bumps. It works well on the trails here as there aren’t many big gaps to send, which would likely bottom out my shock.
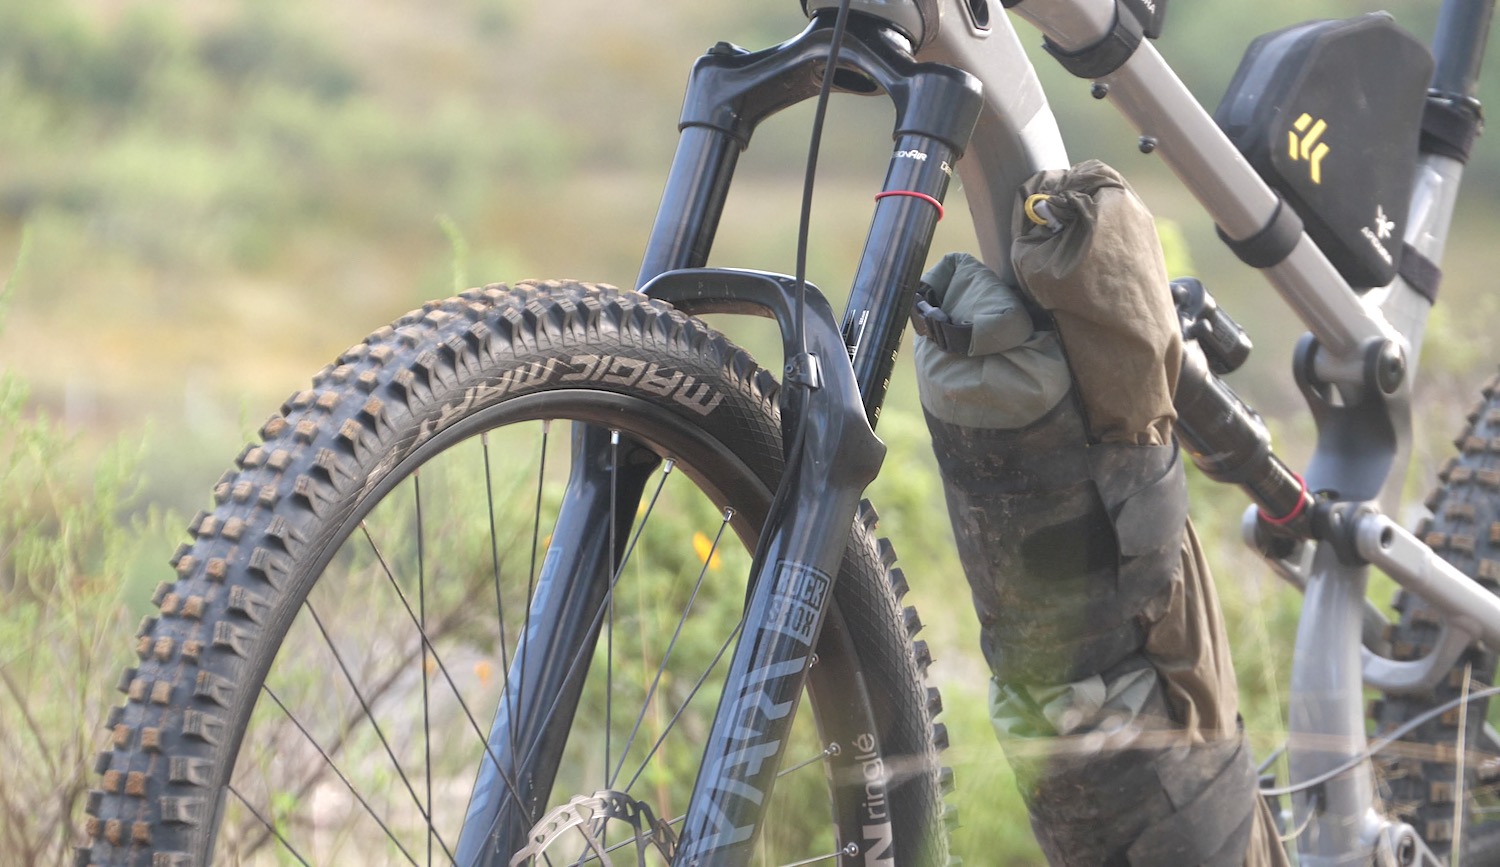
I’m generally happy with the performance of the fork, although it could be better. I again run it soft with zero compression damping to get the highest small bump compliance and grip possible.
The downside is that it sits a little deeper into its travel than I’d like. More compression damping would allow it to sit higher, but even just one click feels harsh on the fast, repetitive bumps here.
A more advanced suspension damper would allow me to better tune my fork (high-speed compression adjustment, in particular). There’s actually a Rockshox damper upgrade kit available with more tuning capability, so I might drop one of those in soon.
How I Optimised My Tyres
Tyre choice is absolutely critical for the terrain I ride.
With the loose, scrambly, Oaxacan trails, I cannot push my tyres into corners for additional grip like I would on a well-groomed trail. This terrain calls for tyres with an aggressive tread pattern and lower pressures.
With low tyre pressures, my tyres can deform more, increasing the contact patch, and therefore, ground grip. It also reduces the effective spring rate of the front of my bike, providing even more grip over high-frequency bumps.
The grip isn’t the only thing a lower tyre pressure optimises. Your tyres play a key role in increasing bump compliance, which reduces the ‘harshness’ of a trail for your hands and upper body. I often drop more than 1000 vertical metres in a single run – low tyre pressures help me to minimise how far or fast my handlebars move over bumps, resulting in significantly less arm and hand fatigue.
To dial in my tyre setup, I’ve recently teamed up with Schwalbe to test tyre models in different widths, tread patterns, rubber compounds and sidewall constructions.
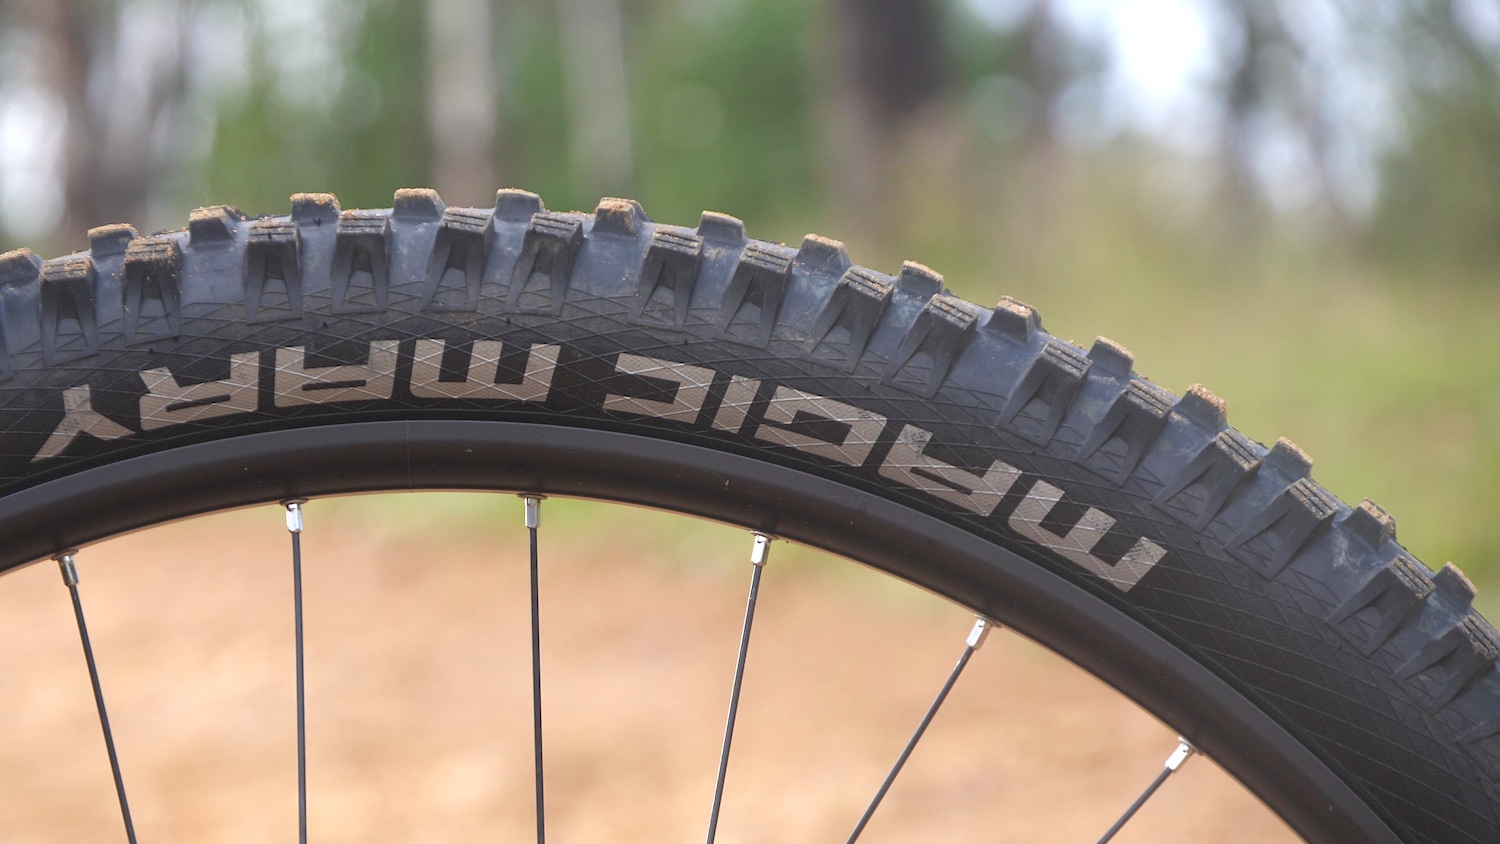
I figured 2.6″ wide tyres would best serve the loose terrain here, as I’d be able to use lower pressures to increase grip and reduce fatigue.
But strangely, the most aggressive front tyre model, the Schwalbe Magic Mary, was not providing enough grip when I was cornering hard on soft surfaces compared to my outgoing 2.4″ tyre. This was even occurring down at 11psi/0.8bar in my front tyre!
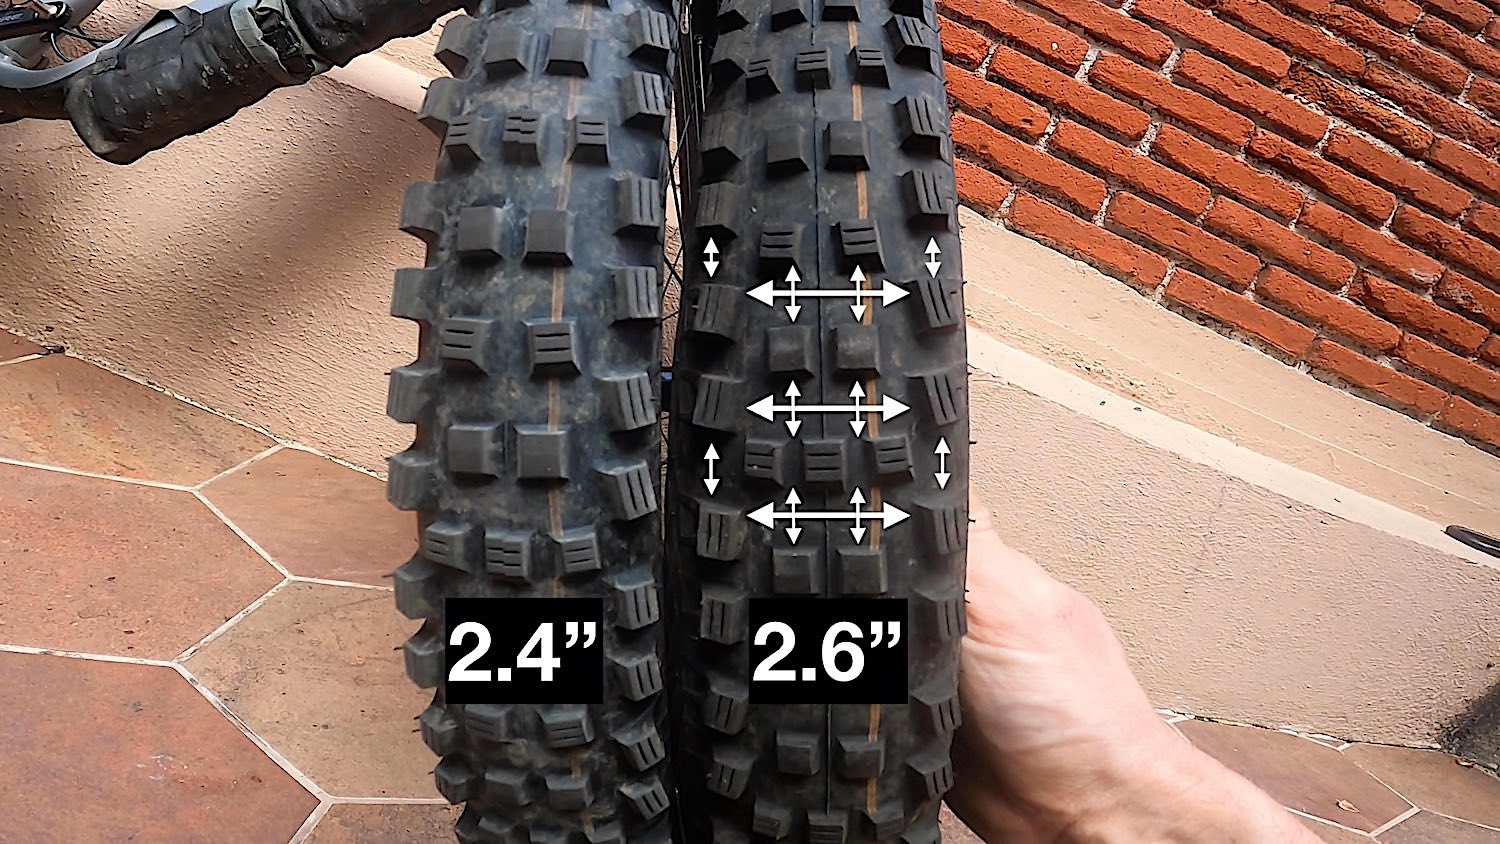
I was initially quite perplexed but I think I’ve worked it out. When the tyre is scaled up from 2.4″ to 2.6″, the tread pattern simply becomes too open. I solved my front grip problem entirely by switching to a 2.4″ model with 15-16psi/1-1.1bar.
Another interesting thing is that Schwalbe sidewalls are really, really stiff. This provides much more puncture protection and prevents the sidewalls from collapsing in hard corners. But the downside is that they ride harsher than other tyres at the usual pressures.
To give you an idea, my previous Michelin front tyre had the same amount of ‘harshness’ with almost 50% more tyre pressure (22psi instead of 15psi). This means that you will always need to experiment with pressure when switching between tyre models.
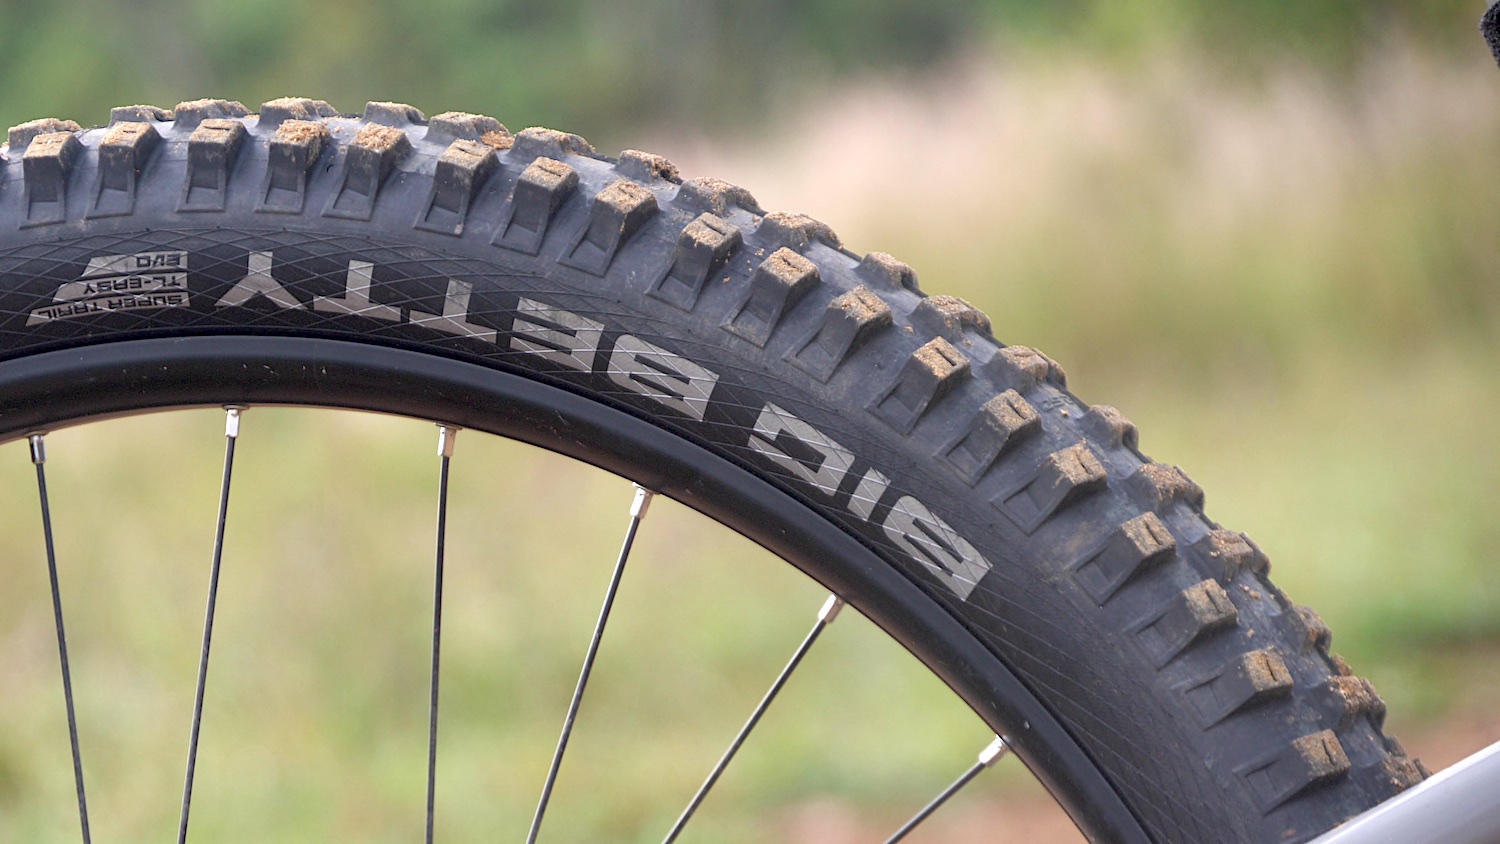
The rear tyre I’ve settled on is called the Schwalbe Big Betty. I’m happy with the 2.6″ version, which I run at 17-18psi. The less aggressive Schwalbe models worked out fine on rockier, hardpack trails, but the Big Betty is the only option for me when the surface is loose.
Ok, you’re probably hearing my low tyre pressure and wondering how I’m not rolling tyres off my rims and ploughing my rims into rocks…
The Benefits Of Tyre Inserts
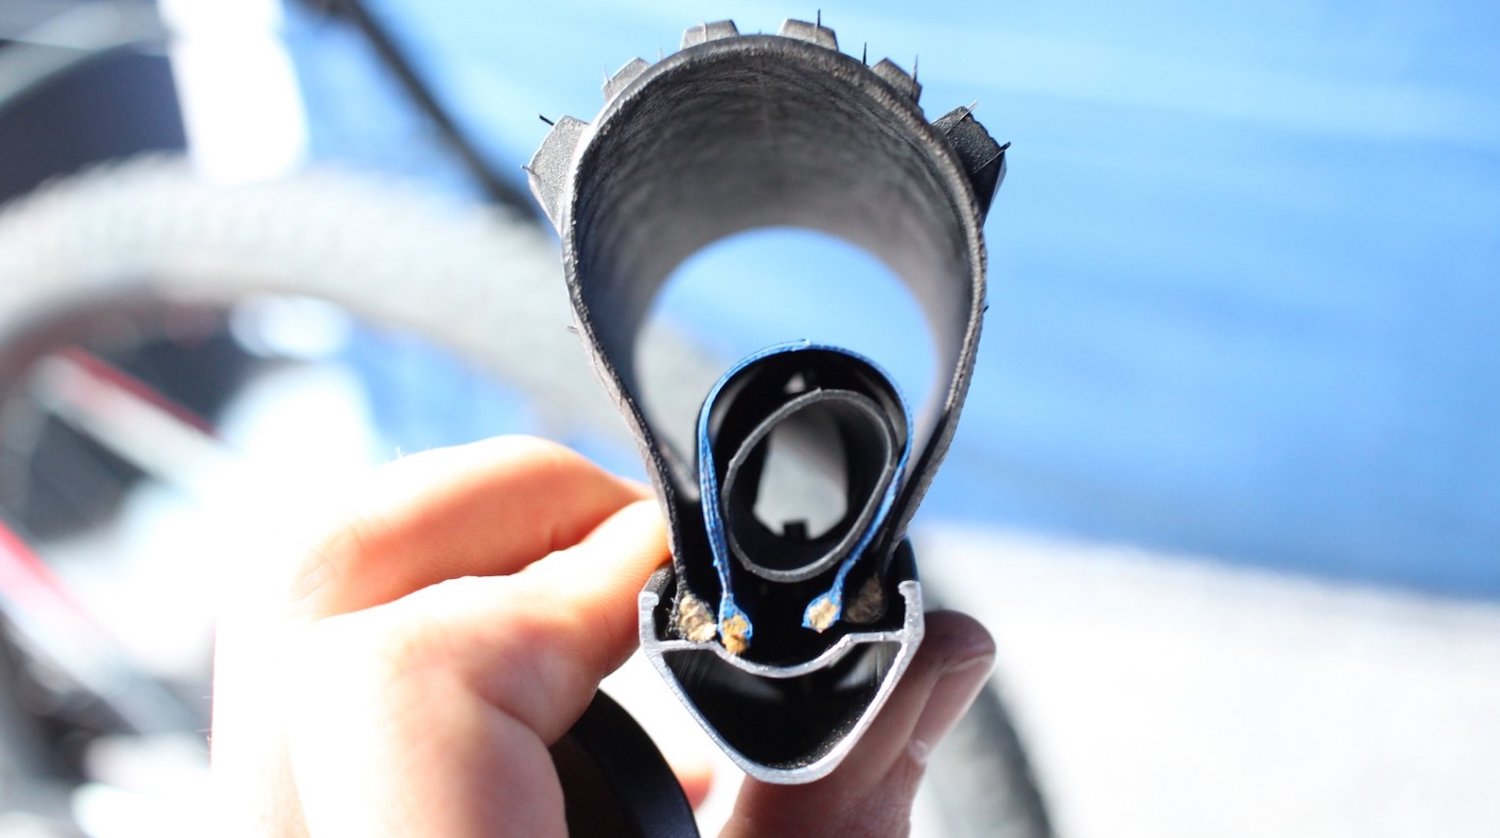
To run low tyre pressures, I’ve fitted Schwalbe Procore tyre inserts to my bike.
You can think of Procore as a separate road bike tyre fitted inside your mountain bike tyre. A special inner tube then allows you to choose to inflate the inner tyre or the outer tyre.
Tyre inserts prevent pinch flats and protect my rims from impacts. Instead of a rock slamming directly into my rim; the rock will instead bounce off the inner tyre. Ultimately, I can run lower tyre pressures to get more grip and comfort, without the risk of denting my rim or getting a flat.

Procore also puts outward pressure on my tyres, locking the bead to the rim. Before using this system, my Michelin tyres would regularly ‘burp’ on rocky trails, losing small amounts of sealant and air pressure. This simply doesn’t happen anymore using Procore.
Another really handy feature of Procore is that it makes tubeless setup really easy with a hand pump! I just partially inflate the inner tyre first, which seats the outer tyre to the rim without the need for a large rush of compressed air.
And finally, Procore makes switching tyres easy, as the inserts take up almost no volume compared to foam inserts like Cushcore, so you can easily manipulate your tyres to get them on and off. I can change my tyres just as quick with this system as with no tyre inserts.
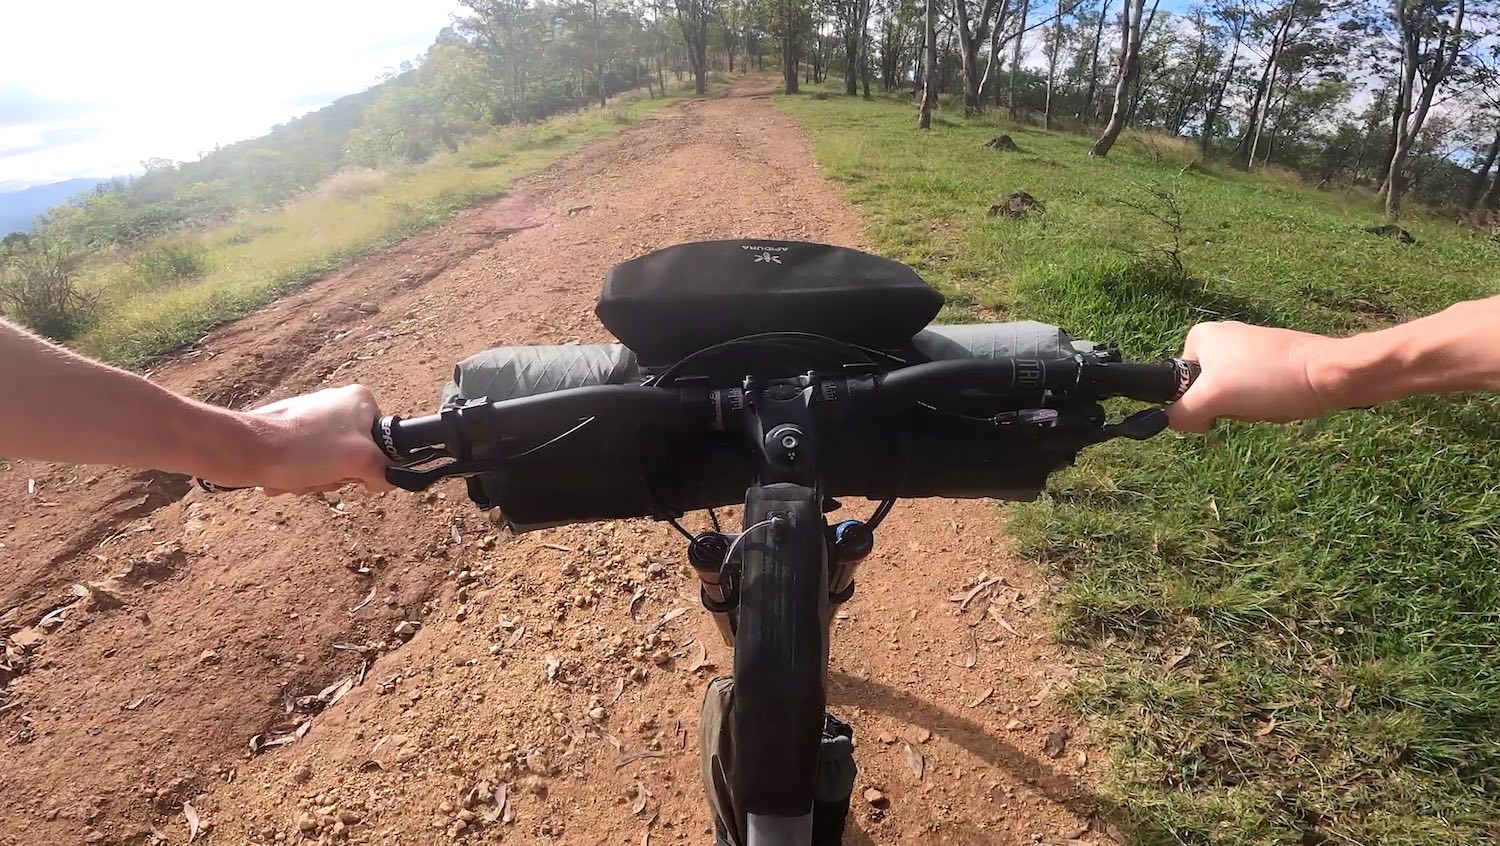
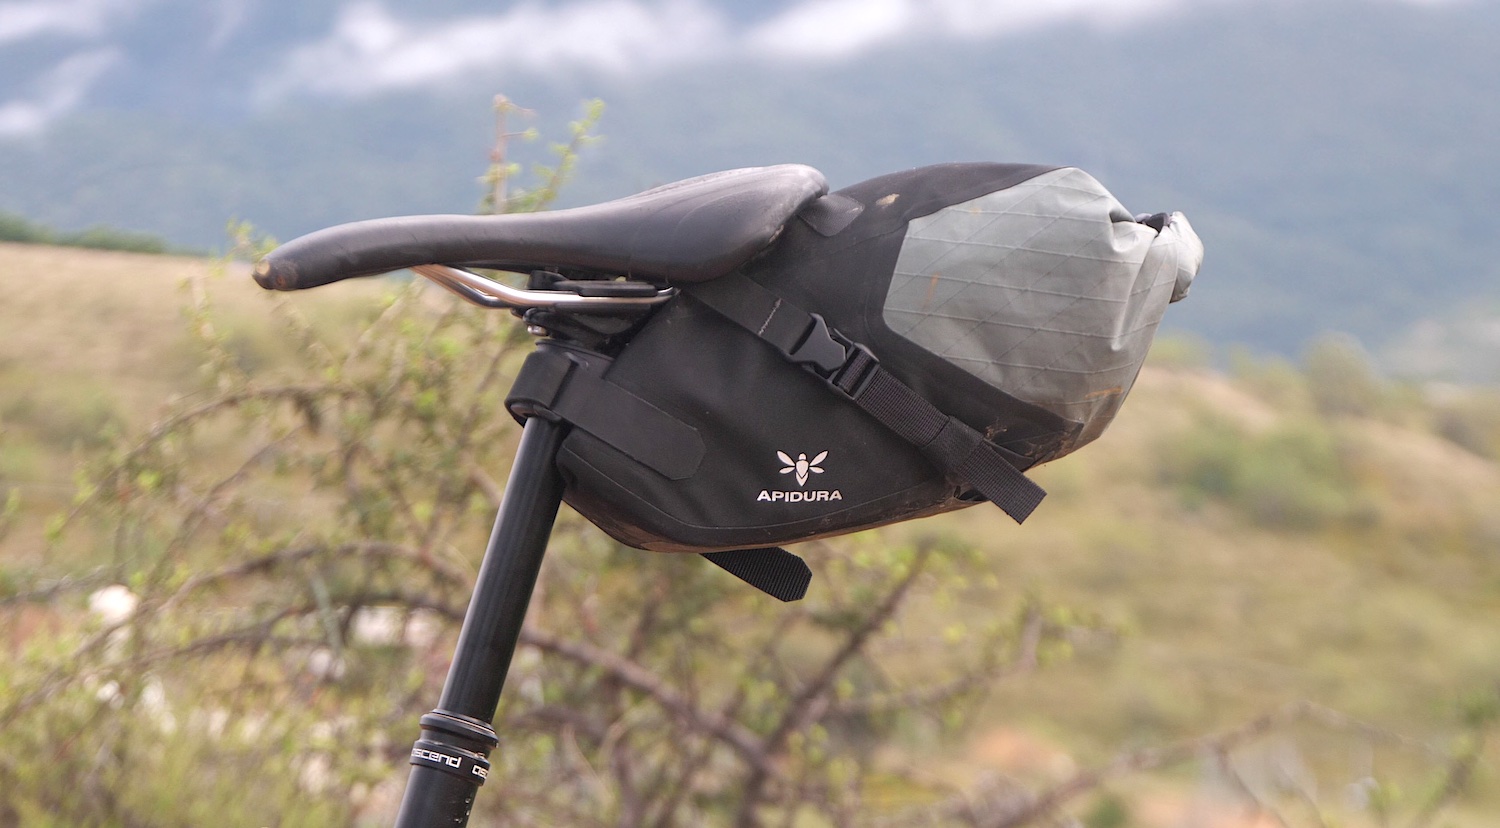
Apidura Backcountry Bikepacking Bags

Let’s change the tune a bit and talk about luggage. I needed waterproof bags as it was guaranteed I’d be riding in super wet conditions sometimes.
The Apidura Backcountry bags looked perfect, using a mix of soft X-Pac VX21 fabric for the rollable areas and Apidura’s own 420D nylon for the areas that require stiffness and abrasion resistance.
No other company is seam-welding VX21 fabric to be waterproof, as the fabric coatings make it very hard to adhere seam tapes. I’m glad that Apidura found a way.

The bags are super stable – people have literally accused me of using bubble wrap inside my bags instead of regular luggage as they sit that stable. The handlebar pack is the only noticeable bag when I’m riding. On slow, tight turns it makes the bike want to tip harder into corners due to its high centre of mass.
The only thing bag that I think needs improvement is the Accessory Pack – the velcro closure is simply not secure enough. On my first few rides, I lost a few items on rough trails and quickly learned to move my gear to other bags when the trails pitched down.

I’m using my dropper post seat pack about 20% of the time. Surprisingly, it doesn’t hit my wheel at full travel thanks to my massive inseam. When the trails get steep, I definitely prefer to use a backpack so that my legs and bum have much more freedom to move about.
One thing I didn’t consider was that stem/feed bags wouldn’t fit due to the short stem. There is simply not enough space left for turning when I fit them!
I’ve stuck some ISC surface protection tape to my frame to make sure my bikepacking bags don’t make a mess of my paint.
The Nukeproof Mega 290 Components
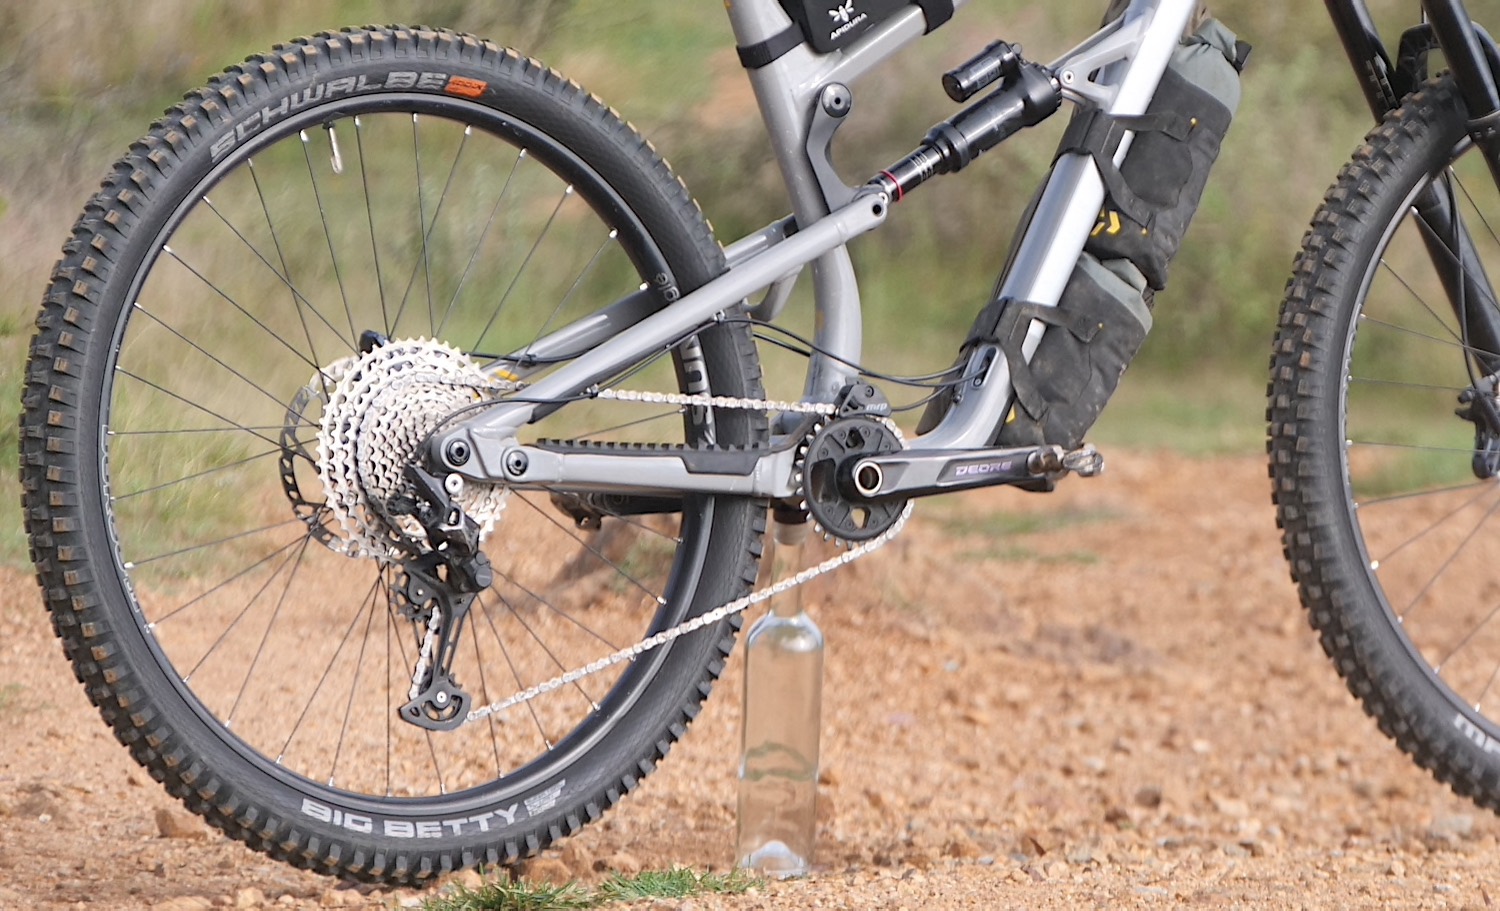
The Mega uses the latest Shimano Deore 1×12 drivetrain.
It has a really low climbing gear (17.3 gear inches) that I’ve calculated will take me comfortably up long climbs with an average gradient of 13%, even when I’m fully loaded. I’ve probably only used my highest gear just once or twice since I got my bike, so I could actually benefit from a smaller front chainring to make climbing even easier again.

The Deore drivetrain is great for the price – it’s quiet and shifts well even though my derailleur has taken some big hits.
The drivetrains biggest downfall has been in muddy/gritty conditions. The shift performance suffers much more than other derailleur drivetrains, and it gets pretty loud and crunchy too.
As you may know, I’m a big proponent of gearbox drivetrains, so I have a Kindernay 7-speed gearbox coming in just a few weeks. I’m excited to share with you how the extra 300 grams (10oz) of unsprung mass affects the suspension performance and whether I notice a suspension performance gain from the lack of a derailleur clutch.
My brakes are Shimano Deore four pistons, which offer large surface area brake pads, and big-ish 203 and 180mm rotors. This is enough power for my needs as I’m pretty light on brakes.
The Shimano Deore brakes do lose power after repeated braking on long descents though (brake fade). I’d love to test out some Hayes Dominion A4 brakes, as Bike Magazin’s lab test shows that they offer 15-25% more power and appear to be significantly more resistant to fading (see comparison HERE).
The Brand-X dropper has performed flawlessly, although 170mm is not enough travel for an XXL bike – Nukeproof should have specced the 200mm model instead, or even better, a 210mm OneUp post.
You might be familiar with my saddle. It has been on all of my touring bikes since about 2013. I kept getting a saddle sore in a specific spot with the flatter and wider Nukeproof saddle – going back to this familiar model keeps me comfortable all day long.
Summary

I hope you’ve enjoyed this in-depth enduro bike analysis!
I think my choice of bikepacking bike is almost perfect for my current adventures. The frame geometry pairs particularly well with the steep and loose terrain here. It’s been fun tinkering with my suspension and tyres to achieve the maximum grip and comfort down Oaxaca’s epic descents.
The frame’s build quality and suspension components have exceeded my expectations of a $3000 full-suspension bike. I cannot think of another enduro bike that offers better value-for-performance.
I’ve just released a bikepacking film that will give you guys a better sense of the terrain here, along with how I travel on this bike, so make sure to check it out.


