

I’ve made my quest for the most comfortable bike as objective as possible.
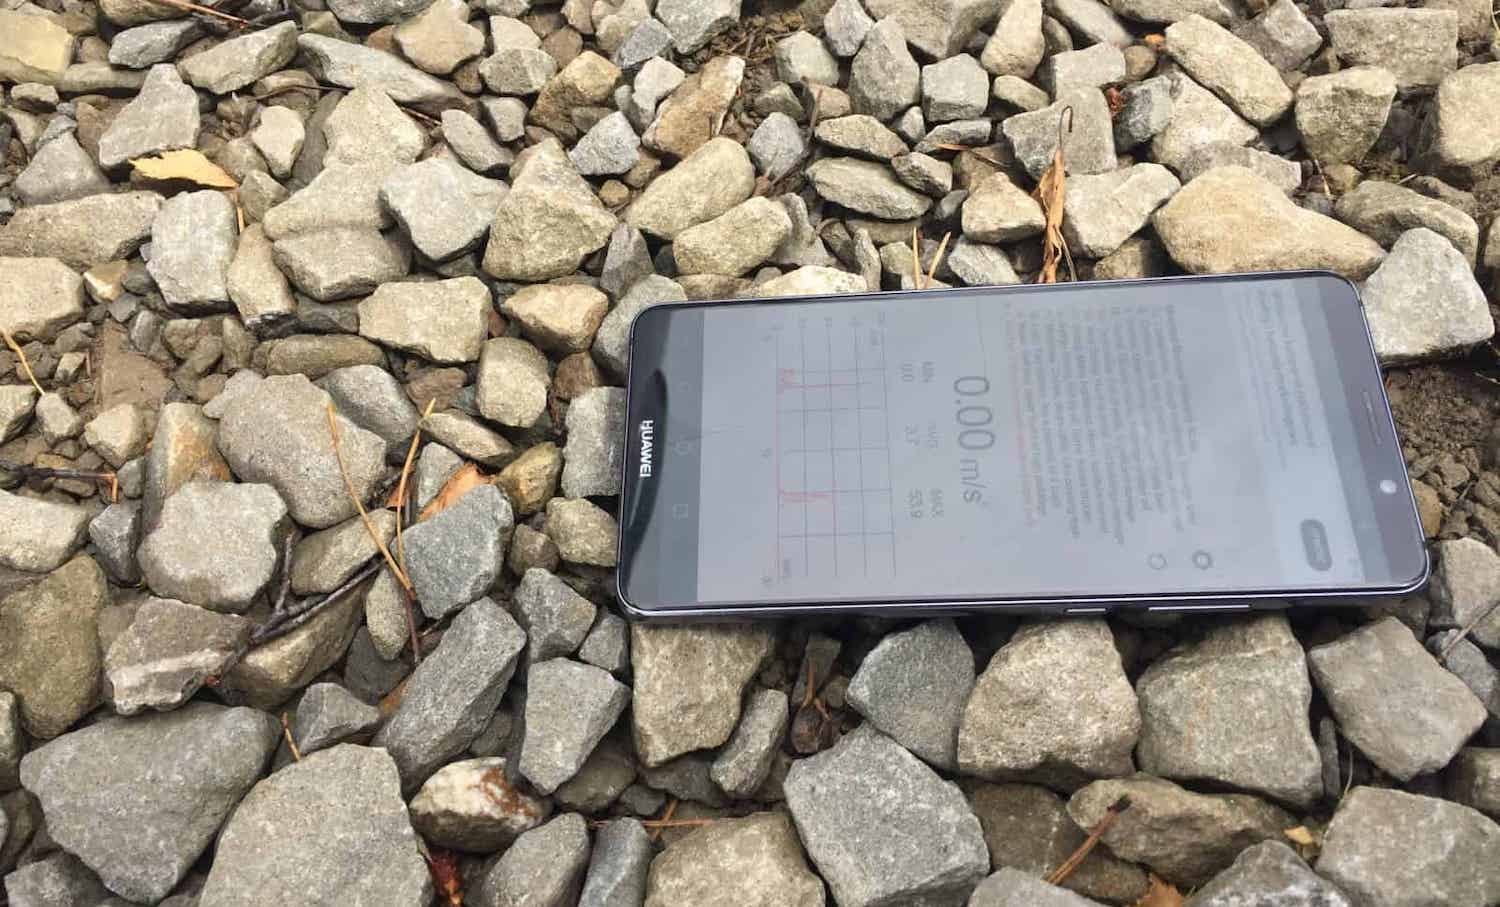
It all starts with a smartphone (Huawei Mate 10 Pro) and a vibration meter app that uses the internal accelerometer to measure vibrations. Fewer vibrations measured (m/s²) usually suggest a more comfortable ride.
I take these measurements on two different courses.
Please note: This page is about the vibration measurement procedure I used for my tests before November 2023. Any tests after that date use my new procedure HERE.
Bumpy Forest Trail (15km/h)

The first course is a forest trail with a lot of big and small bumps as well as roots from trees. It measures 720 metres in length (2362ft) and emulates bumpy gravel roads, although it’s certainly not as bumpy as some mountain bike singletrack.
This route is more challenging, which is why I measure the vibrations at a steady 15km/h average speed (9.3mph).
Fast Gravel Road (35km/h)

The second course is a true gravel road with very small bumps and rocks. It measures 350 metres in length (1148ft), and I use it to emulate gravel racing. I take my vibration recordings at 35km/h (21.75mph).
Multiple Test Runs

I follow the same line on both courses and conduct three test runs in the same direction. I then calculate the average vibration level, but only when the runs harbour similar readings.
If there is an odd measurement, then I discard it and conduct one more run. Usually, three test runs are enough, especially on the slower forest trail. The fast gravel route sometimes varies much more as it produces significantly more vibrations.
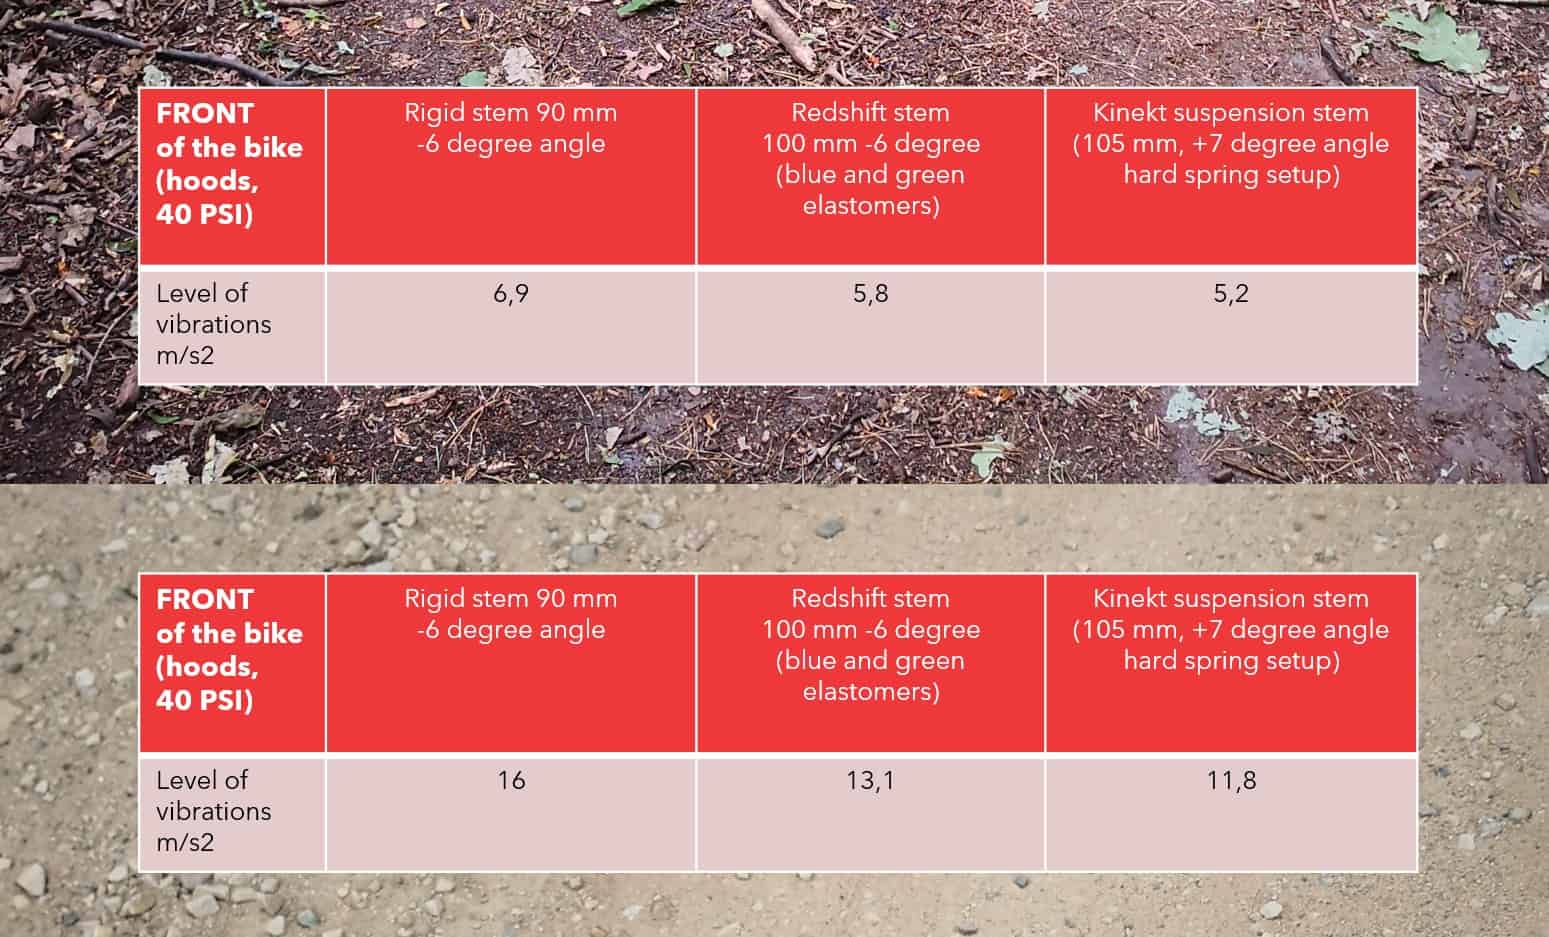
Front and Rear Vibration Measurements
I measure the front and rear vibration levels of the bike. I ride seated on both of the test courses.
I always ride in the brake hoods of my gravel bike (unless stated otherwise). This is often where people hold their bars, but it also puts a bit more weight up front, allowing for more flex of the handlebar and/or stem.
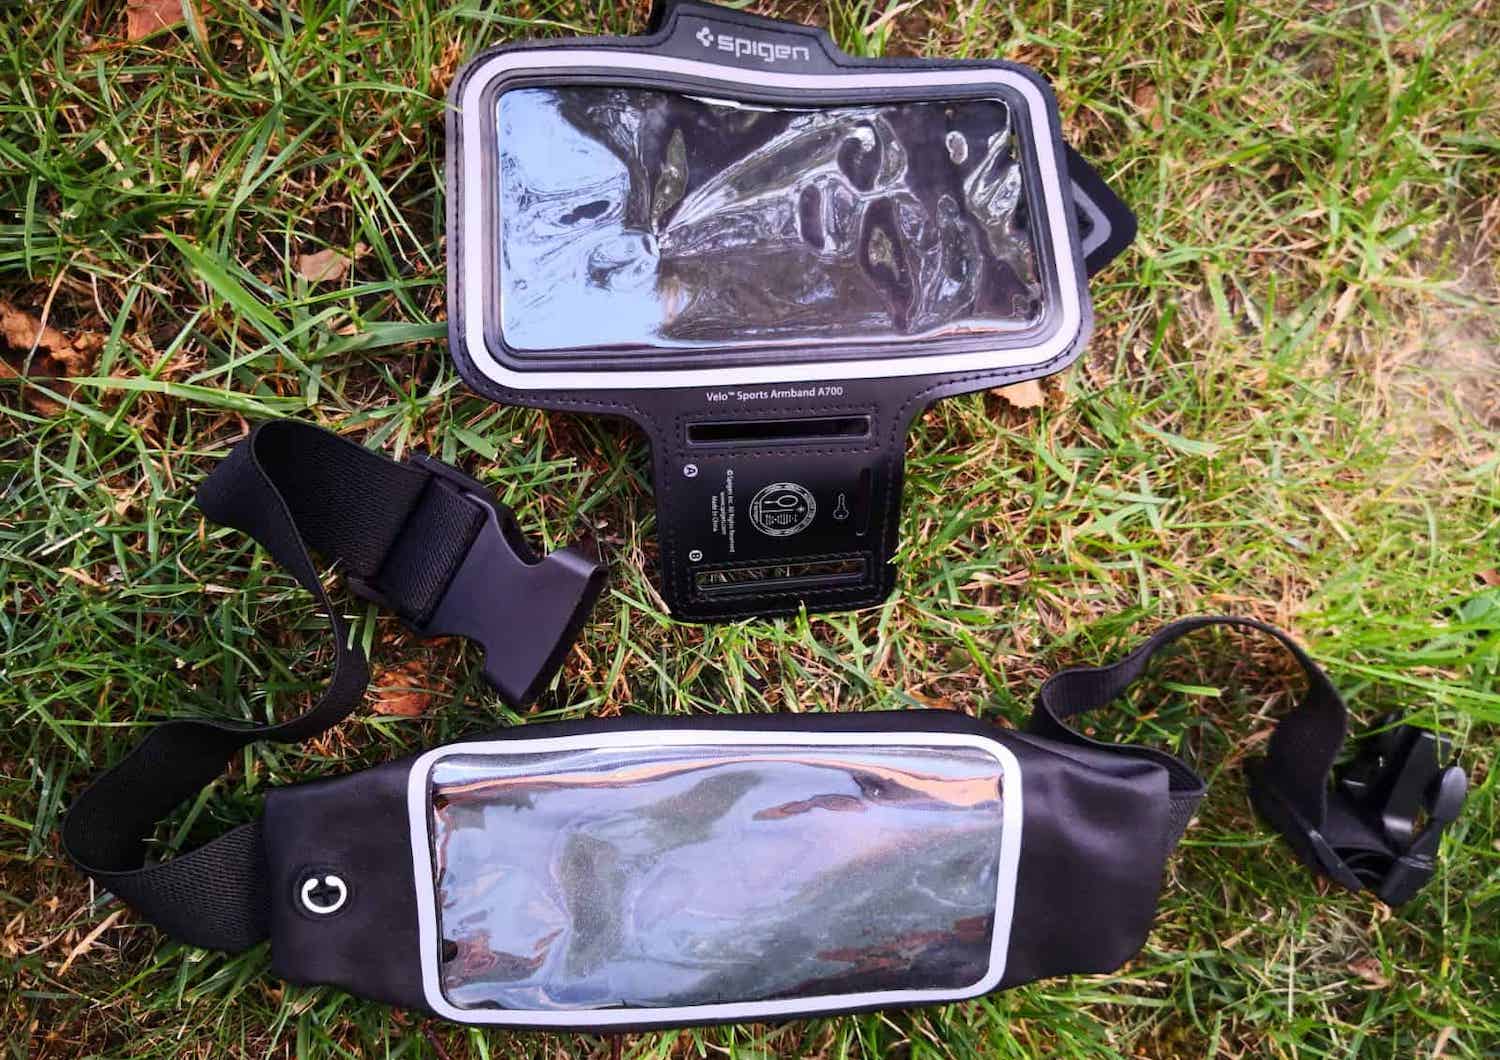
To take the front vibration measurements, I mount my smartphone to the handlebar as close as possible to my wrist, which minimises the impact of my arm movement on the final readings. The bar tape is not taken into consideration in my tests.
To take the rear vibration measurements, I simply fit my smartphone to a belt mount that has the smartphone sitting against my lower back. This measures the vibration levels just above the saddle.
Consistent Variables
To get the most comparable results, I make sure to use the same equipment – that’s the smartphone, vibration app, mounts, bike shorts, clothing, and Giro Bravo gloves.
I also try to achieve the closest ride position possible. That means my saddle height and saddle position remain largely the same between bikes (although it can get tricky when comparing the different frame geometries of bikes).
My weight is rather stable at 83 kilograms (183lbs).
Vibration Test Results

I think my measurement procedure is the best possible way to determine the comfort of different components in “real-life” ride scenarios. But despite my efforts, you have to remember that this is not a scientific lab, and there are still some variables that are not controlled.
A vibration level difference below 5% should be considered ‘marginal’ in terms of perceived comfort difference. Anything between 5% and 10% is a modest but perceptible improvement. And a difference above 10% is a strong indication that there is a substantial comfort improvement between the tested products.
Comparing Results
We cannot directly compare the vibration levels between tests conducted on different days (ie. most of my results). This is because the weather conditions are always changing and have an effect on the test results. I do not publish a leaderboard for this very reason.
The results of my tests are also connected to one particular accelerometer on my smartphone, which means that you will not be able to compare my vibration results with any you collect yourself.
What you can compare is the vibration levels of the components (or bikes) to my benchmark bike, which is always tested in the same riding conditions.
Benchmark Bikes
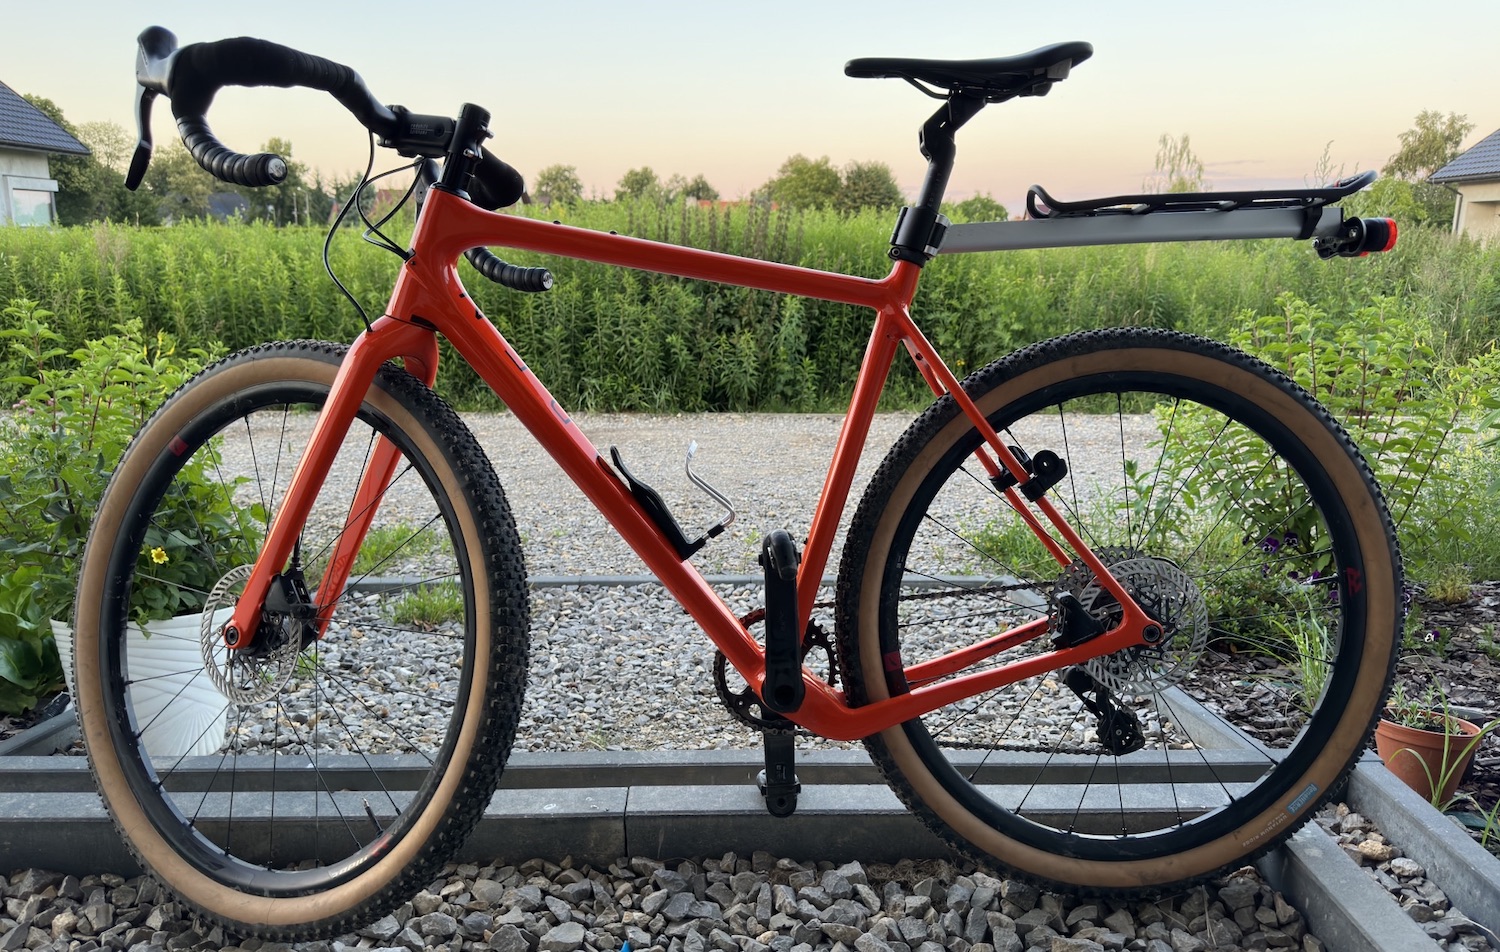
I’ve used three different benchmark bikes over the years. You can see them all on this page.


