
At the core of the CyclingAbout Comfort Lab is vibration measurement. My aim is to have comparable data that can clearly indicate the effectiveness of different comfort-improving bikes and components.
In this article, I will explain how my approach to testing bike vibrations has changed over the years, and how I’m conducting my vibration tests going forward.
Measuring Vibration Outdoors With A Smartphone App
Most of my vibration tests have been conducted using a smartphone and a vibration-measuring app.
For front vibration measurement, the smartphone was mounted on my wrist, and for rear vibration measurement, the smartphone was mounted on my back.
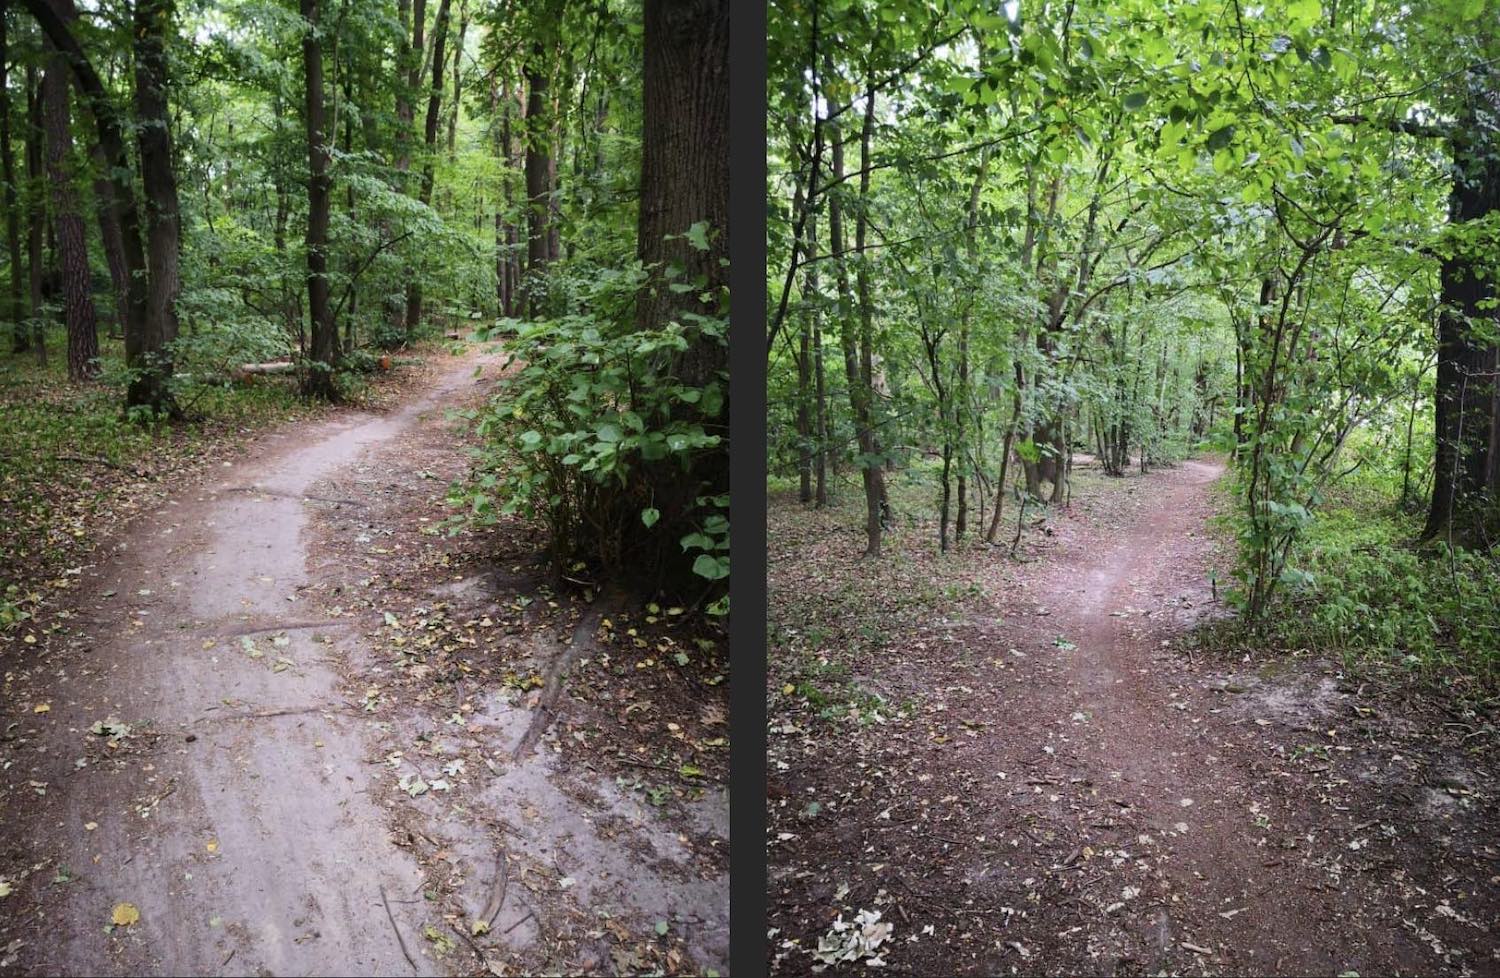
I took the vibrations on two different routes and at two different speeds. One was a bumpy forest trail (pictured above) to see how bikes and components attenuated vibrations coming from bigger hits (15 km/h). The other was a fast gravel road to see how bikes and components attenuated high-frequency vibrations (35 km/h).
Like any outdoor test, it’s really hard to control the variables. My vibration results were never directly comparable because the routes simply yielded different results in hot, cold, dry, or wet conditions.
I also used a long measurement duration of ~10 seconds for the fast gravel road and ~60 seconds for the bumpy forest trail. As a result, the vibration levels were often reduced significantly after I averaged the data.
Additionally, I was measuring vibrations at my wrist and back, and the human body itself dampens a lot of vibration before it hits the accelerometer.
You can read more about my outdoor vibration testing HERE.
Measuring Vibration Indoors With A Treadmill
I wanted to have something more scientific, so I started experimenting with a Woodway treadmill. This allowed me to better control both the environment and speed.
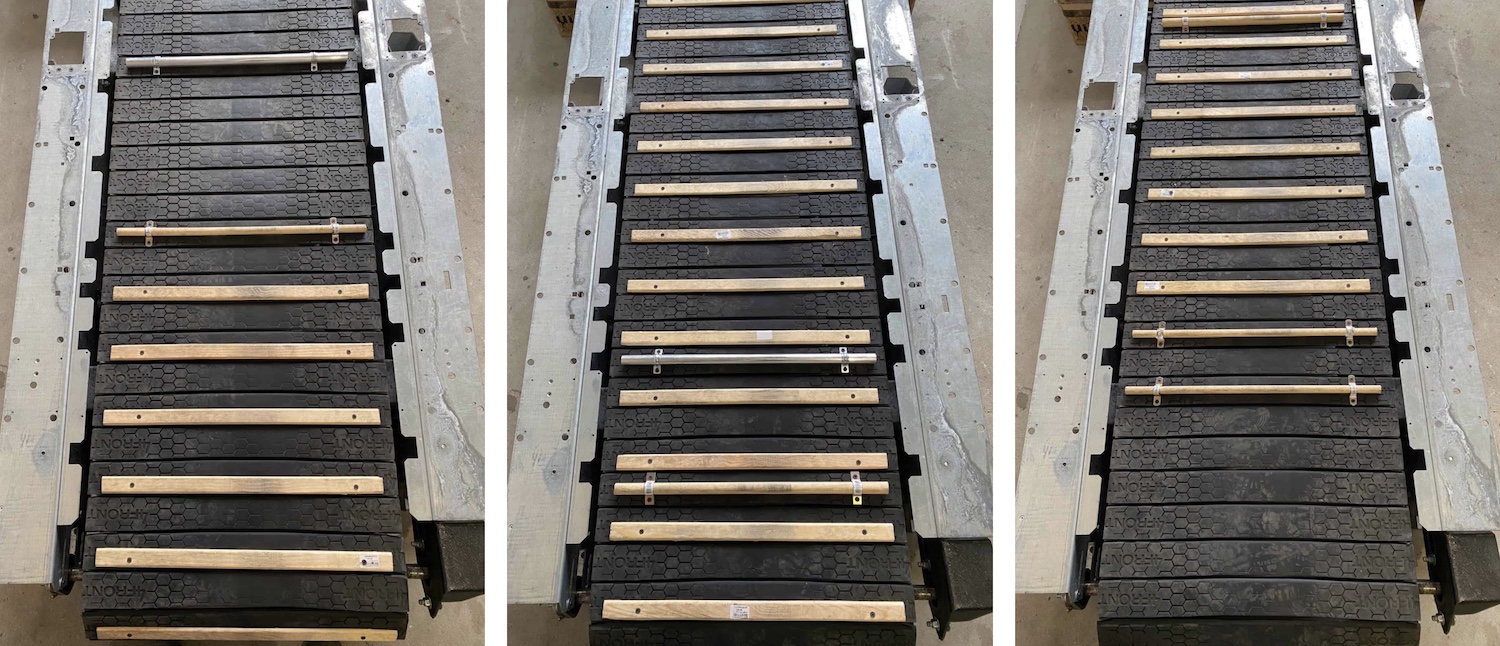
I mounted different slats on the treadmill to simulate both big hits and high-frequency, gravel chatter. I had to experiment with the placement and frequency of these slats to achieve results consistent with my bumpy forest trail and fast gravel road tests.
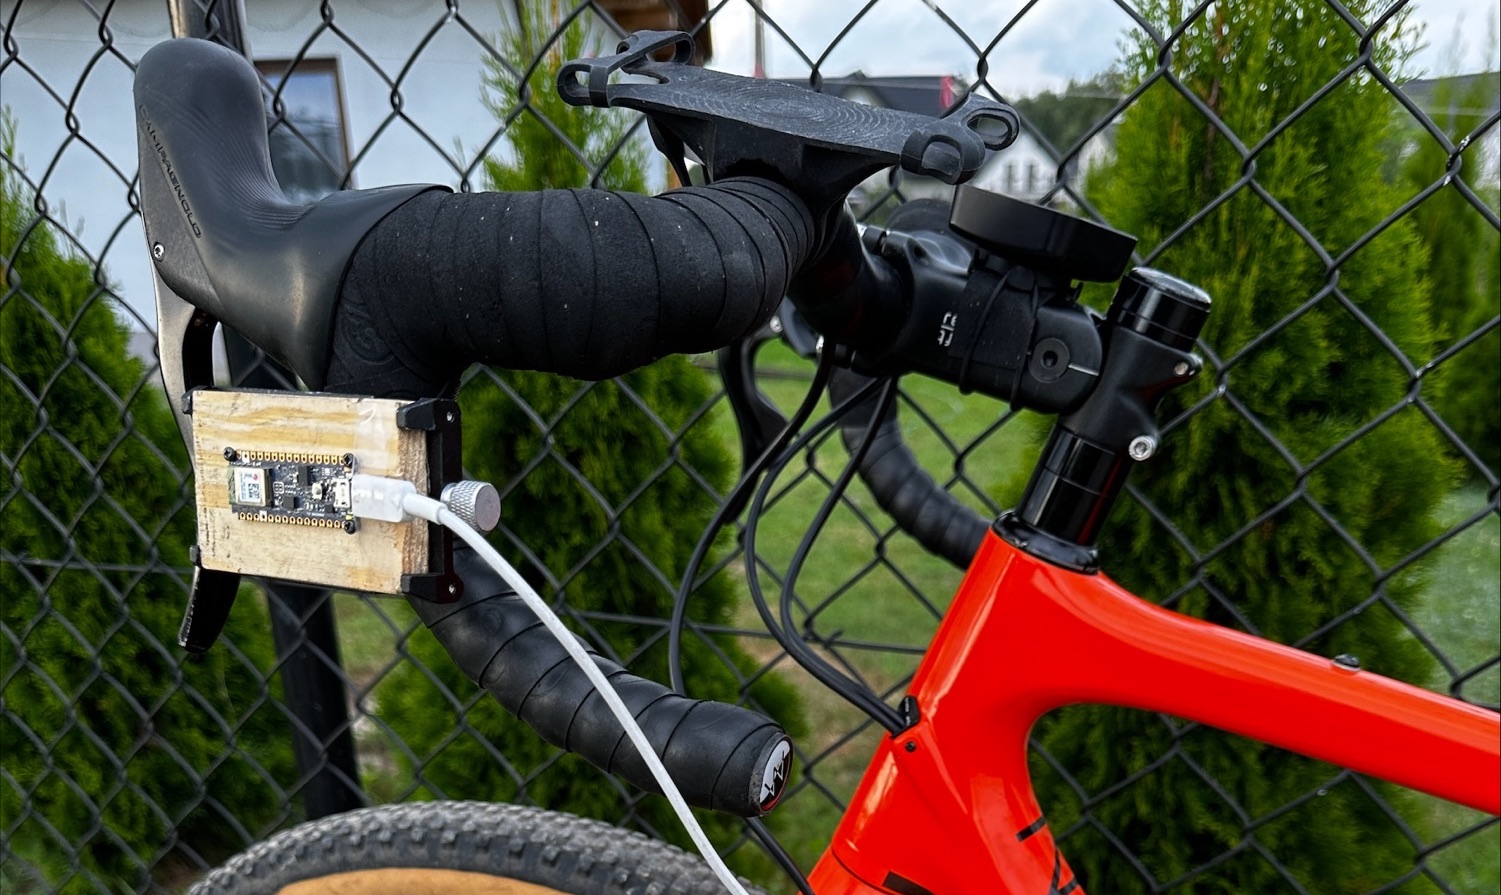
A big improvement here was using a dedicated accelerometer. With help from the developer of Vibration Analysis, I was able to configure the Arduino Nano BLE 33 exactly for my needs. I could also collect very detailed data, in fact, this was 5 to 10 times more data than my smartphone could collect (the measurement frequency was now 500 Hz).
I took measurements both under the saddle and under the brake hoods. At these locations, I could exclude the damping effect of the body.
But the treadmill was far from perfect. Trying to make a bike ride by itself on the treadmill was a chore. Also, figuring out how to achieve realistic weight distribution for the rider proved to be very tricky. Ultimately, this methodology brought a few too many challenges.
You can read more about my treadmill vibration testing HERE.
Measuring Vibration Outdoors With Consistent Results
Going forward, I will be conducting vibration tests that combine elements from the outdoor and treadmill tests.
I am using the same Arduino Nano BLE 33 accelerometer as my treadmill test. It’s mounted under the brake hoods (front of the bike) and under the saddle (back of the bike).
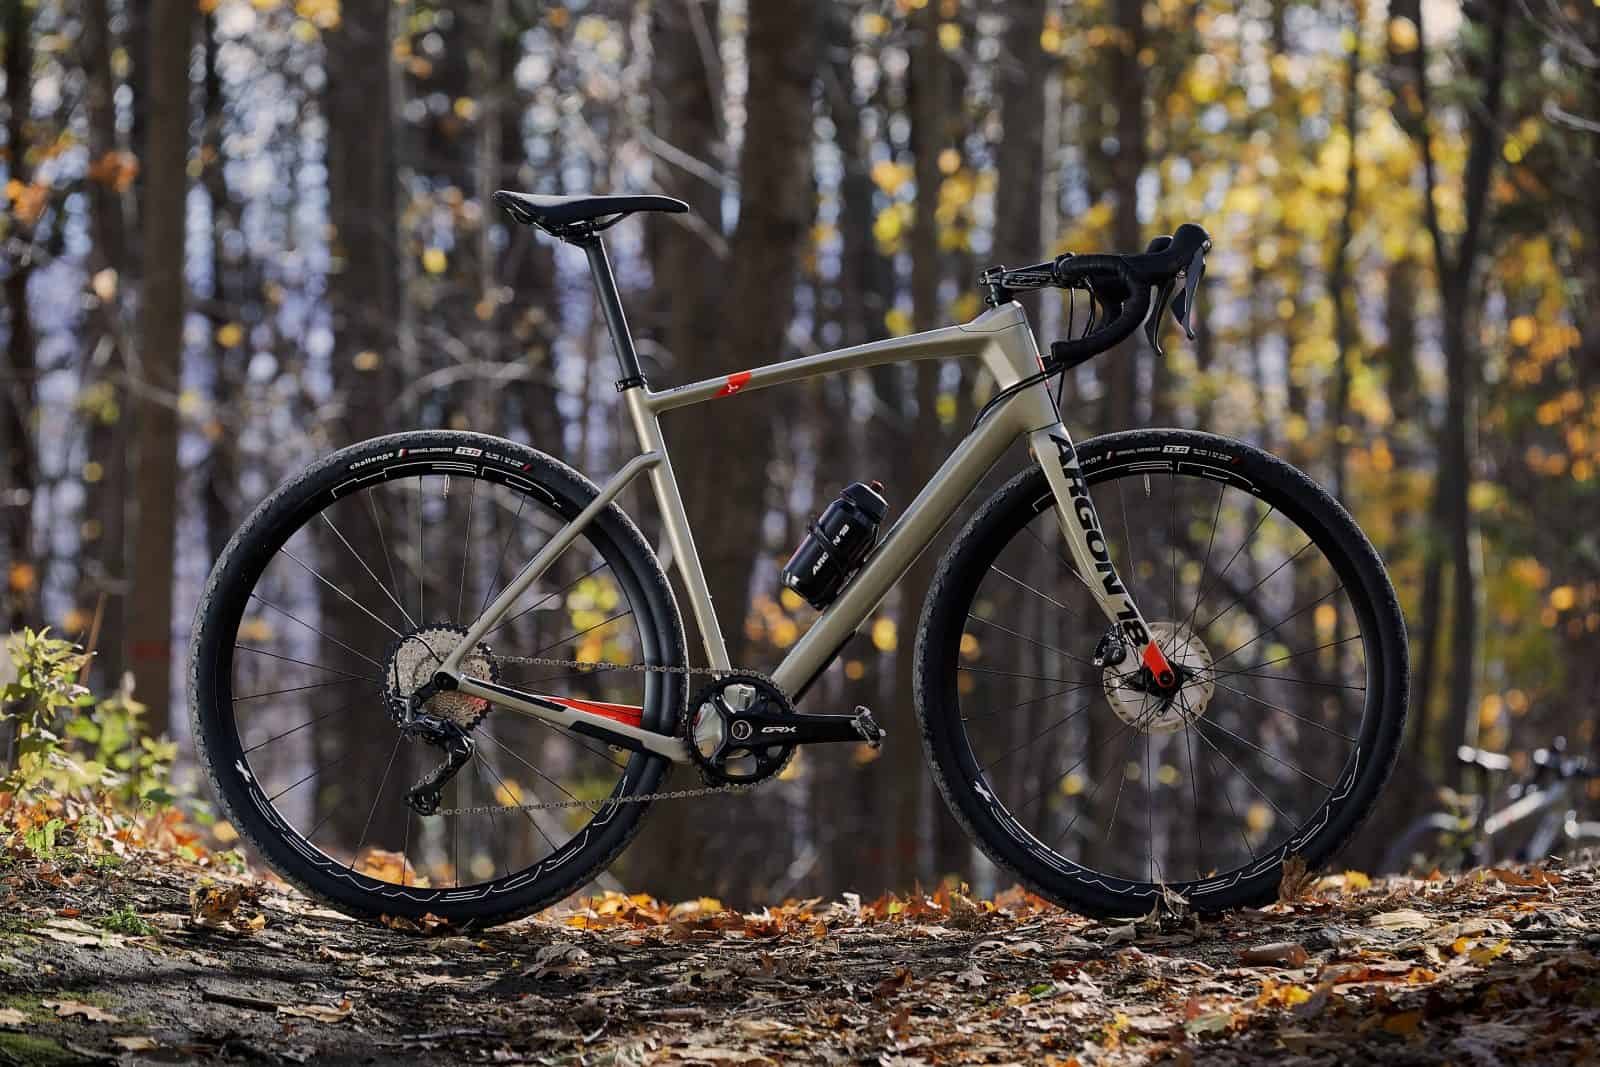
I will again be using my benchmark bike as a point of comparison between different bikes and components.
My Rene Herse Umtanum Ridge 650B x 55 mm tires will be inflated to a rather high 45 PSI air pressure. This high pressure ensures the tires are not impacting the vibration results too much.
And if I’m using tires of different widths I will calculate the appropriate tire pressure using Laplace’s law. This allows me to maintain the same tire casing tension for all tests. You can read a bit more about how I use Laplace’s Law HERE.
To determine how a bike or component handles bigger hits, I am laying a single wooden block that’s 50mm long and 30mm high on a smooth, flat asphalt road. I run over it at the speed of 25 km/h and then can measure one very clear bump event.
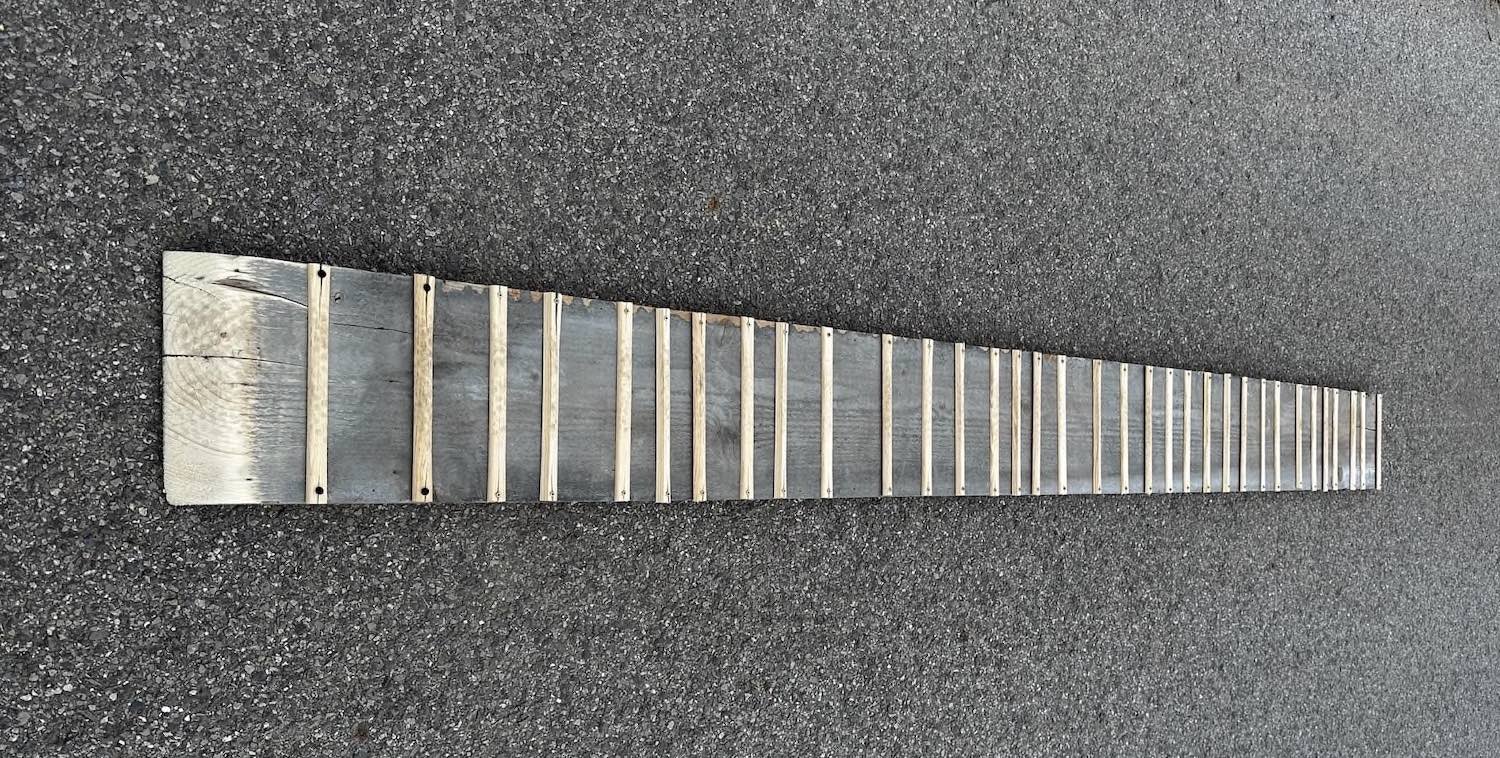
To determine how a bike or component handles fast gravel roads, I am using an obstacle almost 300cm/118″ long with a lot of different wooden slats mounted at random (as gravel is random in terms of bump frequency). I run over this obstacle at a speed of 25 km/h. The bump frequency is high enough to properly simulate the high-frequency chatter of a gravel road.
This 300cm test can also be considered an overall performance test because it also contains two bigger hits – at the beginning and at the end (when riding on and off the obstacle).
I conduct exactly nine test runs in each scenario. I exclude the two highest and two lowest measurements to ensure that slight speed fluctuations are not impacting the results in any significant way. I then calculate the average vibrations of the five remaining test runs.
Summary
My latest approach to vibration testing yields results consistent with my outdoor comfort tests. But this time, the results are repeatable – no matter the weather conditions.
Unlike the treadmill test, I’m actually on the bike and moving at typical gravel cycling speeds (25 km/h) so the vibration measurements are even closer to real-life scenarios.
And with the high-resolution vibration data being measured at the brake hoods and saddle, we take out the damping effect of the human body. This will hopefully highlight bigger comfort differences between bikes and components.
If you have any questions about how I conduct my tests, feel free to ask in the comments section below.


